Cricut Joy Vinyl Dresser Makeover
This is a sponsored post written by me on behalf of Cricut. All opinions are 100% mine.
While I love being crafty, many of my craft endeavors involve the kids. But recently I’ve started doing more projects for me and I’ve gotten into getting crafty around the house with help from my Cricut Joy machine.
I haven’t had my Cricut Joy machine for long, but I’ve been busy! I had fun personalizing a Teacher Survival Kit and we’re in the planning stages of ways to use some of my daughter’s favorite Cricut Joy vinyl colors to personalize some school supplies soon!
But you can do more than personalize little things. You can use the Cricut Joy to customize pretty much anything. It may be Cricut’s smallest smart cutting machine ever, but it can handle some amazing jobs including a makeover of the dresser in my master bedroom!
CRICUT JOY DRESSER MAKEOVER
The Cricut Joy makes it so easy to personalize anything with one cut and one color. You can do it in 15 minutes or less!
If you’ve been following me for a while, you know I like things to be easy. This is true about my recipes and about my crafts! The Joy is simple to use. It’s also fun and extremely functional with easy setup.
I’m going to show you how easy it is to use Cricut Design Space to put together a custom vinyl decal design for furniture in no time at all!

WHAT IS CRICUT JOY?
If you haven’t heard of the Cricut Joy, it’s the smallest smart cutting machine! You can fit it almost anywhere and it packs away into an adorable carrying case. If you need to move it from one room to another, setting up again is easy to do.
I love the size of the machine and how practical it is.
The machine uses Cricut Smart Materials that are different from other vinyl and paper that you might be used to using. I love these Smart Materials because you don’t need a cutting mat!
You really can create anything. I love using vinyl so it’s definitely one of my favorite materials to use in my Cricut Joy projects.
But you’re not limited to vinyl! The Joy is a cutting and writing machine so you can personalize almost anything! You can make decals, labels, cards, party decor, custom shirts, and more!
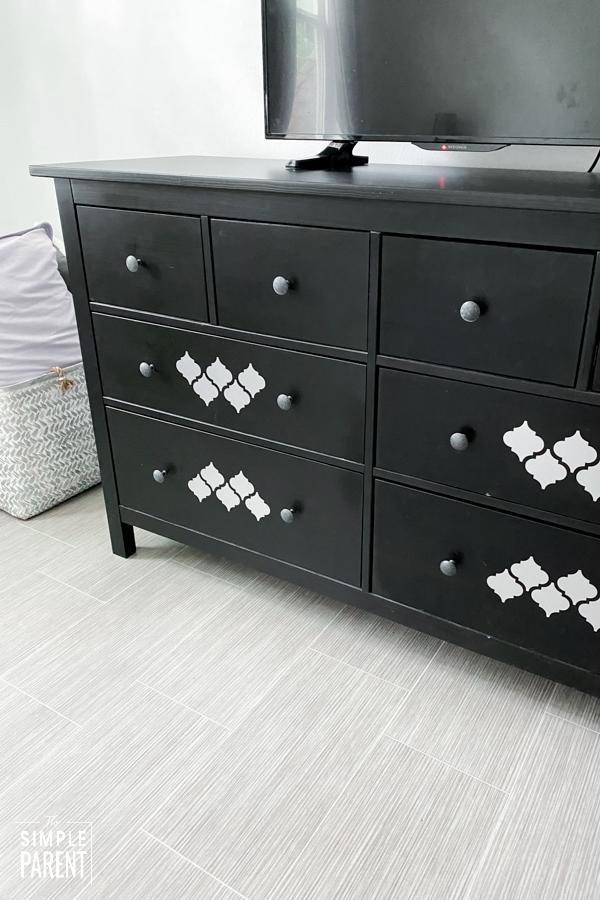
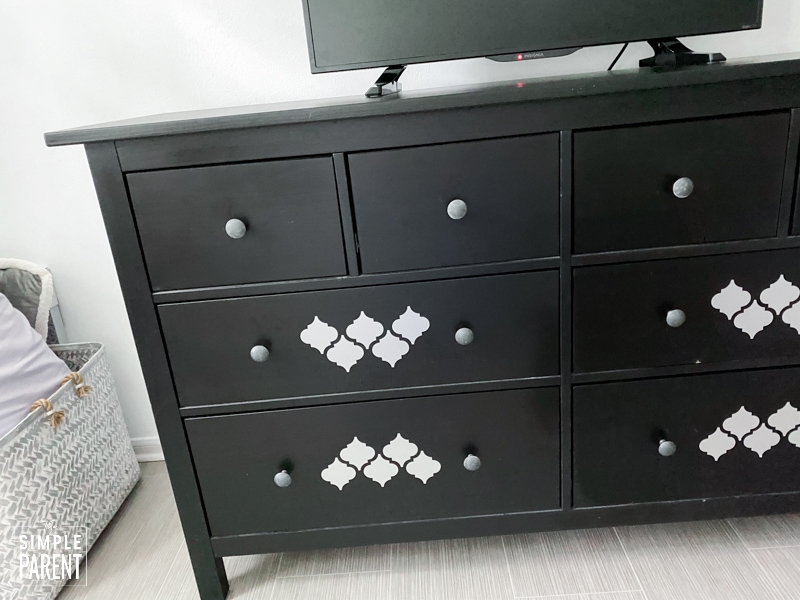
After getting new flooring, we’ve been giving our master bedroom a makeover. We started with brown walls and beige carpeting with black furniture. I’ve been transitioning the room to shades of gray after getting our new gray flooring.
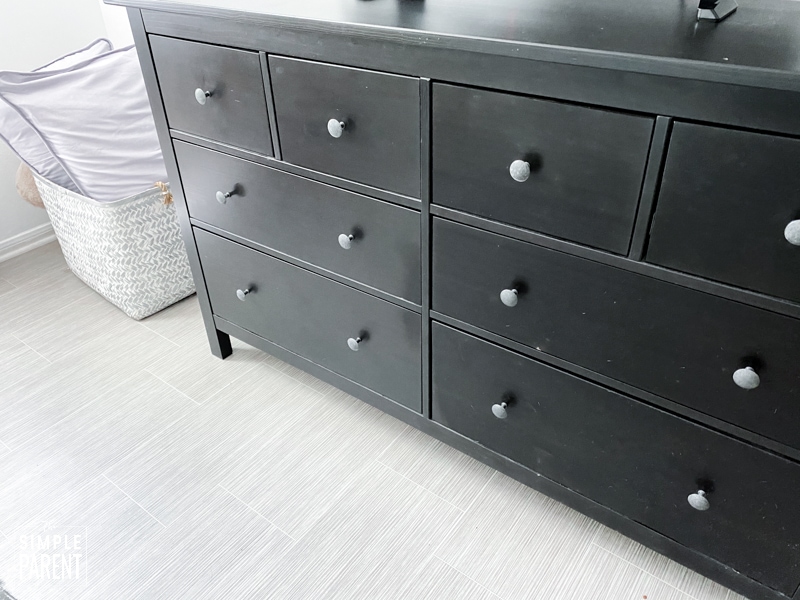
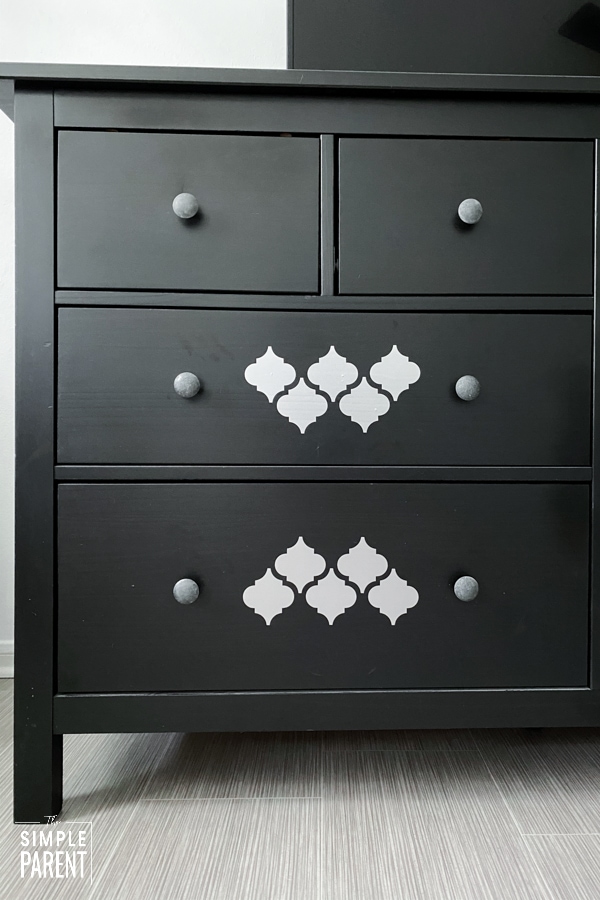
One thing I have yet to find is a new dresser that I love. Ours has been so dependable and is a great size. It’s black and I think that it works okay with the different grays and whites around the room. But it needed a refresh and some flair.

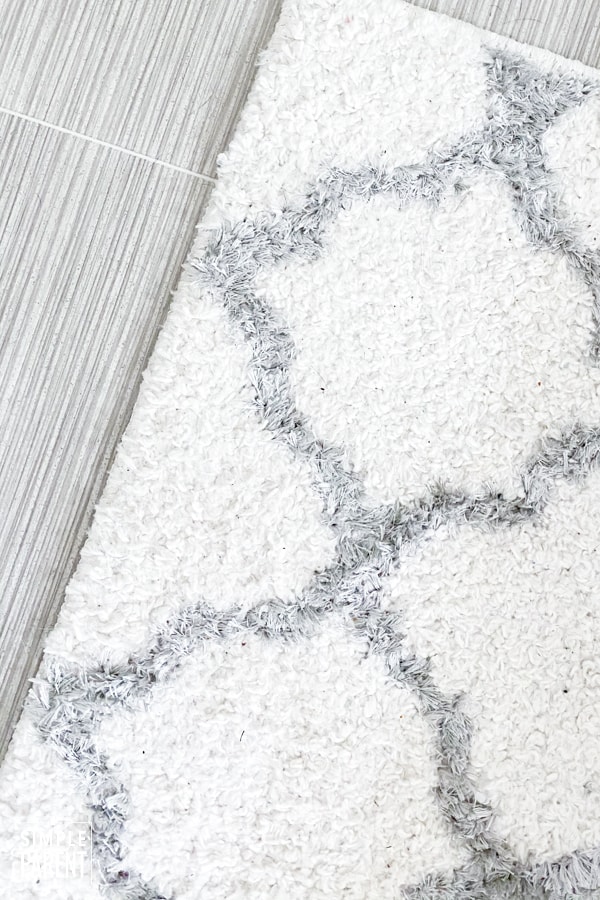
I used my new rug and new lamps as inspiration and went browsing through the graphics and fonts in my Cricut Design app until I found something I thought would be perfect.

VINYL HOME DECOR PROJECT
It only took a few steps to go from the project on my app to cutting my vinyl and putting it on the dresser.
You can use projects in the Cricut Design Space app or on your desktop as they are or edit them to fit your needs. For my furniture makeover, I didn’t need the shapes with writing in them. I wanted the simple shape design to cut on my silver vinyl. You can also resize your design using Cricut Design Space.
With a few taps, I was able to rem0ve the parts of the design I didn’t need and I was ready to cut. It’s really that simple.

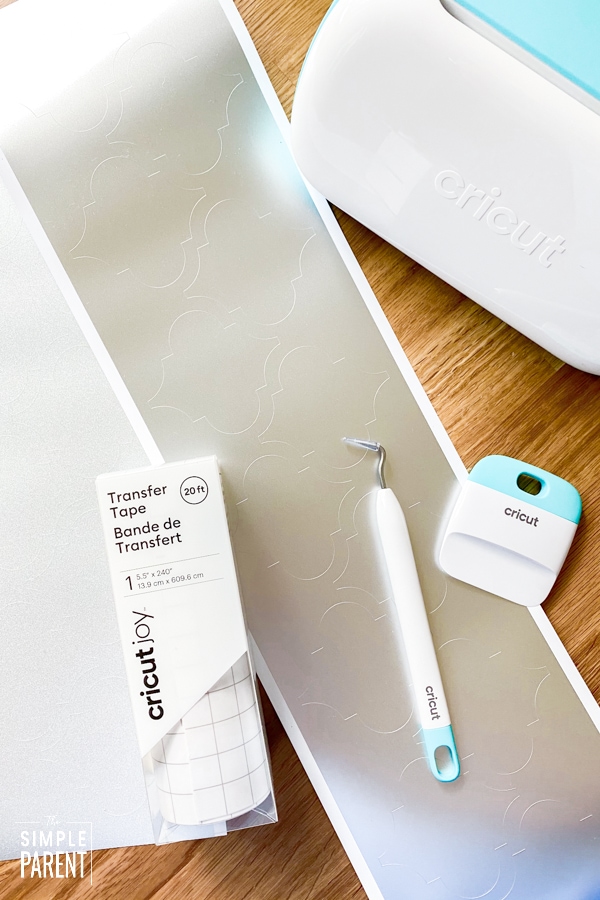
With Cricut Joy Smart Materials, I can cut shapes up to 4 feet long or make repeated cuts up to 20 feet long. It makes projects very easy to make. Since there’s no need for a cutting mat, I only need my Joy machine and my Smart Materials!

Once the vinyl is cut, remove the vinyl off the backing so you have your design left. Then use the Cricut Weeder to pull out any extra bits and pieces of vinyl from your design. I didn’t need to weed any vinyl for this design so that was a huge timesaver!
Cover your design with a piece of Cricut Transfer Tape. Peel off the backing and place it on top of the vinyl design. Make sure all of the vinyl is covered with transfer tape.
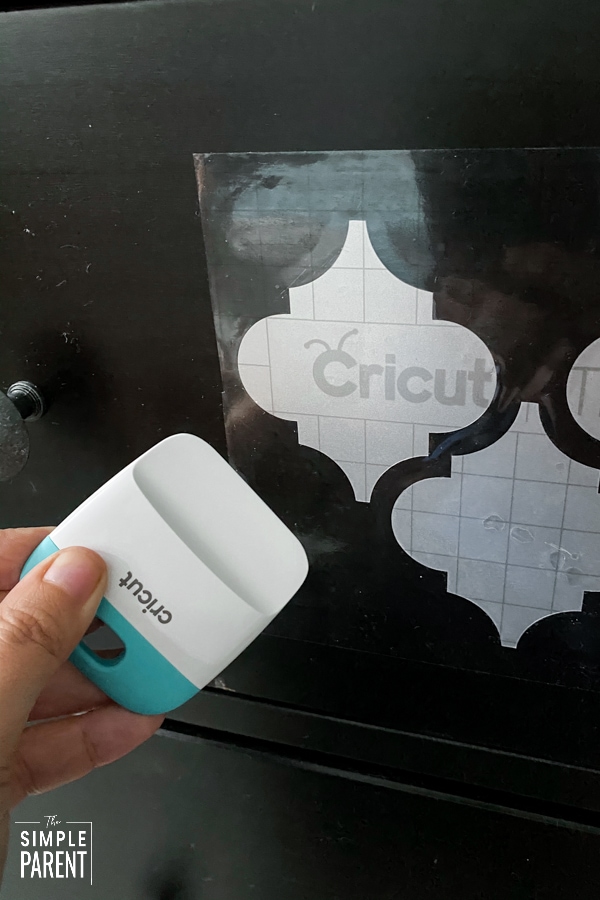
Using the Cricut Scraper, smooth the transfer tape over the design. You want to smooth it down so it sticks to the entire design, especially the edges. This will enable you to lift the design off the backing.
Then place it on your furniture where you want to be and use the scraper again to smooth over the top of the design. Pay attention to the edges again! Then peel off the transfer tape and your vinyl decal will be in place on your furniture piece!
My Cricut Joy is so easy to use, especially with all of the project ideas you can find using Design Space, that I’m finding myself inspired to add more personal touches around our home. Adding something special to pieces we already own is a fun way to give our home a fresh look!
You can learn more about Cricut Joy and get your own by visiting Cricut.com.

The post Cricut Joy Vinyl Dresser Makeover appeared first on The Simple Parent.