GeekMom: Making Custom Decal Transfers for Easter Eggs


Most commercial egg decorating sets have those little rub-on decals to add an image to the egg.
These are cute, but sometimes you want to personalize your egg without resorting to drawing a picture in that white, waxy crayon. You might want to add a favorite fandom or family photo that may be a little too hard (or time-consuming) to draw on an egg that will likely be broken later that evening for appetizers.
It isn’t too hard to make your own rub-on decals to add to your Easter basket, and there are two ways to get similar results.
Note: These ideas work best on real eggs, not on those slick plastic ones.
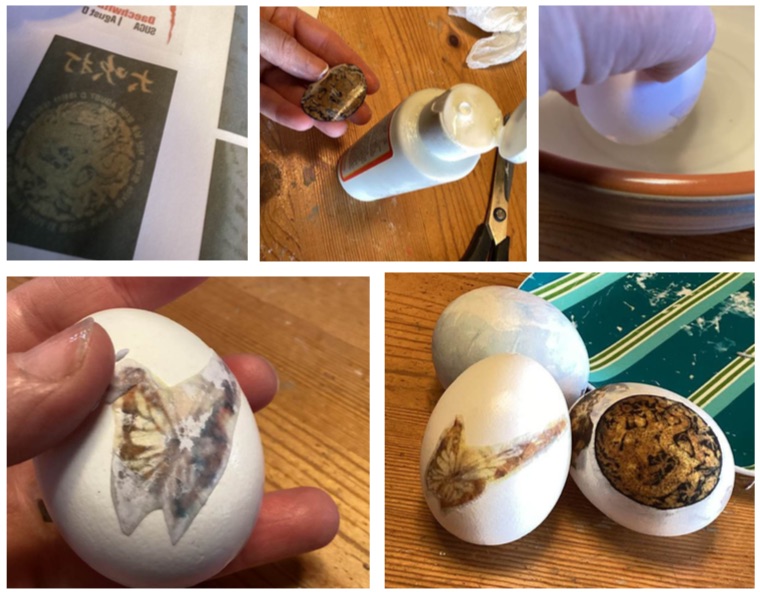
The first method is for use with any inkjet computer printout image, as long as you make it small enough to fit on the egg.
Print out an image you want, and make sure it is reversed, especially if you have words on it. The image on the egg will appear like a mirror image from the original printout.
Now, cut the image out as small as you need, and paint over it with ModPodge or other decoupage glue on the image side. A 1:1 mix of school glue and water works as well. Smooth the image onto the egg with as few wrinkles as possible. Once it dries completely, wet the back of the image. Finally, rub it off so only the image remains on the egg.

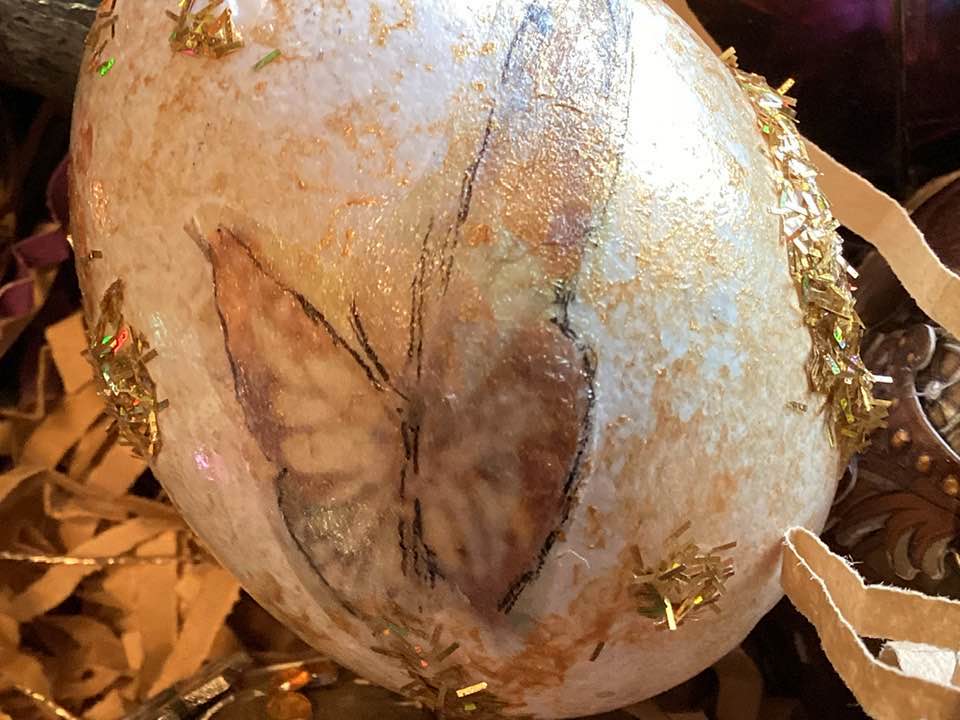
Pretty easy, right? Once done, you can add whatever else you want on it, like painted edges.
They turn out pretty cool, particularly if you want to theme your eggs. My girls decided to celebrate all the solo work of their BTS boys with some images associated with their music videos. Neat idea, but obviously not something you can find in a pre-packaged egg kit.

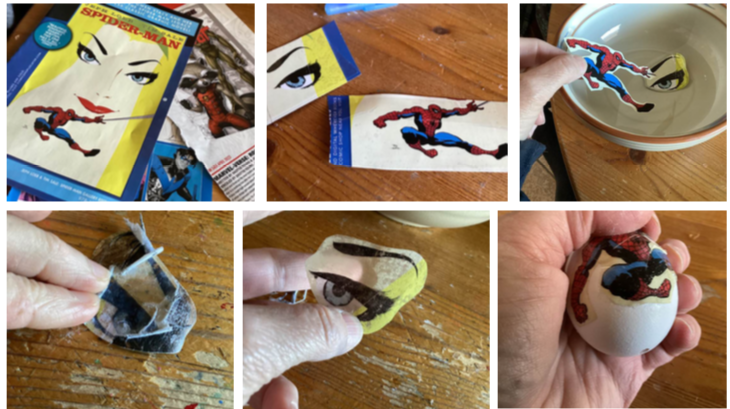
The second method can be used with an image from a glossy magazine or catalog where you want to get rid of the writing or image on the backside of the page. This works well with both flimsy pages and with slightly thicker pages like the kinds from travel pamphlets.
Cut out the image you want and place some clear packing tape over the front of it, as smoothly as you can. Trim the image to the size you want it, and soak it in a small plate of warm water for a few minutes.

Take it out, and gently rub the back of the image off. This will leave a transparent image of what was on the front of the page you wanted. Use some craft glue or decoupage glue and paste the image on your egg. Let it dry, and add whatever else you want. This result will be more of a translucent sticker than a decal, but they still look pretty cool.
Also, pretty easy, huh?

These are always fun if you want some special egg decoration centerpieces, but also cool ideas for letting kids discover a special personalized egg just for them.
Easter weekend is here, and whether you celebrate and observe the holiday or just want to enjoy the spring, don’t pass up the chance to get creative this weekend.
Click through to read all of “Making Custom Decal Transfers for Easter Eggs” at GeekMom.If you value content from GeekMom, please support us via Patreon or use this link to shop at Amazon. Thanks!
Click through to read all of "GeekMom: Making Custom Decal Transfers for Easter Eggs" at GeekDad.If you value content from GeekDad, please support us via Patreon or use this link to shop at Amazon. Thanks!