How To Make a Giant Wall Clock | Decorative Wall Clock
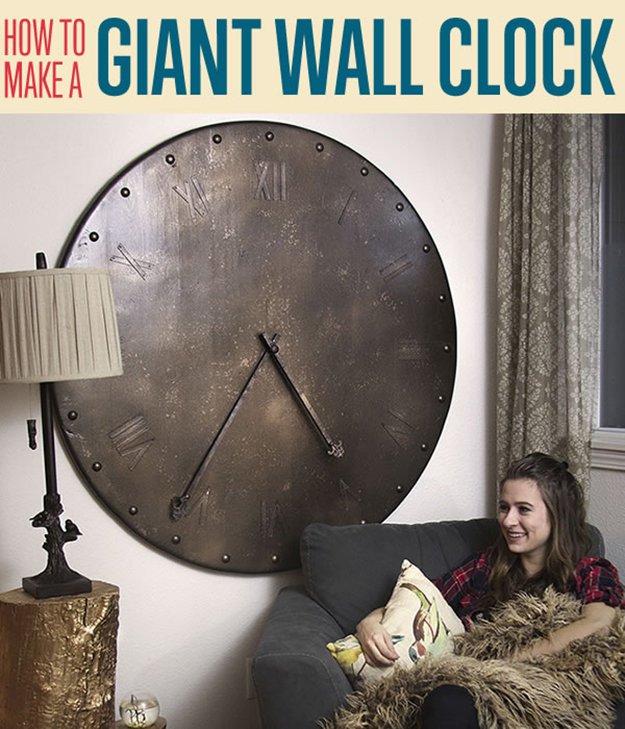
Want a giant wall decor element without the giant price tag? This decorative, static clock will fill a large block of wall space with elegant sophistication. With a few hours of work, and under $100, you can make this decorative statement piece in one afternoon!
Supplies:
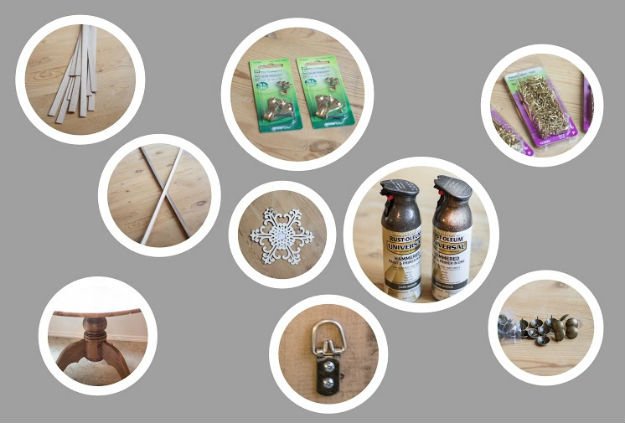
- Round dining table (make sure to look for one with a base that can be removed/demolished). The Dining table I chose was 4ft. in diameter – nice and big! Craigslist is the best place for cheap dining tables, in my experience.
- 1” round upholstery tacks
- ½” upholstery tacks (beveled)
- Cardboard tack strips (I got mine from the upholstery section of the fabric store for only 10 cents each!)
- Small, round head nails
- 2 Square dowel rods
- A few cheap wooden ornaments from the craft store with interesting shapes (Michael’s has a whole wall of them!)
- Spray paint with a “hammered” texture
- Dark bronze spray paint
- Light bronze spray paint
- Heavy duty art hanging hooks
- Tremor hooks (hardware store)
Tools from Around the Craft Room:
- Wood glue
- Hammer
- Rubber mallet
- Crowbar
- Scissors
- Tweezers
- Measuring tape
- Sand paper
Step 1

Remove the pedestal from your table. Because mine was an old table, I had to use a rubber mallet and a crowbar to rip away the pedestal – phew!
Step 2

Lay the table on the ground, face up, and let’s get to work! Use a measuring tape to find the dead center of the table and mark it with an “x”. Now find the four “points of the compass” around the edges of the table – mark those, as well. We want to know where center, 12 o’clock, 3 o’clock, 6 o’clock, and 9 o’clock are, so that we can get everything evenly spaced.
Grab those 1” diameter upholstery tacks. We’re going to line the edges of the round clock with them, so begin by hammering the tacks into the “north”, “south”, “east”, and “west” points of the table that you located in Step 2. Make sure to measure how far in from the edge you are putting the tacks, so that they all line up. I put all of my big round tacks exactly 1” in from the edge.
You’ll notice in the photo for Step 2, that I did twelve 1” tacks around the edge (one for each number of the clock), however later I decided that I loved them so much I had to have more! I ended up putting another tack in each gap, bringing the total number of evenly spaced tacks up to 24. They have such a great texture!
Step 3
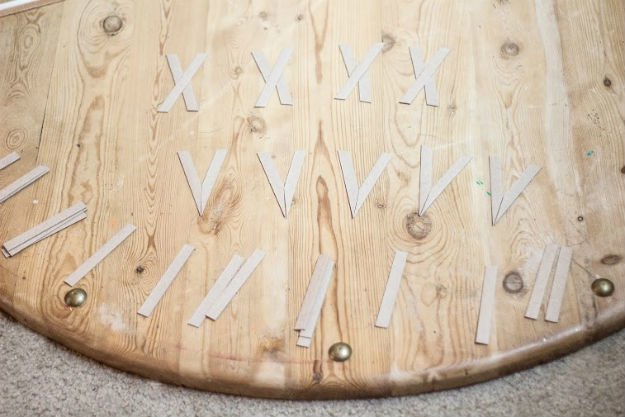
Time to cut out our roman numerals! The great thing about the cardboard upholstery tack strips is that they already have a great width for the numerals, so you are halfway there already.
Using a sharp scissors (or an exacto knife), cut out the I’s, V’s, and X’s. The V’s are made from two strips with a miter cut to joint the two pieces, and the X’s are made from three pieces – one main strip that runs diagonally through the middle, and two side legs. See the photo for Step 3 for a look at each numeral type.
Here are the numerals you will need (XII is 12 o’clock):
XII
I
II
III
IV
V
VI
VII
VIII
IX
X
XI
XII
Step 4
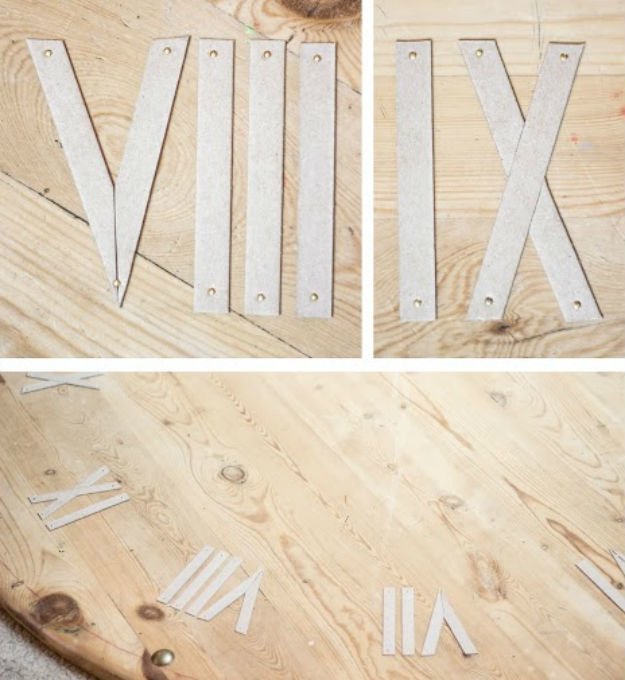
Once you have cut out all of your numeral pieces, anchor them in place with the little round-head nails. They do a great job of holding everything in place very tightly. Once again, remember to measure your distance from the edge/the round 1” upholstery tacks to line everything up symmetrically.
Step 5
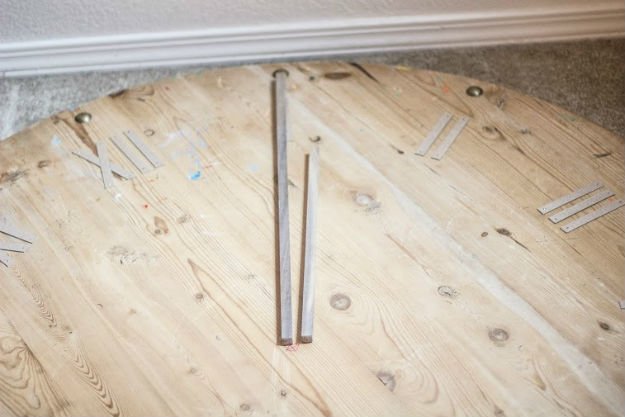
Cut your square dowel rods down so that you have a “big hand” and a “little hand”. The longer arm should extend from the middle of the clock, to slightly below the line of 1” upholstery tacks around the edge. The short arm should be about ¾ the length of the long arm.
Step 6
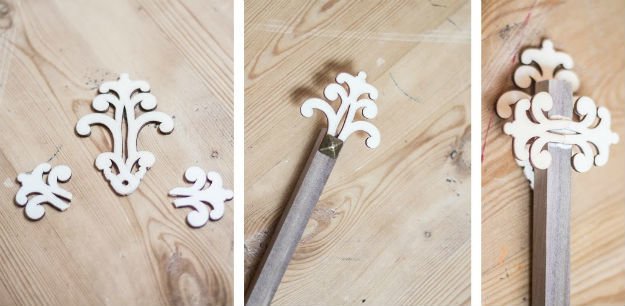
Take your interesting wooden ornaments and use a sharp scissors to slice off some scrolls and embellishments. Use sandpaper to smooth away the rough edges.
Use a small, beveled upholstery tack to anchor the front embellishments onto your clock hand, and use wood glue to attach some back embellishments. That will create a 3-dimensional effect that is very attractive!
I did that front-and-back embellishment style for the long arm and only a single-sided embellishment for the short arm.
Step 7
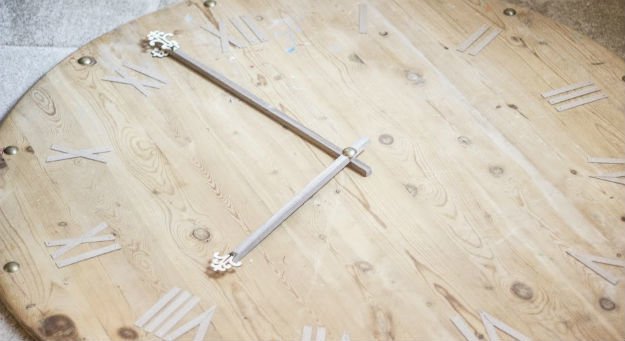
Use a 1” upholstery tack to pin the two arms together (we’ll glue them onto the actual clock with wood glue later in the process).
Step 8
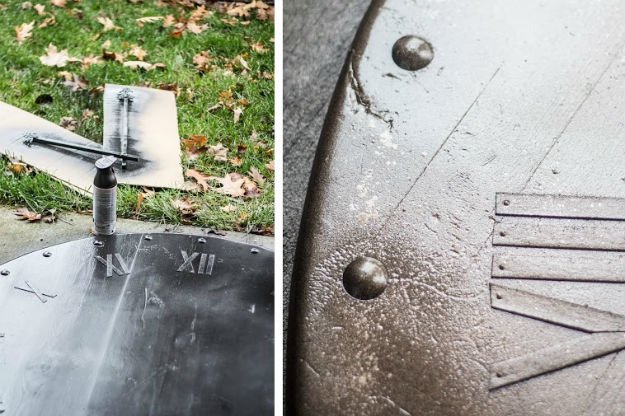
Let’s start spray painting! Use your dark bronze spray paint to coat the clock and the arms with an even base coat.
After the first layer is dry, use the lighter bronze spray to do an organic, uneven, worn-looking topcoat. I found that if I held down the nozzle gently instead of firmly, I got some great spatters that looked like rust, age, weather-worn spots, etc. Apply this top coat to taste.
Step 9
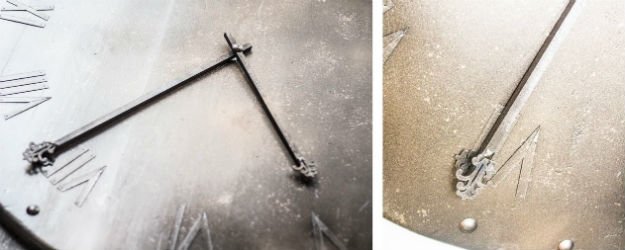
Attach the clock arms with wood glue in the center of the clock. Allow it to dry completely.
Step 10 – Hanging the Clock
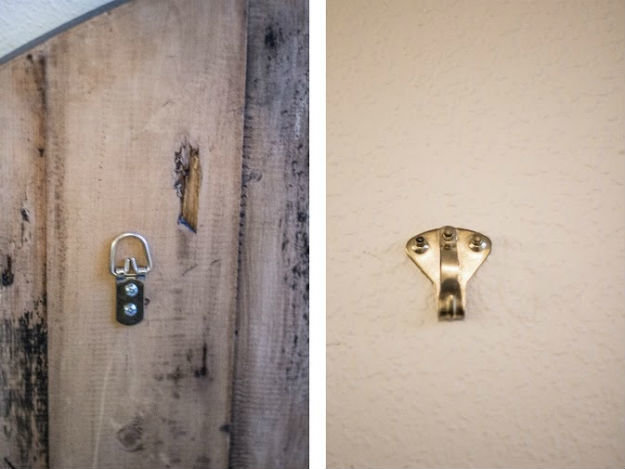
Using tremor hooks (or “earthquake proof” hooks) for safety, find two studs in the wall and sink them in. Use a level to get the two hooks exactly even with one another.
On the back of the clock, screw in two heavy duty hooks that can hold the appropriate amount of weight. Use a level to make sure they are even with each other, and use a tape measure to make sure they are appropriately spaced for the hooks that you have on the wall.
Grab a strong assistant and latch the clock onto the wall.
You’re done!