How to Make a Messenger Bag With Mosaic Tiles
Hi, I’m Katy from The Littlest Thistle, and I’m thrilled to be here today with another Mosaic Tiles block project from Lindsay’s new book, Modern Bee.
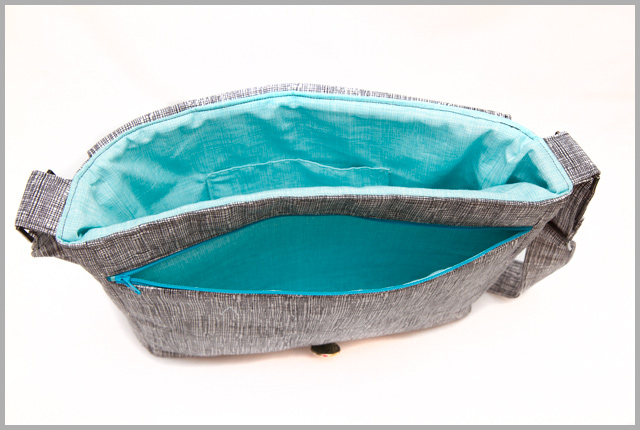
I know how hard Lindsay worked to make her book dream become a reality, and I’m delighted that it came together in such a lovely book. Well, I’m a bag lady at heart for my stop, so I’m afraid my project was only ever going to find its way into a bag somehow! I love how this Mosaic Tiles block isn’t a traditional symmetric block, making it a perfect project to put on a bag for a lovely, modern young lady. It finishes at 12″ x 12″ x 3″, with an adjustable strap and a simple button closure.
We also posted lately a really easy tutorial > How to sew a tote bag with lining
What do you need to make the messenger bag?
- Scraps for colored squares in the block
- 1 yd main outer fabric
- 1 yd lining fabric
- 1 1/2 yds 35″ wide OR 2 1/2 yds 22″ wide fusible woven interfacing, such as Vilene G700 or Pellon SF-101 Shapeflex
- 1 1/2 yds thick fusible fleece, such as Vilene H640 or Pellon TP971F Fusible Thermolam
- 1 large button
- 1 1 1/2″ strap slider + 2 1 1/2″ rectangular rings to match
- 1 14″ zip (please note that mine was longer and had to be cut down)
From this, you will need to cut:
- 9 x 2 1/2″ squares
- 2 x 2″ WOF strips, subcut one to get 1 x 1 1/2″ x 11″ strip for side of flap
- 1 x 1 1/2″ x 11″ strip for side of flap
- 1 x 1 1/2″ x 13″ strip for bottom of flap
- 1 x 4 1/2″ x 13″ piece for top of flap
- 1 x 13″ x 16″ for flap lining – O1
- 1 x 13″ x 13″ for back – O2
- 1 x 10 3/4″ x 13″ for bottom of front zip pocket – O3
- 1 x 3″ x 13″ for top of front zip pocket – O4
- 3 x 4″ x 13″ for base and sides – O5
- 1 x 6″ x WOF for strap – O6
- 2 x 3″ x 6″ for strap ends – O7
- 3 x 13″ x 13″ for back/front/back of front pocket – L1
- 1 x 10 3/4″ x 13″ for bottom of front zip pocket – L2
- 1 x 3″ x 13″ for top of front zip pocket – L3
- 3 x 4″ x 13″ for base and sides – L4
- 1 x 7″ x 13″ for lining patch pocket – L5
- 2 x 13″ x 16″ for flap – W1
- 2 x 13″ x 13″ for back/back of front pocket – W2
- 1 x 10 3/4″ x 13″ for bottom of front zip pocket – W3
- 1 x 3″ x 13″ for top of front zip pocket – W4
- 3 x 4″ x 13″ for base and sides – W5
- 1 x 6″ x WOF for strap – W6
- 2 x 3″ x 6″ for strap ends – W7
- 1 x 12″ x 15″ for flap – F1
- 2 x 12″ x 12″ for back/back of front pocket – F2
- 1 x 9 3/4″ x 12″ for bottom of front zip pocket – F3
- 1 x 2″ x 12″ for top of front zip pocket – F4
- 3 x 3″ x 12″ for base and sides – F5
Preparing the pieces
Fuse the fusible woven interfacing onto the back of the fabric pieces according to the manufacturer’s instructions:
- 1 x W1 -> O1
- 1 x W2 -> O2
- 1 x W2 -> 1 x L1
- W3 -> O3
- W4 -> O4
- 3 x W5 -> 3 x O5
- W6 -> O6
- 2 x W7 -> 2 x O7
- 1 x F2 -> O2
- 1 x F2 -> L1
- F3 -> O3
- F4 -> O4
- 3 x F5 -> 3 x O5
Making the bag
Step 1
Using the 2″ strips of the outer fabric, and the 2 1/2″ squares, assemble the block as per the instructions in the book with a 1/4″ SA:
Step 2
Add the two 1 1/2″ x 11″ strips to either side of the block, then the 1 1/2″ x 13″ strip at the bottom, and the 4 1/2″ x 13″ piece at the top, all using a 1/4″ SA. Press your seams well, then fuse the remaining W1 piece to the back, followed by the F1 piece.
Step 3
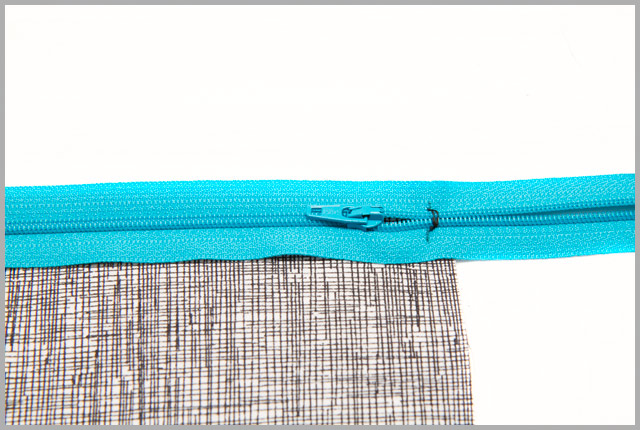
Take your zip and work out where the tape meets the side of piece O3. Make a small mark, then make a few stitches at that point to keep the tape together when assembling the pocket – make sure the zipper is on the right side of the stitches!
Step 4
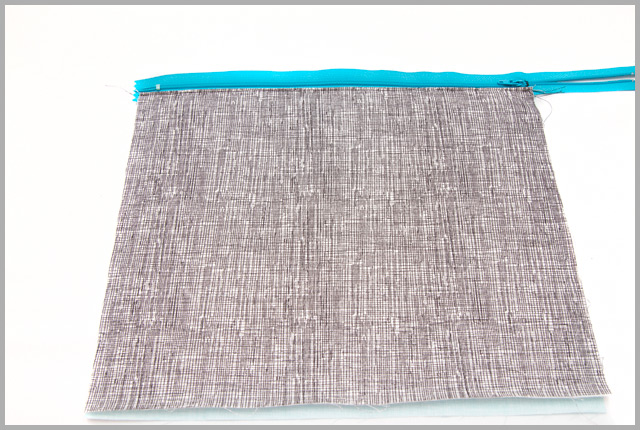
Turn your zip face down on top of piece O3, making sure the teeth are 1/2″ from the edge of the fabric, then tack in place close to the edge of the tape:
Step 5
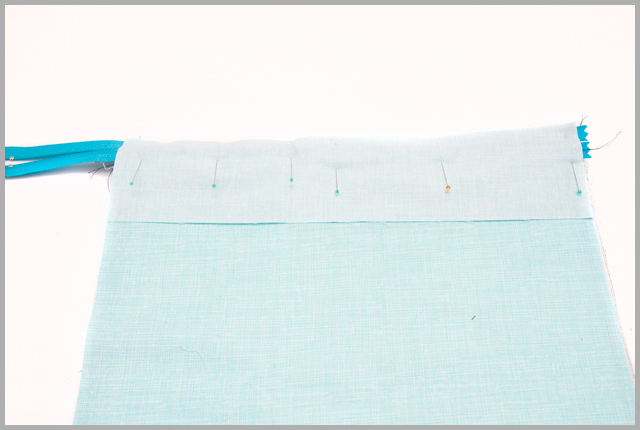
Place lining piece L2 face down on top of piece O3, right sides together (RST) sandwiching the zip in between, and stitch in place:
Step 6
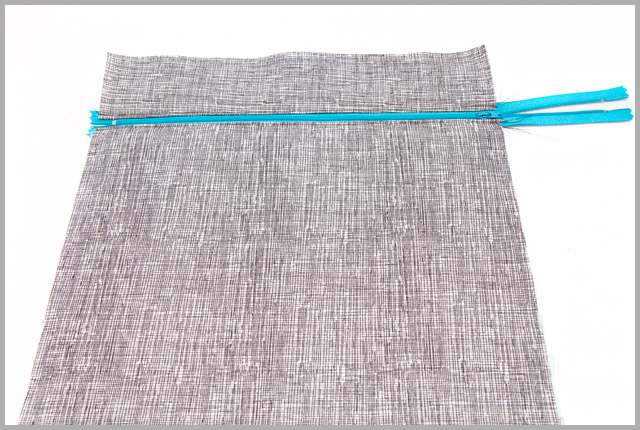
Flip both pieces of fabric away from the zip so that they are wrong sides together (WST) and topstitch along the edge of the fabric near the zip teeth.
Step 7
Take the zip, and place face down on top of piece O4, making sure the teeth are 1/2″ from the edge of the fabric, then tack in place close to the edge of the tape:
 |
| Zip facing down |
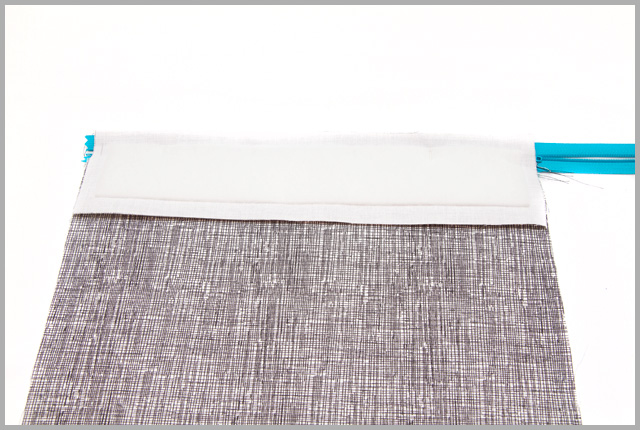 |
| Zip facing up |
Step 8
Place lining piece L3 face down on top of piece O4, RST, sandwiching the zip in between, and stitch in place:
Step 9
Flip both pieces of fabric away from the zip, so that they are WST and top stitch along the edge of the fabric near the zip teeth.
Step 10
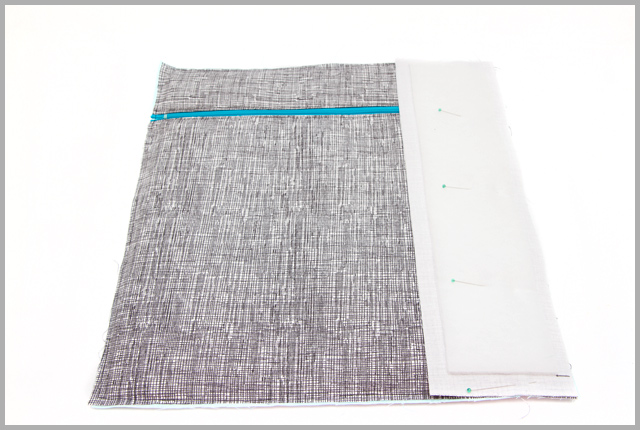
Place pocket on top of piece L1, which has had the fusible interfacing/fleece applied so that the lining pieces are RST, then tack all the way around about 1/4″ from the edge. Trim any excess zipper tape at this point.
Step 11
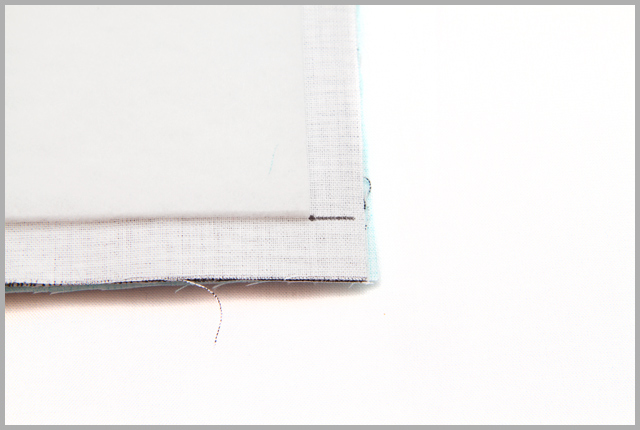
Take one piece O5, and place it so that the short edges are top and bottom, draw a line 1/2″ up from the bottom right-hand corner between the fusible fleece and the edge:
Step 12
Place marked piece O5 RST on top of the front pocket piece at the right-hand side and sew from the very top down to the marked line and stop there.
Step 13
Repeat with piece O2 and another piece O5, marked in the same way as in step 11. Note that it will also be on the right-hand side.
Step 14
Place the pieces from steps 12 and 13 and place them RST. Mark the bottom right-hand corners of pieces O2 and the outer pockets as per step 11, stitch together at both sides down to the marked line. You should now have a tube-shaped piece.
Step 15
Take the remaining piece O5 and make a mark 1/2″ in from each side at each corner:
Step 16
Taking the remaining piece O5, place RST with the pocket side of the tube, matching the long edges. Note that you will need to pin the sides out of the way. Going only between the corner marks, stitch together.
Step 17
Work your way around, doing one short side next, then the back, then the remaining short side, ensuring that you only sew between the marks each time.
Step 18
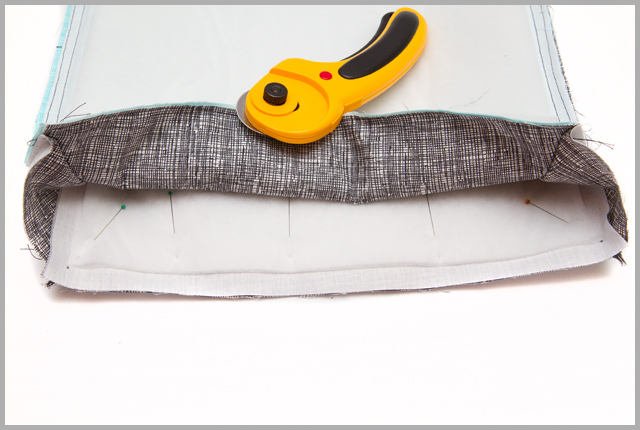
Trim the excess fabric away from each side at each bottom corner:
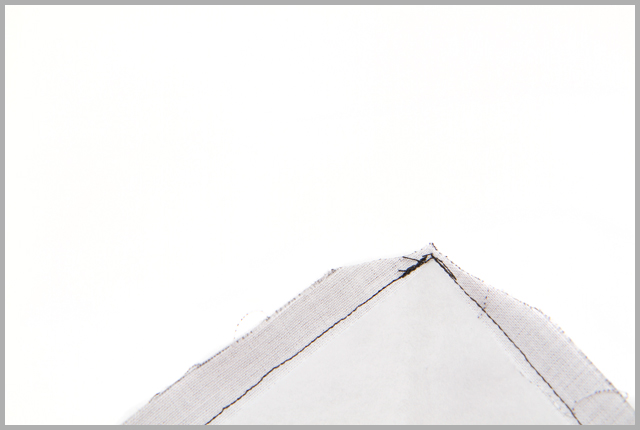 |
| Note that I approach the corner at a shallow angle to ensure no overlap when the bag is right side out |
Step 19
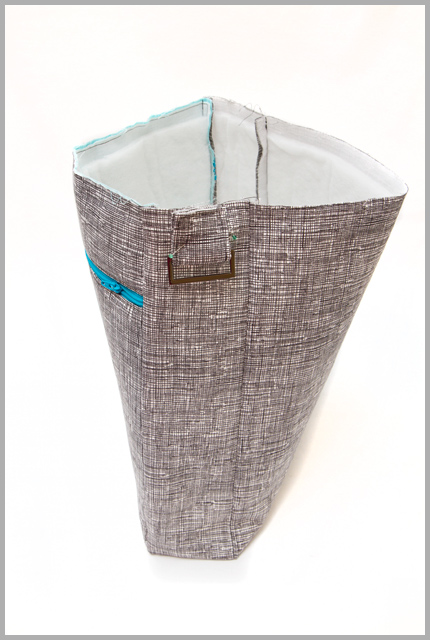
Turn the bag right sides out:
Step 20
Take one piece O7 and fold in half, matching short edges, and press. Then fold the short edges into the center and press. Repeat with the remaining piece O7.
Step 21
Stitch around each piece 1/8″ from the edge, starting at one short edge, then coming down the open edge before going across the bottom and up the folded edge.
Step 22
Fold piece O6 as per step 20, except matching the long edges together. Fold each end in by 1/2″ and press.
Step 23
Stitch all the way around as per step 21.
Step 24
Draw a line 1/2″ in from the topstitching at one end of the strap, then join the opposite corners with diagonal lines. Loop that end of the strap over the crossbar of the slider by 1 1/2″ so that the marked lines are facing upwards. Following the topstitching already there, stitch round the rectangle twice, using the drawn line as the 4th side, then sew up one diagonal line, across the top and down the other diagonal, and repeat:
Step 25
Take one piece O7 and thread through one rectangle ring, matching short edges. Center on the side of the bag, and stitch in place 1/4″ from the edge, going back and forth along the line 3 or 4 times for security.
Step 26
Repeat with remaining piece O7 and rectangular ring, then set the bag aside.
Step 27
Place the block flap piece RST with piece O1 and all the way around, leaving the top edge completely open. Trim the corners as per step 18, then turn right side out:
Step 28
Press and topstitch around the 3 stitched sides 1/8″ from the edge, then tack the top edge closed 1/4″ from the edge.
Step 29
Make a mark in the center of the flap 3/4″ from the bottom
Step 30
Using the buttonhole stitch on your machine, make a buttonhole big enough for your chosen button.
Step 31
Place the flap RST with the back of the bag, matching raw edges, and tack in place 1/4″ from the edge.
Step 32
Take piece L5 and fold in half RST, matching short edges, and sew all around open edges, leaving a 2″ gap for turning. Trim the corners as per step 18 and turn through the gap. Push out the corners and press.
Step 33
Place pocket on top of one piece L1, centered and 4″ down from the top, with the folded edge uppermost, then topstitch along the sides and bottom of the pocket 1/8″ from the edge.
Step 34
Assemble the bag lining in the same way as the outer from steps 11 to 18, making sure that you leave a gap 7″ long for turning on one long side of the base.
Step 35
Place the outer bag inside the lining bag and pin it carefully around, making sure the edges match.
Step 36
Stitch all the way around, then turn the bag through the opening in the base of the lining. Press in place, then topstitch 1/8″ from the edge around the top of the bag:
Step 37
Thread the strap through one rectangle ring, back through the slider, and finally through the remaining ring with a 1 1/2″ foldover. Stitch in place as per step 22.
Step 38
Ladder stitch or slip stitch the opening in the lining closed.
Step 39
Sew your button onto the front of the front pocket of the bag, then stand back and admire your bag:
The post How to Make a Messenger Bag With Mosaic Tiles appeared first on Art & Craft, DIY ideas and Tutorials - Craftbuds.


