How to Make a Paper Bow and Arrow
For our Disney themed activity today, I decided to throw caution to the wind and have my daughter pick out a Disney movie.
And I quickly regretted my decision because she picked Brave. Not that I don’t like Brave – in fact, I love how strong and skilled Merida is. She kind of reminds me of my daughter! But, there just aren’t too many craft ideas I can think of pertaining to Brave.
I proposed that we make bear masks. Nope. It has to be about the princess and not the mom or brothers. Why can’t do we another Frozen day?
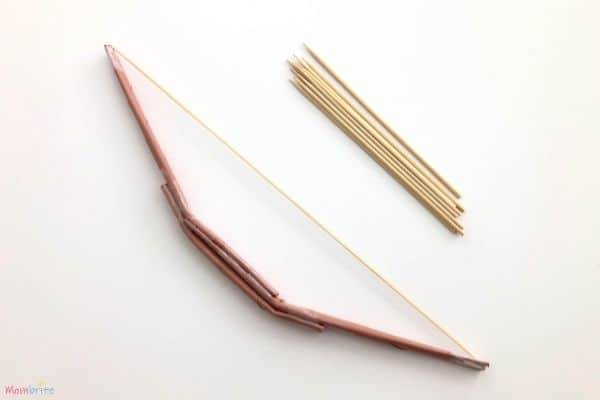
So guess what we ended up making? Merida’s bow and arrow! To my son’s delight (who grumbled when he heard we were doing a princess project today), the mini bow and arrow we made out of paper worked so well that the arrow can fly straight across the room!
Continue reading to see what else we shot with our paper bow and arrow.
How to Make Bow and Arrow Out of Paper
Materials:
- 3 sheets of construction papers
- Tape
- Rubber band
- Skewer sticks (for the arrows)
- Optional: Drinking straw
Instructions:
- Take a sheet of rectangular construction paper and fold it as shown.
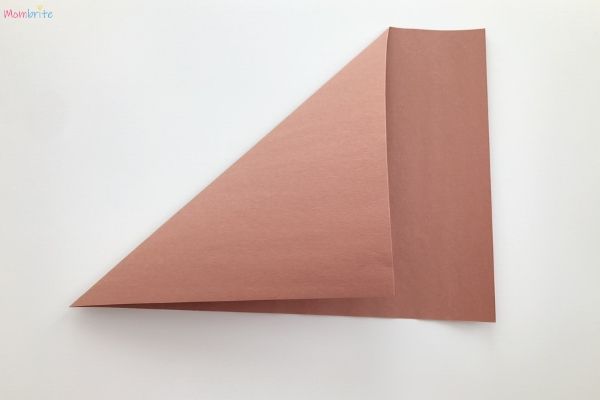
- Use the edge as a guide to cut off the lower rectangle.
- Unfold the triangle. You should now have a square with a diagonal crease in it.
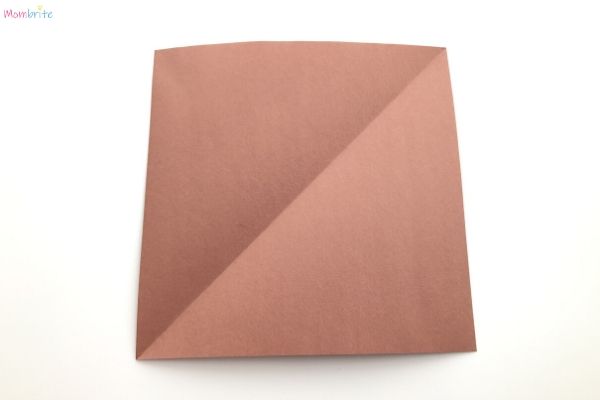
- Turn the square so that you now have a diamond.
- Start folding at the bottom angle and continue folding until you have folded the entire paper. Try to keep the folds as small as possible so that in the end you get a narrow stick.
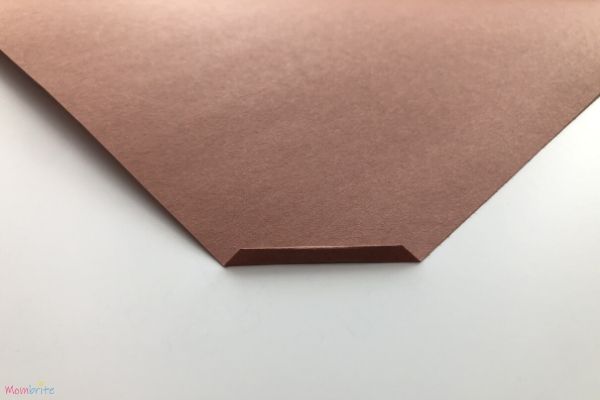
- Tape the loose end of the paper down.
- Repeat #1-6 with two other pieces of construction paper.
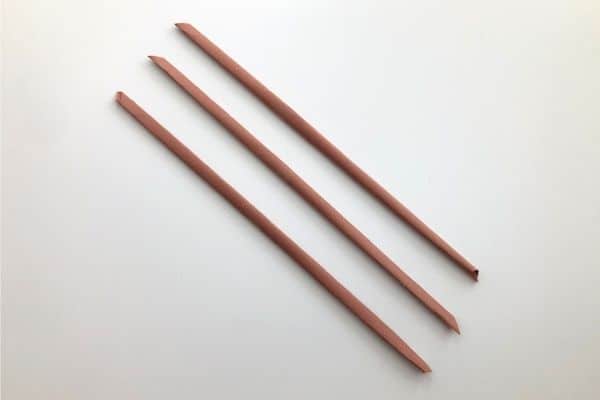
- Take 2 of the sticks and cut about 1 inch off each end of the sticks.
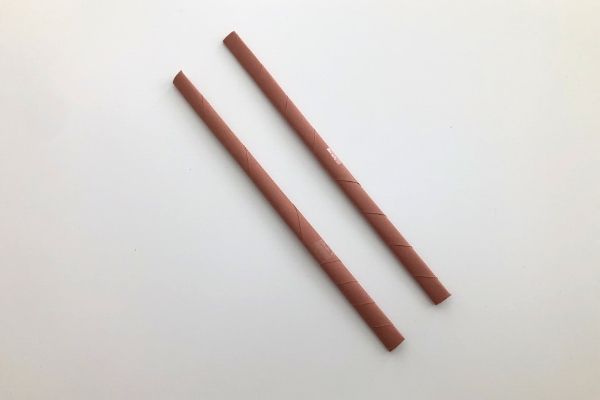
- Overlap the two sticks about 2 inches and tape the two sticks together.
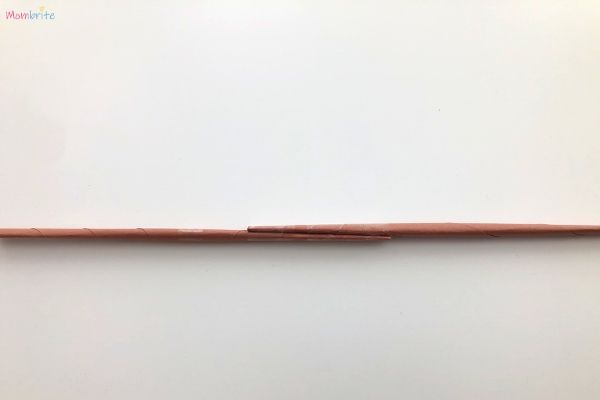
- Bend the sticks a little at the ends of the overlapped portion.
- Take one end of the stick and cut a small slit down the middle.
- Repeat #11 with the other end.
- Cut the rubber band so that you now have a long string.
- Stick one end of the rubber band through one of the slits and tape it to the stick.
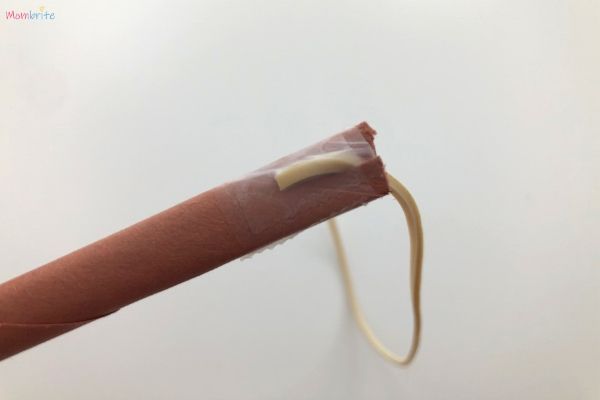
- Repeat #14 with the other end.
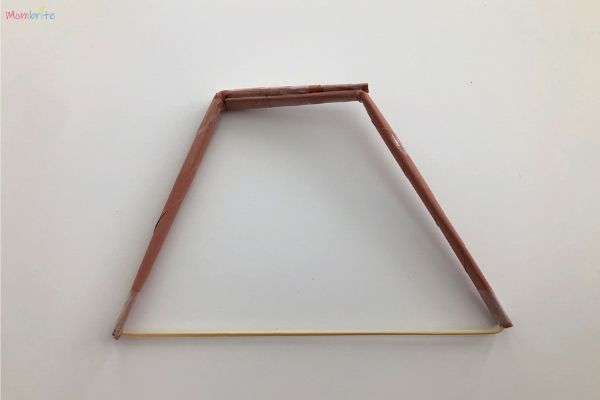
- Take the remaining stick and cut it just a little longer than the overlapping portion of the other two sticks.
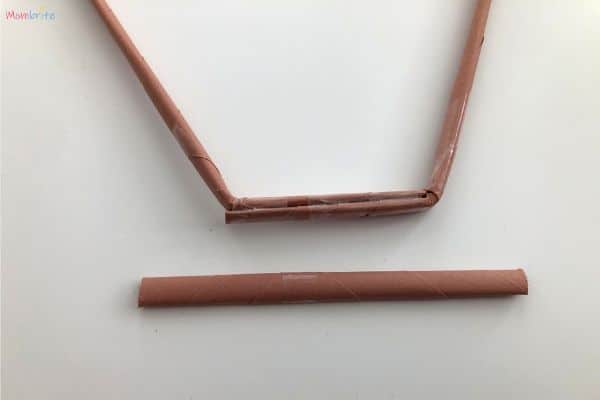
- Tape the ends of the remaining stick to the other two sticks. This essentially straightens the bow slightly so that the rubber band is tauter.
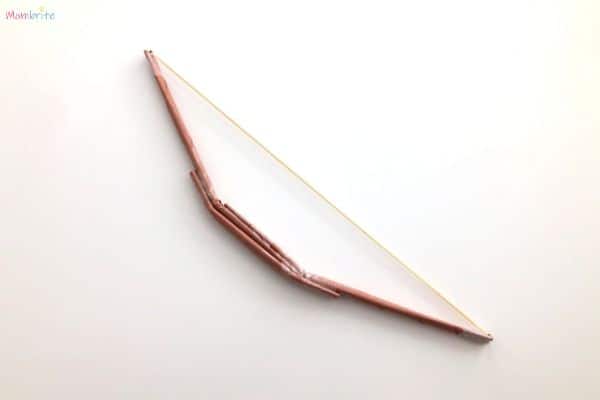
- Use the skewer sticks as your arrows, pull back on the rubber band, and shoot!
- Optional: Cut about 1 inch of the drinking straw and tape it to the arrow. You can stick the skewer stick through it and use it as an arrow rest. This is
- Optional: Cut a small piece of construction paper and wrap it around the rubber band where you would place the end of the arrow. Tape it so that it stays in place.
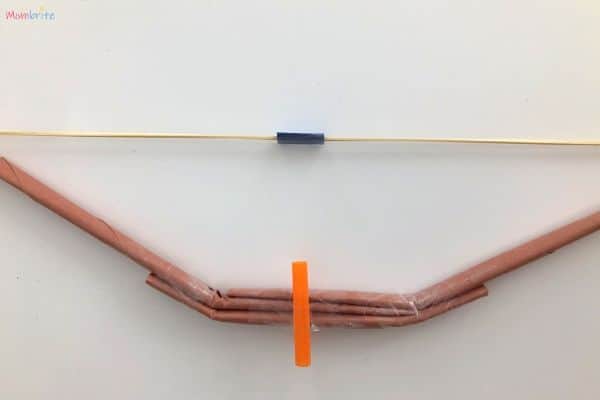
I want to explain steps #18 and #19 in the directions. You don’t need to do those steps for older kids because they can easily pull back the arrow with the rubber band behind it. They can also use the hand that’s holding the bow as an arrow rest by placing a finger below the arrow.
However, for younger kids like my daughter, she couldn’t hold the arrow straight. She also had trouble pulling the rubber band back so that it’s behind the arrow. Therefore, I used the straw as her arrow guide and used a piece of construction paper to help her pull the arrow back with the rubber band behind it.
Are you surprised at how well this paper bow and arrow shoots? When my kids first shot it, the skewer stick flew straight across the room. Then at one point, my son shot at the wall and the skewer stick got stuck in the wall. Oops.
Warning: Please supervise your kids carefully. As you can see from the video, the paper bow and arrow can actually shoot forcefully enough to pop balloons and pierce through foam boards.
That said, you don’t have to use skewer sticks for the arrows. We did find them to perform very well, but they do have sharp, pointing ends that can be dangerous.
You can try using disposable wooden chopsticks as arrows, or you can even make an additional paper stick. While you still shouldn’t take your eyes off your kids when they are shooting anything with this much force, chopsticks or other types of sticks at least do not have pointy ends.
Here are some fun ideas for playing with the paper bow and arrow.
- Shooting at a bullseye (self-explanatory).
- Shooting at stacked cups. Using mini red cups, we stacked them high in a triangle formation. Then we tried to shoot at the stacked cups to see who can knock the most down in one shot.
- Shooting at balloons. My kids absolutely loved this. We blew up water balloons and taped the balloons to a foam board. Then we shot at the balloons! The person who popped the most balloons win. This is like the carnival game you play with darts, except bow and arrows are even more fun!
- Shooting at filled water balloons. My son wanted to do this so badly but I didn’t have all the materials for it. Similar to shooting at the balloons, you would want to fill the water balloons up with water instead of air. Then secure it to a board.
Taping the balloons won’t work because the water makes the balloons quite heavy, so you would probably have to nail them to the board. I didn’t have a wooden board that I can use the nails on so the kids will just need to wait for another day for this one.
There you go! My daughter was happy pretending to be Merida in Brave with her paper bow and arrow. My son was happy with a bow and arrow that actually shoots well. Overall, a successful Disney themed day!
YOU MAY LIKE:
- Build Moana’s Canoe with Popsicle Sticks
- Adorable Popsicle Stick Disney Pixar Cars
- Minion Toilet Paper Roll Craft
The post How to Make a Paper Bow and Arrow appeared first on Mombrite.