How To Tie Dye Shirts With Food Coloring? Step-By-Step Guide
Do you know how I spend my weekends? No, the answer isn’t traveling or going to the movies. It’s tie-dyeing. It’s a great pastime I’ve been relishing for a long time.
All you need is vibrant dyes and a suitable shirt. However, the dyes you’ll come across are primarily made with chemicals. That’s why I prefer using food coloring instead. Not only are food colors skin-friendly, but they are also highly water-soluble.
In this guide, I’ll illustrate the entire process to tie-dye your boring shirts with food coloring and making them attractive. Furthermore, I’ll reveal my secret formula for a reliable & chemical-free homemade tie-dye. So, without further ado, let’s start.
Can You Use Food Coloring To Tie Dye Clothes?
Yes, you can tie-dye clothes with food coloring. It’s the safest alternative to the otherwise chemical-loaded dyes. However, it’s worth noting that food colors don’t leave a bold and long-lasting design on your fabric.
Nevertheless, food coloring remains an excellent way to work on projects with your children. Its most significant advantage is its high solubility and quick drying.
Another significant aspect of food coloring is that all suitable fabrics, including cotton, quickly absorb the food colors as they are made with petroleum and are readily soluble in water.
The temporary nature of food coloring might bother you. But it’s a safer option when compared to commercial dyes having toxic components.
Food coloring produces a rich color when using a plain cotton shirt or other white fabric. Other synthetic fabrics like polyester do not absorb food colors. It is because they’re made from plastics, which, as we know, don’t absorb any watercolor.
Note: Food coloring permanently colors any protein-built materials like silk or wool. Since food coloring is a sort of acid dye, it can smoothly dye any animal-based fabric.
How to Tie Dye with Food Coloring and Vinegar?
To tie dye with food coloring and vinegar, follow these simple and easy steps.
-
Pick the Right Shirt Fabric
Before starting your dyeing process, choose a suitable fabric material. It’s possible to work with any material, but will it give the same results?
The answer to this is no.
I would always suggest you work on shirts made out of cotton, wool, or silk as they are hydrophilic. That is, they absorb water very quickly. You can put aside hydrophobic materials like polyester or synthetic, which don’t absorb water easily.
For maximum benefits from food coloring, go for a white shirt.
Tip: Since food colors provide only a pastel shade, it’s always better to use a white shirt so that the results are excellent.
Supplies Needed for Dyeing
You will need to pick up a few more things, including:
- A big bucket (for dipping your shirts)
- Food coloring
- White vinegar
- Squeeze bottles
- Rubber bands
- Gloves
- Table cloth (to avoid a mess)
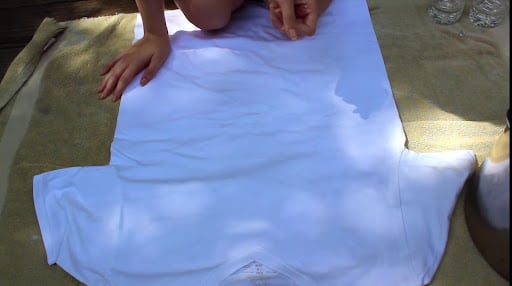
Prepare Your Shirt
Always wet it before beginning the tie-dying project, whether you’re using an old white shirt or a recently purchased shirt. This will eliminate starch from the new shirt and stains from the old one.
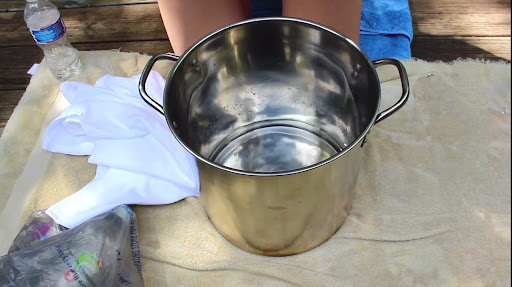
For the food coloring to stick properly to the shirt, you can also dip it into a solution of water and vinegar. Mix water and vinegar in a ratio of 1:1 to prepare this “magic” solution.
Don’t forget to mix them up thoroughly. Let your shirt sit in this solution for half an hour. If needed, you can let it sit for an hour, but not more.
After you have soaked them, squeeze the shirt to drain any excess water. Remember, the shirts should only be slightly damp and not dripping wet.
Patterns
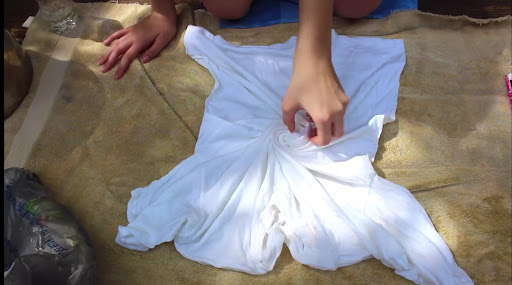
You can create many types of patterns while tie-dyeing your shirt. You can fold, crumple, or twist it into any shape to try different designs. There is no wrong way to do it!
Once you’ve decided on your pattern, secure your shirt with some rubber bands to create your design. Instead of rubber bands, you can even use a string to secure your pattern on the fabric.
Tip: When securing your shirt, take your time to do it for a precise design.
Apply Food Coloring
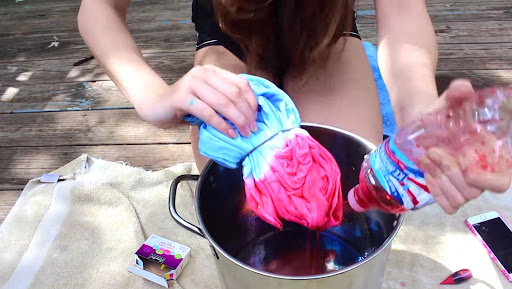
Once you’re done with the previous step, let’s dye the shirt using food coloring. If you want a deeper shade, combine about 16 drops of the food dye with half a mug of water.
Use a metal stirrer to stir the solution properly to achieve the exact shade. You can store the solution in a squeeze or spray bottle for quick application. However, use a separate bottle for every color.
To start dyeing, spread your shirt on the floor (that’s already covered with a tablecloth) and apply the food colors onto each section of the shirt using a squeeze bottle or a spray bottle. Make sure that the shirt is thoroughly soaked in the food color.
Once you’re done dyeing the shirt on one side, flip it and repeat the process on the other side.
Tip: Use the tip of the bottle to go down to the folds.
Let it sit
Now, wrap your shirt tightly in a plastic bag, keeping all the rubber bands intact on the shirt. Squeeze all the air out as much as possible and close the bag tightly. You can also use two plastic bags to cover your shirt if one doesn’t work well.
If you’re dyeing multiple shirts, put each shirt in a different bag to avoid different colors from mixing.
Now, your shirt should sit for at least 12 to 24 hours. The longer this period, the deeper the shade will be!
Rinse and Dry
After 12 to 24 hours, remove the shirts from the plastic bags and prepare them for rinsing. Carefully remove all the strings or rubber bands from them and wash your shirt under a cold water stream. Rinse your shirts until the water runs clear.
You can then wash your shirt with a gentle detergent for a cleaner look.
Note: Using hot water to wash your shirt will open up all the threads and let all the dye get washed. Thus, wash your shirt in cold water to retain its color.
After you have washed your shirts, you can air-dry them as usual.
Homemade Tie Dye Without Food Coloring
You can also make your homemade tie-dye using other components apart from food coloring. Follow the simple steps to make your homemade tie dye without food coloring.
Supplies Required
- Cotton shirt
- Dyes from a tie-dye kit
- Squeeze bottle
- Rubber bands/strings
- Gloves
- Plastic bags
Workspace
Place a plastic cover or tablecloth on the floor to avoid the mess getting onto the floor.
Prepare Your Fabric
Wet your shirt before starting your project; make sure it is damp and not dripping wet. You can also soak the shirt in vinegar or saltwater to absorb the dye well.
Dye Your fabric
Make patterns of your choice by twisting, crumpling, or folding the shirt and securing them with the help of rubber bands or strings.
Then, apply the dye to each section of the shirt, either using a squeeze bottle or a spray bottle. Don’t forget to put on your gloves so that your hands don’t get stained.
Let the Shirt Sit
Seal the shirt in a plastic bag and let it sit for at least 24 hours. The longer it’ll sit, the brighter the color will come out.
Tip: For pastel shades, let the shirt sit for fewer hours.
Rinse
Take the shirt out of the plastic bag and remove all the rubber bands. Then, rinse the shirt in cold water until the water becomes clear.
You can also put it on a cold cycle on the washing machine. Wash your dyed shirt separately to avoid staining other clothes.
Dry and Wear
Air-dry the dyed shirt as usual by hanging it. And it’s ready to rock.
How to Make Your Tie Dye Liquid?
You can make your tie-dye liquid using fabric paint, food coloring, or natural dyes.
I love handmade tie dye liquid because it saves a ton of money and is healthier.
To make your tie dye liquid, I recommend using fabric paint. Mix 3 tbsp of the paint in one mug of water. Stir the solution properly to get a solid shade. Once evenly stirred, you can then store it in either a squeeze bottle or a spray bottle. Repeat this for each color.
Adjustust the quantity of food color depending on the shade you’re looking for. For a darker shade, use more food color and vice-versa. For a tie-dye liquid using food coloring, mix 8 to 16 drops of the color in half a mug of water.
To make your tie dye liquid using natural dyeing agents, you can use beetroot, red cabbage, onions, or avocado skin. However, note that this process requires a lot of work, and is time-consuming.
To make the dye, depending on the color you want, you’ll need to boil the required fruit or vegetable in hot water for an hour and strain it using a cheesecloth. Reheat it for another hour and cool it down. Then, you can give your shirt a good dye bath for an hour for it to get dyed.
How to Tie Dye With Food Coloring and No Vinegar?
Regularly washing your tie dyed shirts with food coloring ruins the color and the patterns if the dye has not set correctly. So, for the food coloring to be appropriately set, vinegar is a must.
But you can also set the dye using soda ash. I will also let you know more about how to let the dye sit appropriately on your shirt without using vinegar.
Vinegar can hardly skim through the shirt, and it’s mainly used for animal-based fibers and not for plant-based fibers.
Here’s how to use soda ash.
Soda ash functions properly only with fiber-reactive dyes when used on plant-based materials like cotton or linen. It forms a permanent chemical bond with the fiber that embeds the dye on the shirt. The pH of the mixture also increases as it improves the chemical process.
Let’s now learn how to make the soda ash solution.
Mix the soda ash in warm water in a ratio of 1:2 to make the solution. Depending on the number of shirts you wish to dye, you may increase the proportion.
Soak your shirts for a minimum of 15 minutes in the solution. If needed, you can also leave them for up to one hour. Next, squeeze the excess water out to get damp shirts that are not dripping wet.
Now, you can dye your shirt as usual.
Letting your shirt soak in soda ash before dyeing is the most promising way for the dye to set. You can also mix the soda ash with the food color if you forgot to mix it beforehand.
Can You Tie Dye With Gel Food Coloring?
Yes, you can tie dye your shirts with gel food coloring. Gel food coloring is more suitable for materials like polyester and synthetic since it is an acid-based dye. Hence, you cannot dye any plant-based fabrics like cotton or linen with gel food coloring.
Conclusion
So, here you go. You can now easily tie dye your shirts with food coloring by following the above-given information. If you don’t want to use vinegar to set the dye, soda ash is the best alternative.
Unlike chemicals-based tie dyes, food coloring is a safe, affordable, and fun way to create your tie-dye designs.
How was your experience of tie dyeing your shirt with food coloring? Let me know by leaving a comment below.
The post How To Tie Dye Shirts With Food Coloring? Step-By-Step Guide appeared first on Art & Craft, DIY ideas and Tutorials - Craftbuds.