How to Transfer Images to Wood with xTool M1
Sponsored by xTool
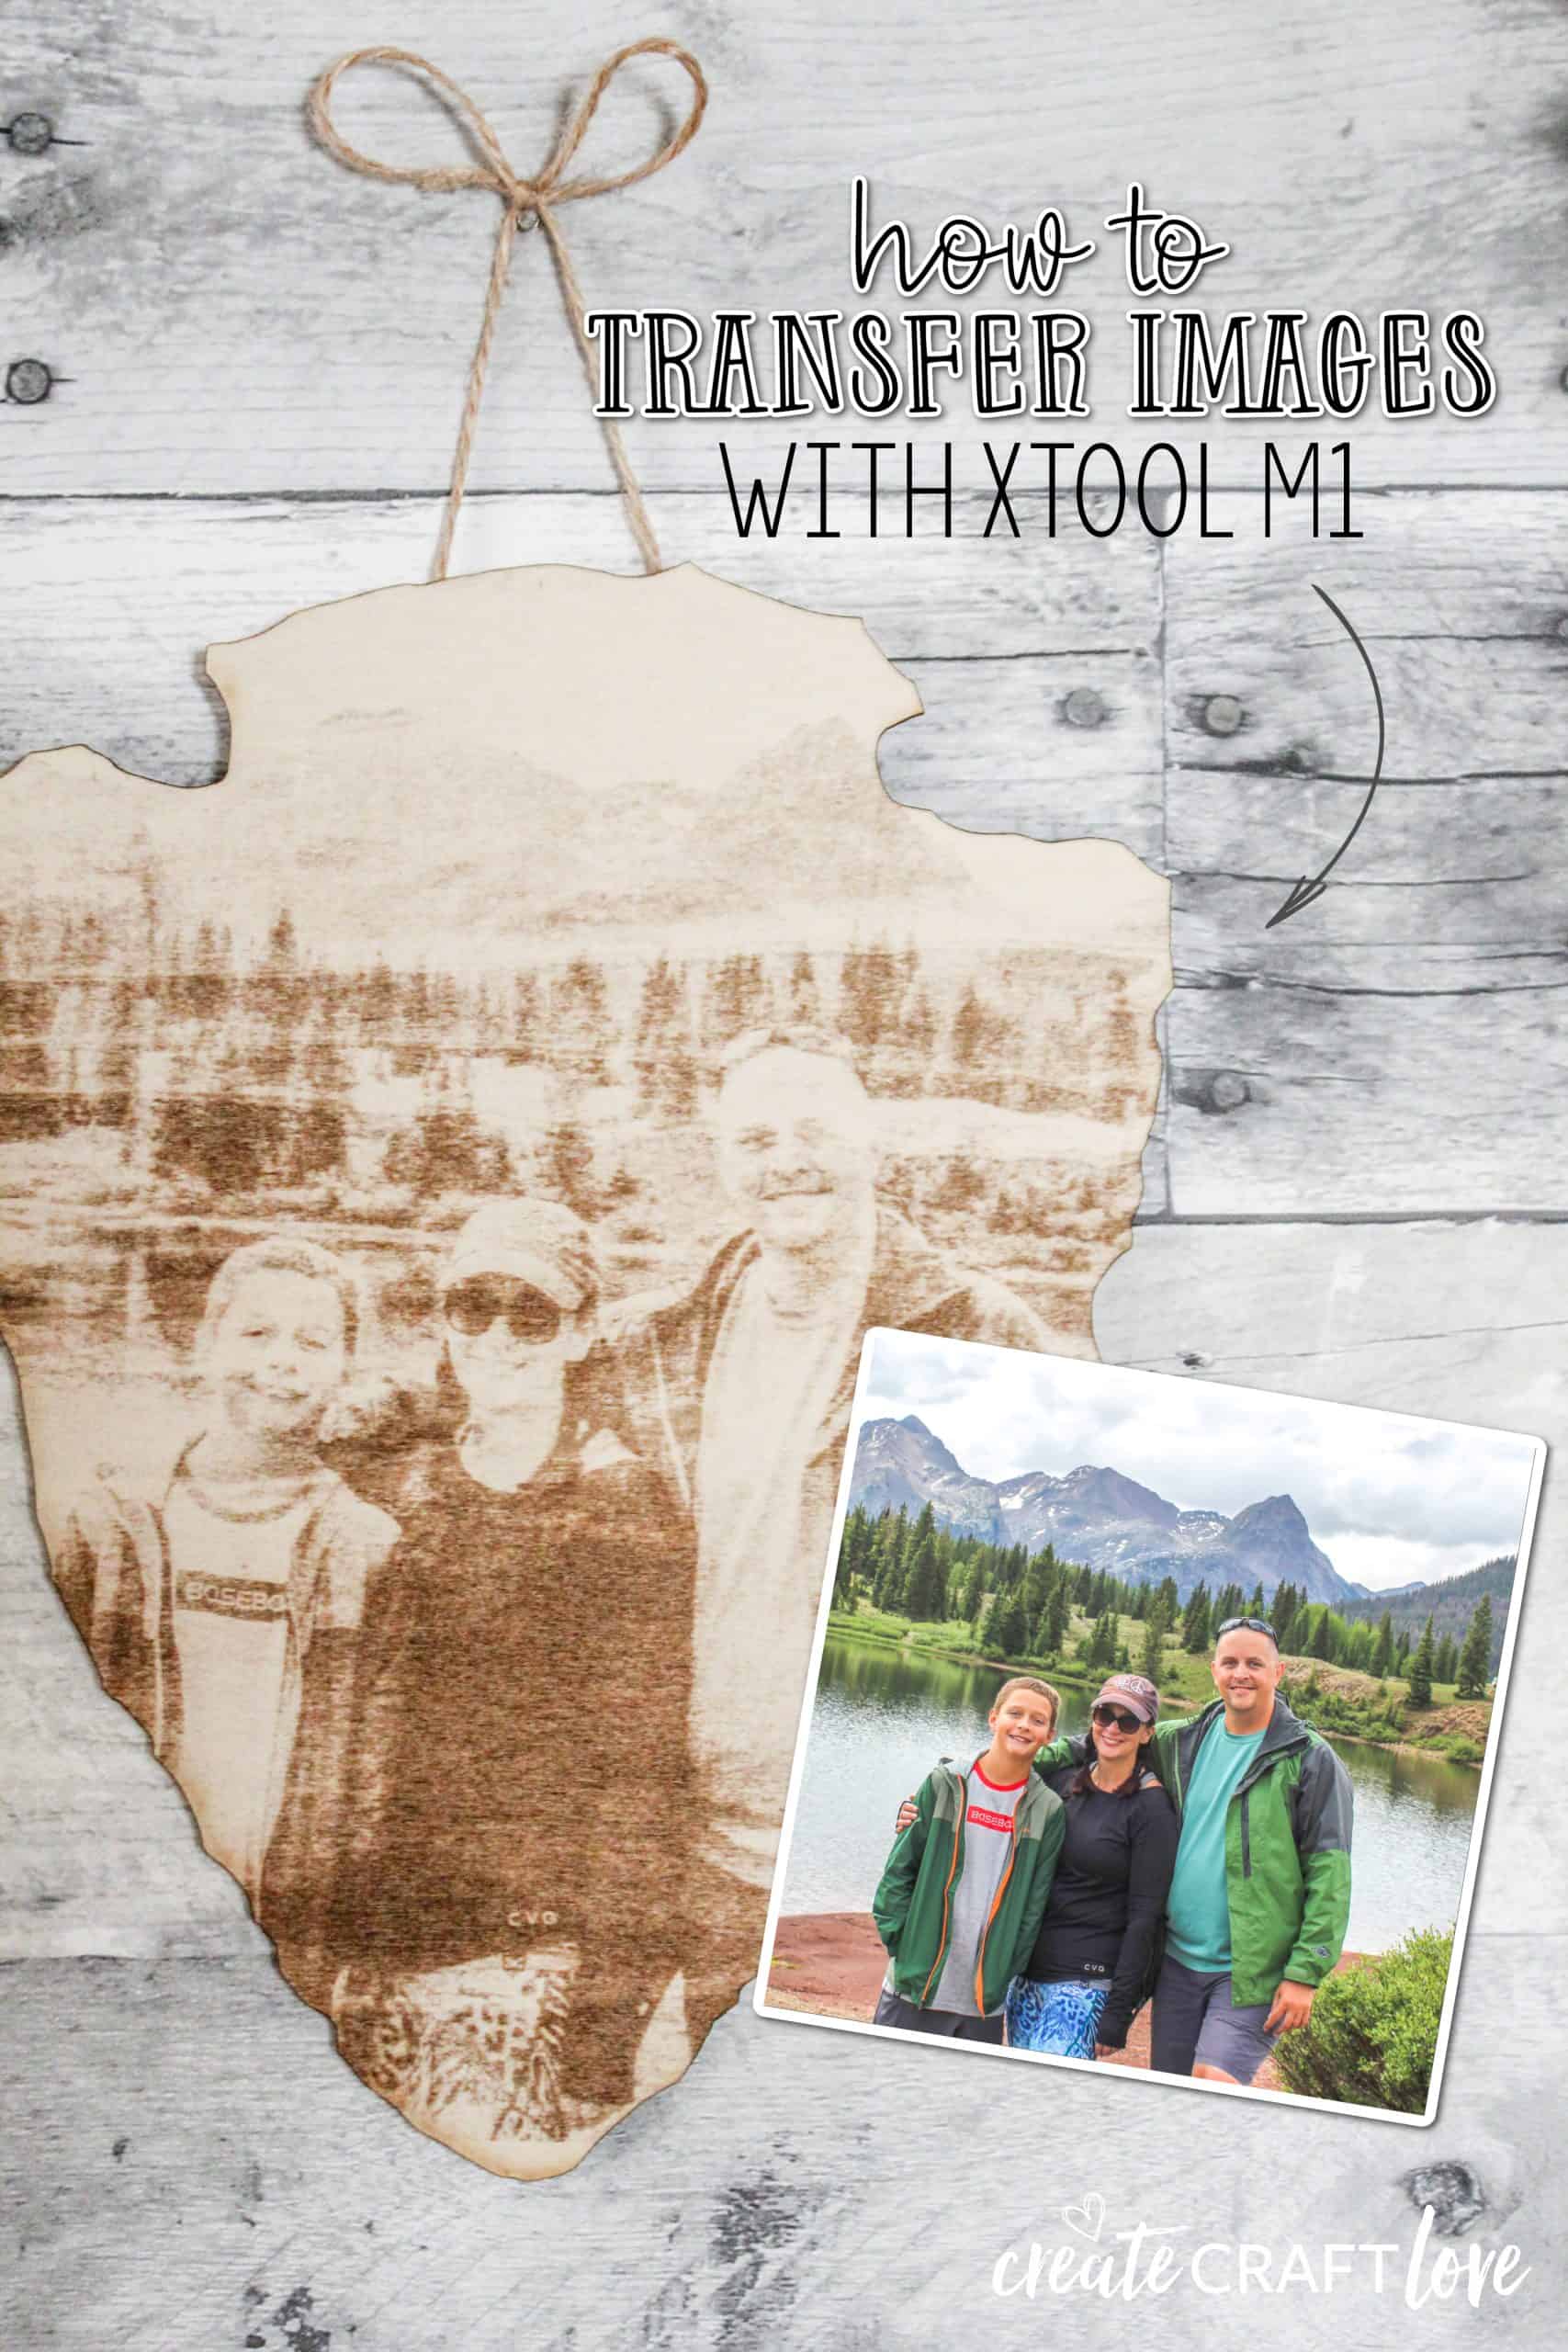
Learn how to transfer images to wood with the xTool M1! This tutorial will walk you through the process step by step!

We are obsessed with the National Parks! Our vacations usually involve visiting a bunch of them. We are headed to the Grand Canyon and Petrified Forest in a couple of weeks. My husband had an idea to transfer one of our family pictures from our National Parks trips into a piece of wall decor. He wanted to frame it in the National Park Service arrowhead. I was able to make that happen for him!
You will need a baseline knowledge of photo editing in order to complete an adequate transfer. That will NOT be covered in this tutorial. I had to lighten up the picture we chose in order for it to transfer.
This is an example of transferring your image without editing. You cannot even see me because the clothes I had on were too dark. Play around with the brightness of the photo and do small sample areas to see if you like the degree of contrast.

This post contains affiliate links for your convenience.
Transfer Images to Wood Using Your xTool
Start by firing up your xTool M1. Open xTool Creative Space. Place your triangle prisms on the base plate.
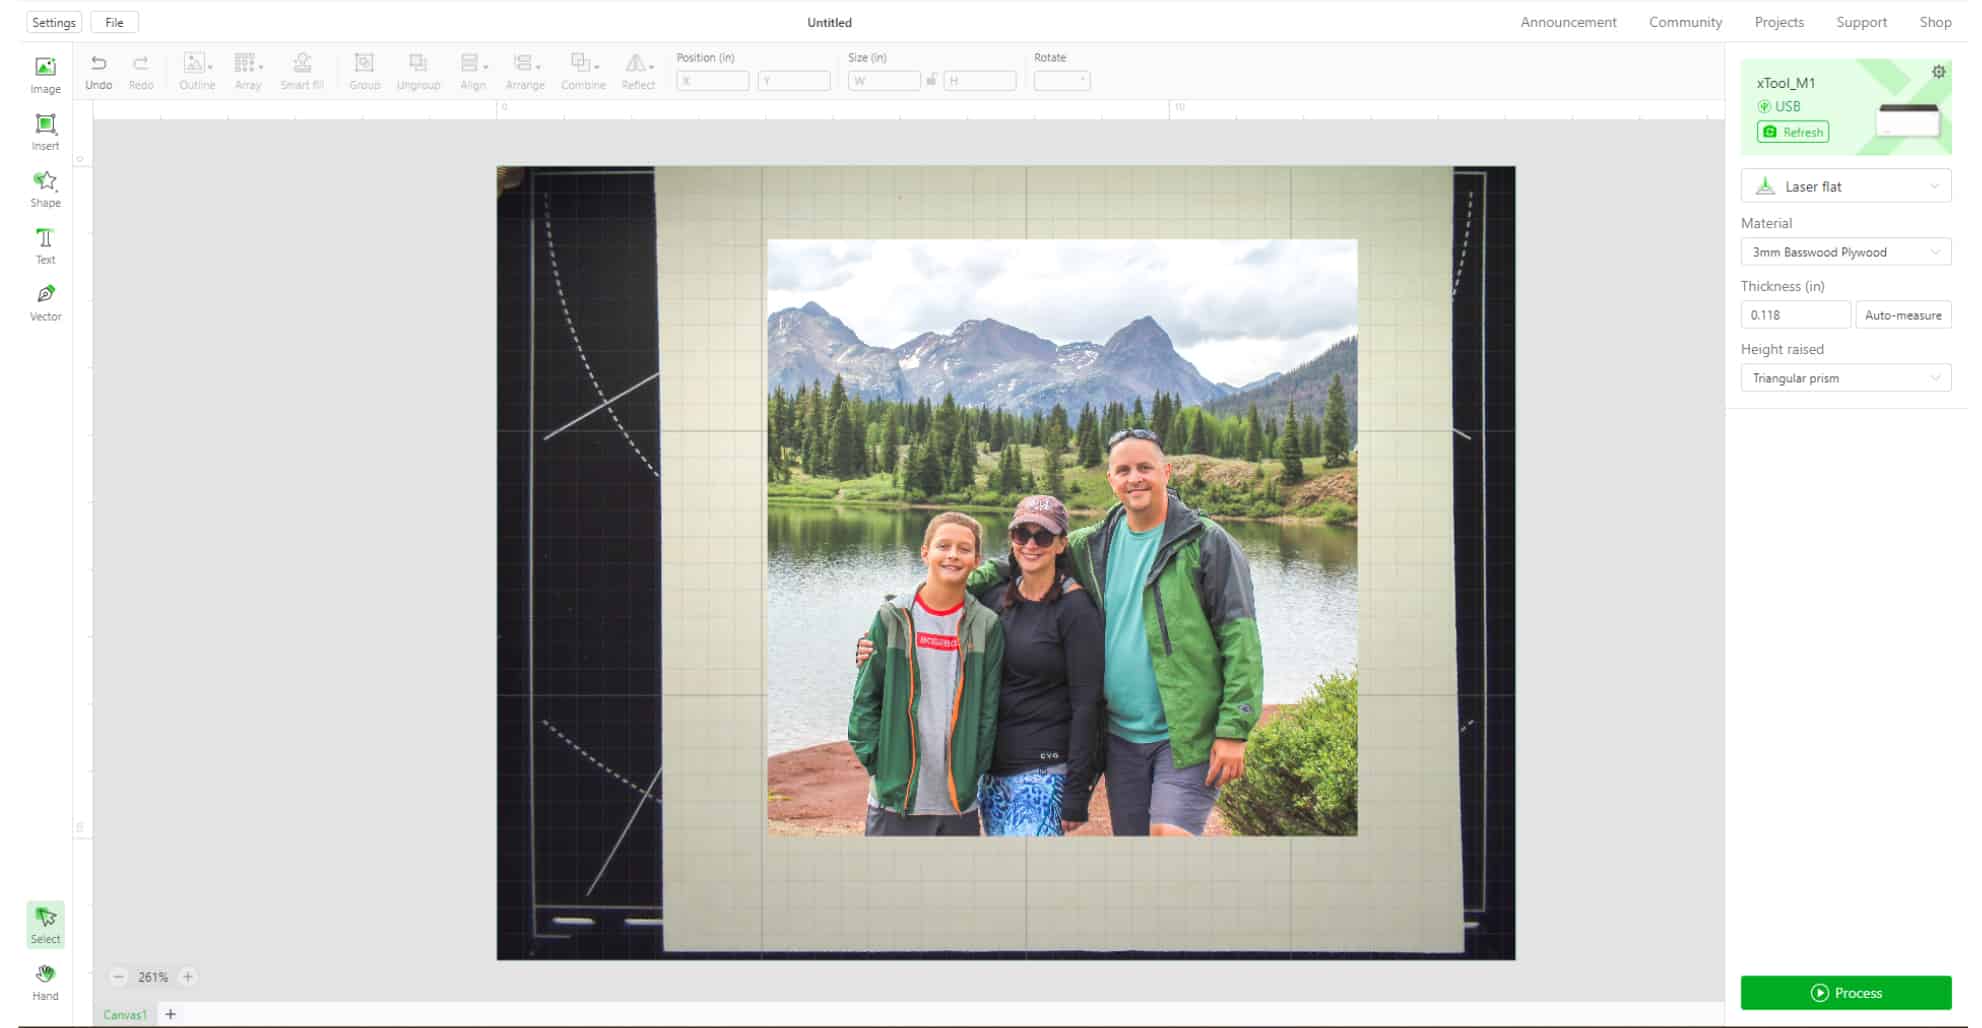
I chose to use 3mm basswood because I like the light color and I felt it would work best for showing the image. Add your basswood on top of the prisms. Be sure the laser is centered on the piece of wood. Close the lid to your machine which will transfer a real time image to your Creative Space Canvas.
Upload your image into the program. Size the image to fit on the piece of wood you are using. On the right hand side, you can see that I am set to laser flat. Choose your material – in this case, the 3mm basswood. Be sure to change your height to triangle prism.

Once you have the image sized to your preference, click process in the lower right hand corner.
Click start to send the data to the machine. Once the light on the front of the machine begins to blink, press the button to begin the transfer.
This took about 35 minutes to transfer.

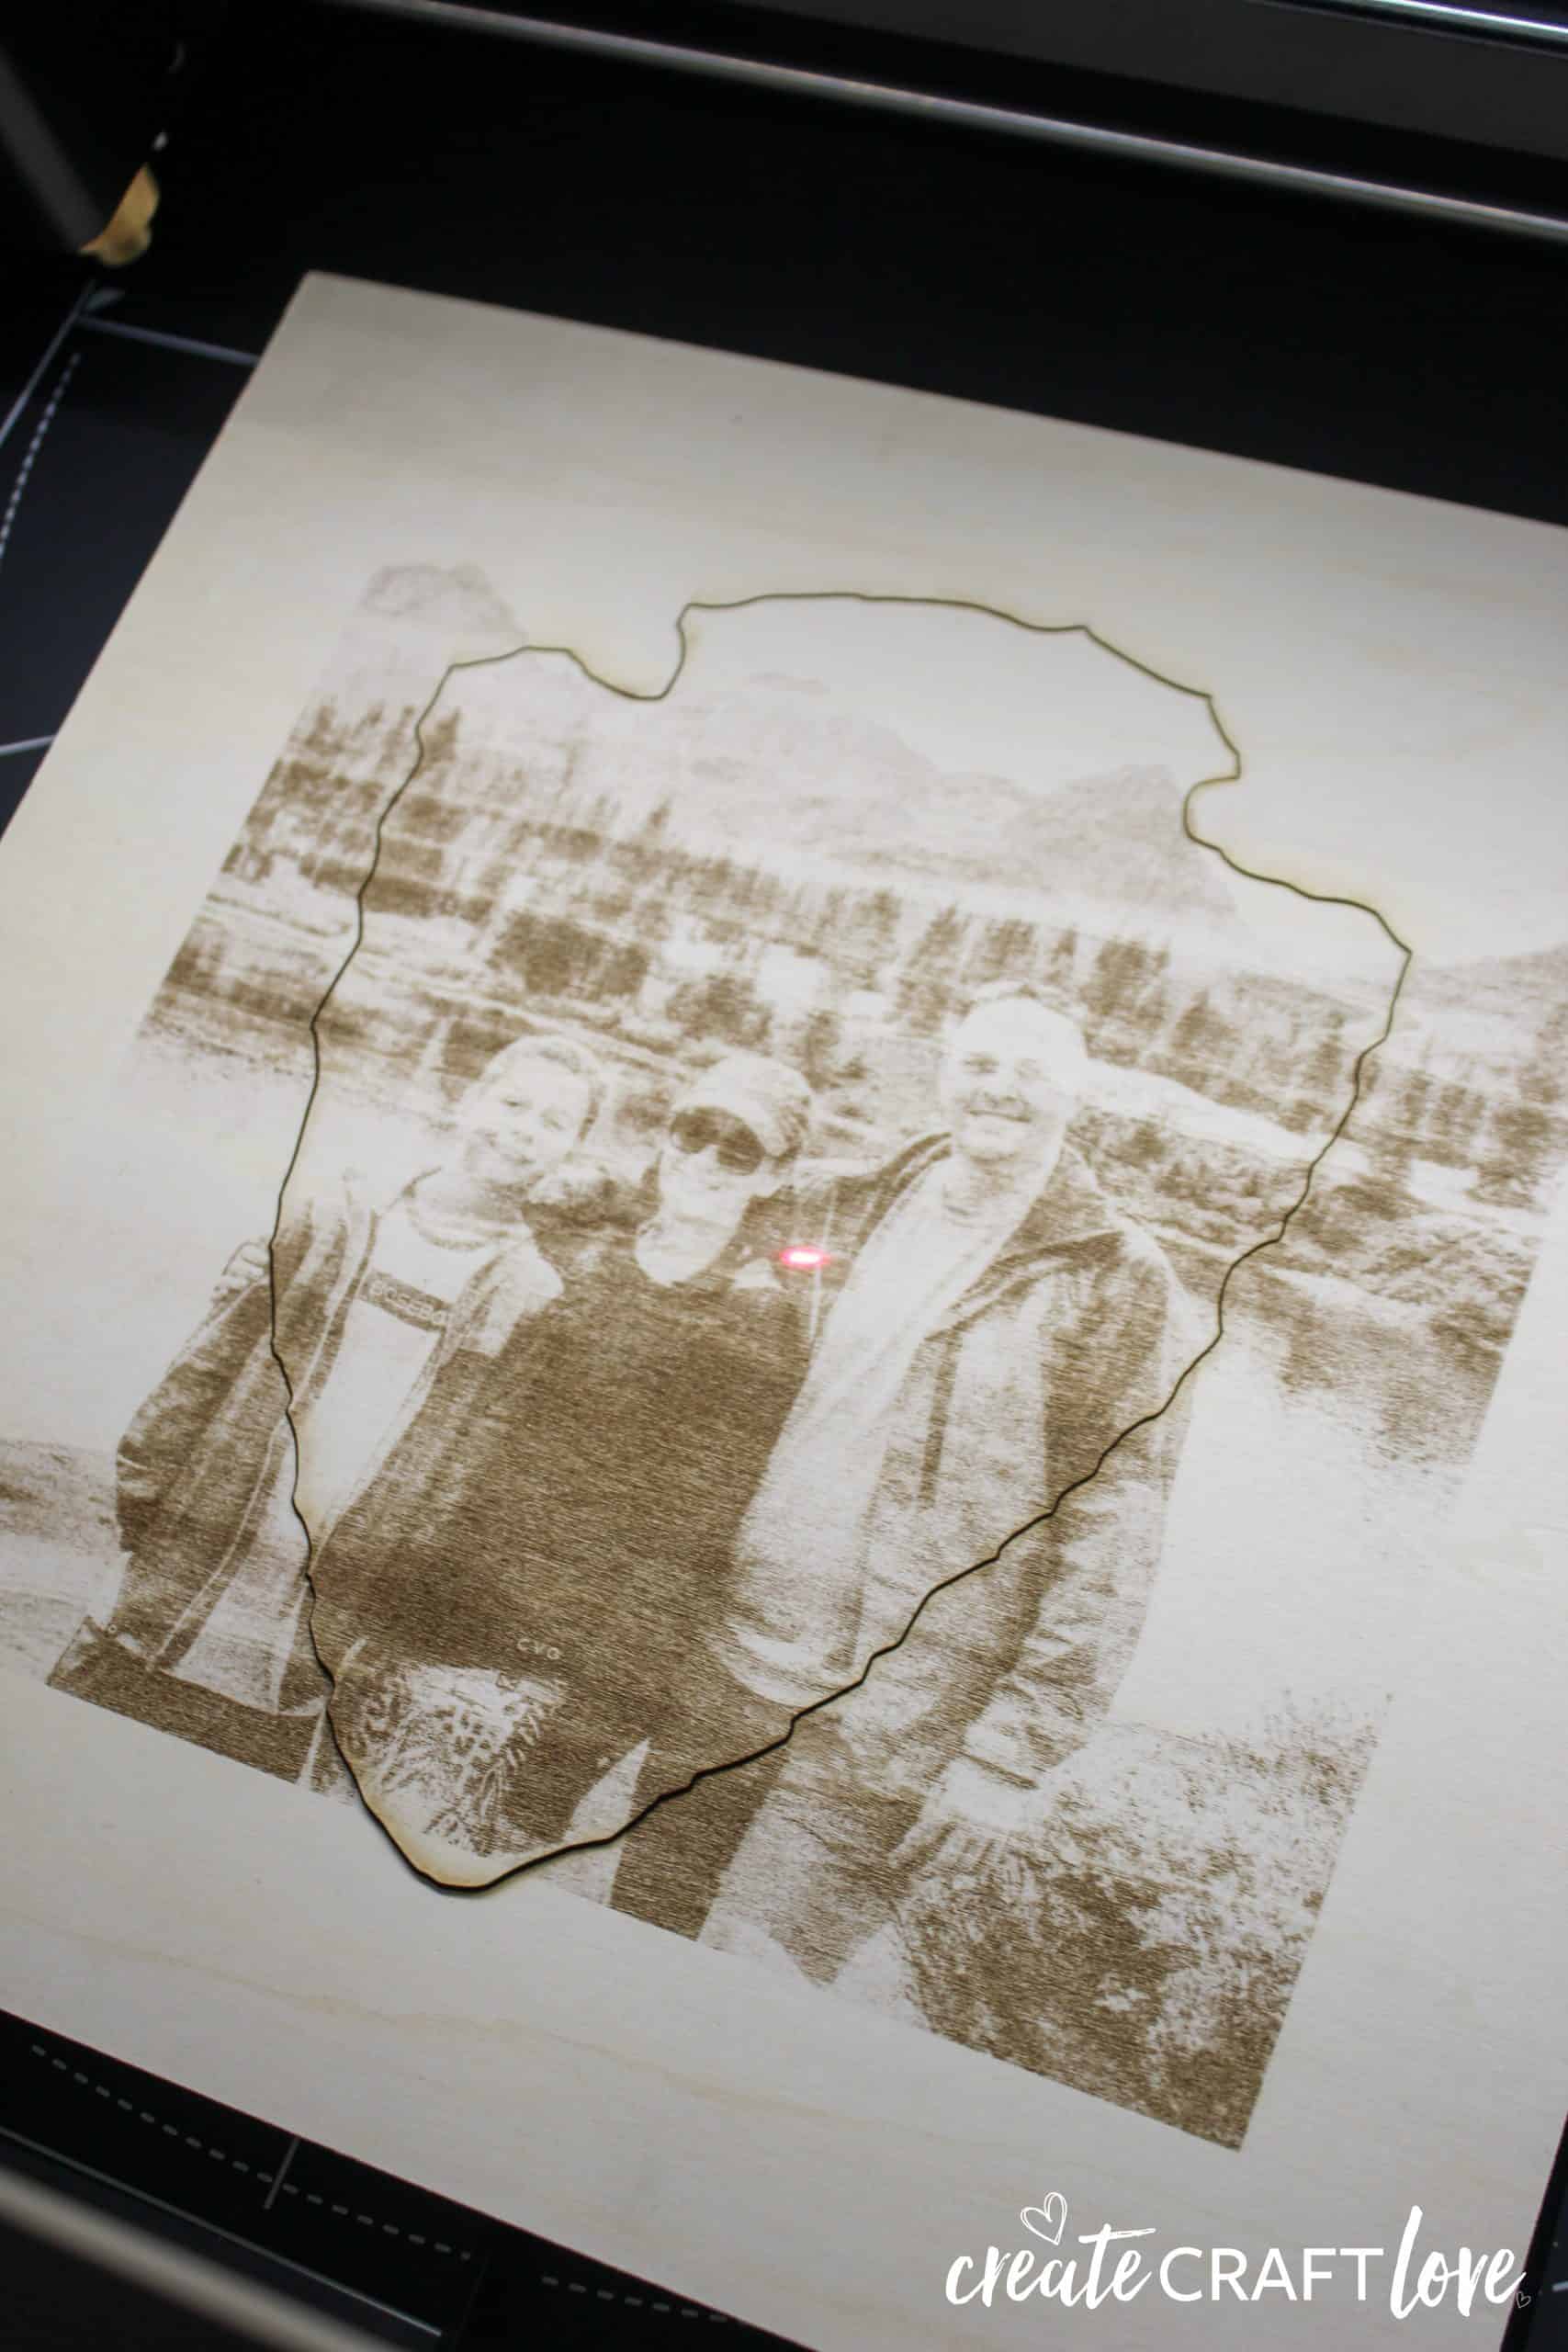
I did not move the wood after transferring the image to wood. Since Kyle wanted it cut out as the NPS arrowhead, I closed the lid and refreshed the real time camera image.

Next I uploaded the arrowhead image to cut. Click the image button in the upper right hand corner and choose the file you want to use. I sized the arrowhead to the transferred image.

Click the image and then choose cut. After you double check your settings, click process in the lower right hand corner. Then click start to send the image to cut to your xTool M1. Push the blinking button to begin the cut.

I finished it off by adding a piece of twine to hang in on our National Park accent wall! He loves how it turned out! I love that this machine is capable can transfer images to wood! I’m thinking ornaments…

Learn more about the xTool M1! Check out our review!

The post How to Transfer Images to Wood with xTool M1 appeared first on Create Craft Love.