Miniature Book Necklace | Personalized Necklace
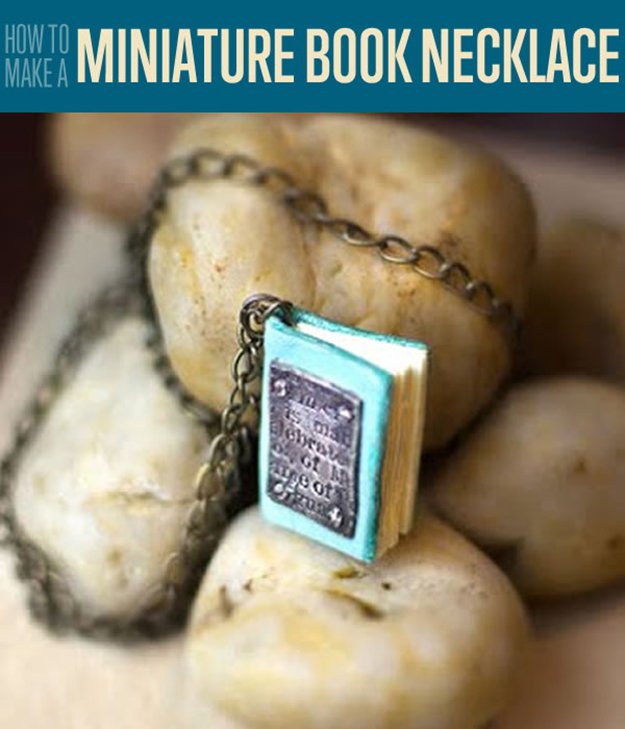
Tiny and charming, this DIY project: miniature book necklace is a stylishly hip piece of wearable art. Bind up your favorite lyrics, memories, love notes, book quotes, or anything you’d like in this sweet little tome.
You’ll need to have a basic Precious Metal Clay setup to do the metal parts of this project. If you don’t want to bother with the metal accents on the book, you can still use this tutorial to create a soft, elegant leather book necklace.
For all PMC-related supplies, I outfitted at www.riogrande.com, www.metalclaysupply.com, and www.Amazon.com.
Supplies:
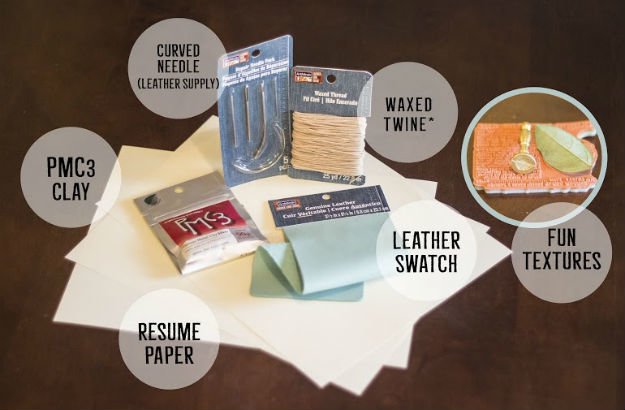
- PMC Clay (I’d recommend PMC3 for this project)
- A supple leather swatch (Michael’s)
- Curved Leather Needle (Michael’s)
- Waxed Thread (this is for crafters who don’t have a sewing machine – if you do have one, skip the waxed thread)
- Interesting texture stamps. As you can see in the picture, I gathered a rubber stamp, wax seal, a fall leaf, etc. You can use jewelry, brooches, items from around the house – anything that will give you a great texture when you press it into the clay!
- Necklace Chain (I just pulled apart an old Goodwill necklace chain for this project!)
- Jump Ring (Michaels or a Bead Store)
- Diamond Glaze (Not Pictured) You can find it on Amazon.com
PMC Tool Essentials:

- Butane Torch
- Butane Refill
- Black Max (for oxidizing the silver and giving it that wonderful “aged” look)
- Polishing Cloth
- Brass Burnishing Brush
- Firing Brick
- Sculpting Tools (optional). You could probably get away with using a toothpick and a kitchen knife for this project, but I thought I’d show you what a little set of sculpting tools can look like (the ones in the black roll out). They aren’t that expensive, and I’ve never regretted getting mine. If you search “wax carvers” on Amazon.com, you can get that whole stainless steel set for $8.99!
- Thin metal files (you only need one, but they generally come in a nice set like this)
Other Items from Around the House + Craft Room:
- Scissors
- Paper Towels
- Baking Soda
- Small Container
- Wax Paper
- Scrap Paper
- Little Paintbrush
- Tweezers
Step 1

From a piece of scrap paper, cut out a little rectangle that is about the size of the book you want to make. I cut out a few pieces, held them up to my neck, trimmed them and such, and ended up with this one. This little rectangle is going to be the size that I cut my metal cover accent to be. The paper is just slightly smaller on all sides than I want the finished book to be, so this will make a great cutting template for my metal accent piece in Step 2.
Step 2
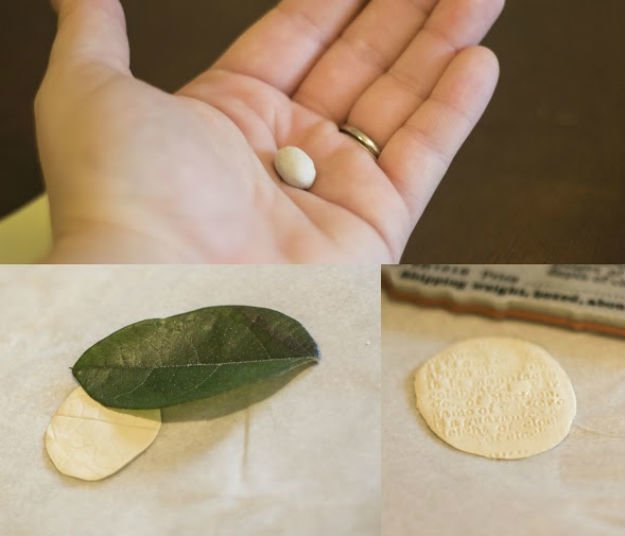
Take a black-bean-size amount of PMC3 from the bag (make sure to tightly wrap up the extra – it dries out fast!) and flatten it onto a piece of parchment/baking paper. You can fold the parchment paper over the top of the ball and squish downward, sandwiching it – that will prevent fingerprints in the malleable clay.
Once you’ve got a nice, thin, flat circle of clay, press something interesting into the top of it. I used a rubber stamp from Michael’s that had some tiny words on it, and a leaf from the backyard on the first day of Fall. You can make one textured rectangular plate, or two. I chose two so that I could cover both the front and the back of this DIY project.
Step 3
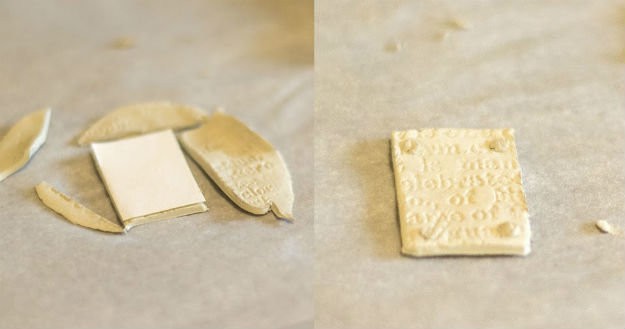
Once you have an interesting texture, place your tiny scrap paper rectangle on the textured clay, and trim around the edges using a sharp blade. You can then accent the corners with tiny balls of clay, if you wish. I took little clay balls the size of poppy seed and pressed them into corners with a thin metal pick (you could use a toothpick if you had one on hand).
Lay your metal clay pieces aside to air dry completely. I love to use a candle warmer to speed up the drying process. You’ll want to make sure your pieces are bone dry (usually about 24 hours for pieces this small, if you don’t have a candle warmer). If they aren’t dry when you start to fire them, they can warp, crack, or even explode with a startling little “pop”.
Step 4
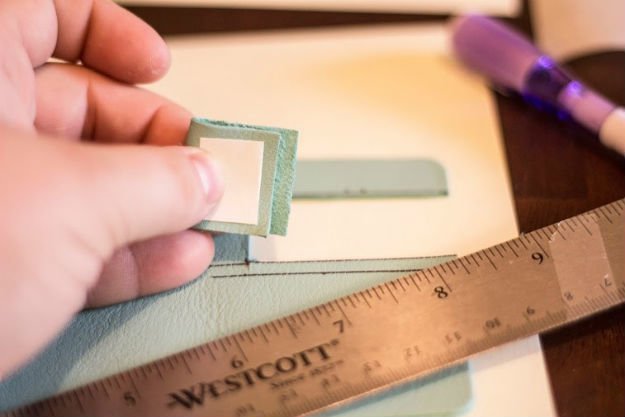
Using a ruler to measure straight edges, cut out the book cover from your leather swatch. You can see how I have left not only a small line of blue around my paper template, but also about ¼ inch of extra leather on one side. That extra length of leather is important later, because when we insert the inner pages, we’ll need that extra length to accommodate them.
Step 5
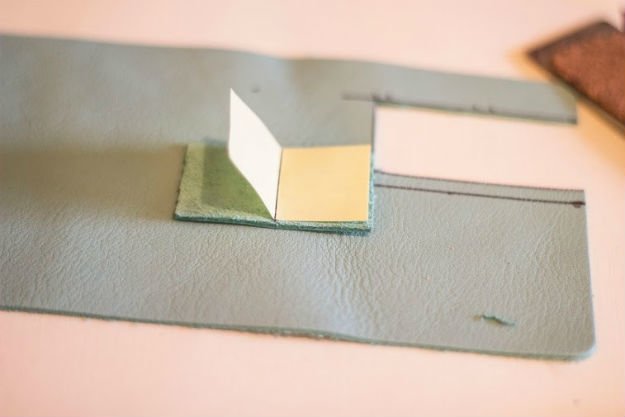
Using more scrap paper, make a template for your inner pages.
Step 6

I decided to go with 20 pages for my book (10 page inserts folded once in half), so I used my template to cut out 10 rectangles from my resume paper supply. You can do this whole project with 1 page of resume paper (or regular computer paper, for that matter – but resume paper does have that lovely ivory color and fibrous texture which I love)
You can see on the left side of the photo for Step 6, that I folded all of the little rectangle sheets in half and slipped them inside one another in sets of 2. Then on the right side of the photo, you can see that you’ll want to stack all of those little pairs on top of each other to create the book pages.
NOTE:
If you want anything written on your pages, now is the time to do it. When the book is complete, you’ll be able to gently open the cover, but you won’t be able to flatten it out for writing. So write your love notes or quotes or hopes and dreams in their now!
Step 7

Using your sewing machine, manually sew along the back of the book pages. You can see that I sewed my binding seam in from the edge a bit, but in hindsight, I wish that I hadn’t. Get as close to that back edge as you can, while still catching all of the pages with the thread.
If you don’t have a sewing machine, you can use the wax thread from the supply list to bind the book. Punch holes in the page stack with a heavy-duty leather needle, and weave the wax thread through the pages, tying it at each end.
Step 8

Using a generous (but not goopy) amount of Diamond Glaze, we are going to seal and attach the pages of the book to the leather cover. Diamond Glaze secures and seals and I am completely in love with it for tons of different projects this month! First, apply some glaze over your sewn seam. Let it really get in those little holes to prevent page tearing. Then, apply a liberal amount to the outside of the page stack and the inside of the book cover. Line them up, attach them together, and press firmly (looking for any ooze spots where the glaze might sneak out). On the bottom-right picture, you can see that I found it helpful to wedge a little metal handle under the inner pages, to keep them from adhering to anything while the glaze dried. Diamond Glaze dries super fast, and within about 15 minutes, I could continue on with the piece.
Step 9
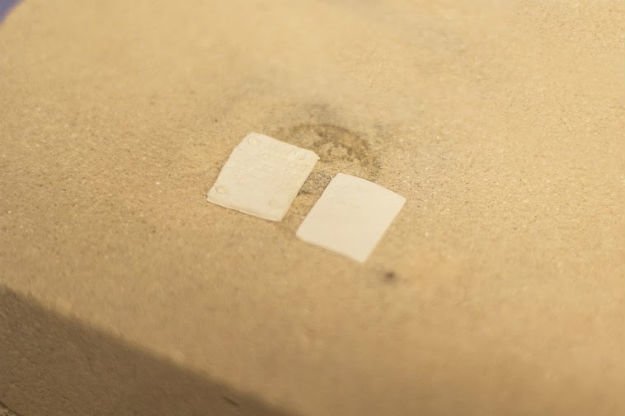
Once your metal clay pieces are dry, it’s time to fire them! If you want a visual demonstration of torch-firing PMC, YouTube is a great resource. I’ll give you a bulleted breakdown here if you just need the basic steps:
- Place your bone-dry PMC pieces onto your firing brick. Make sure your brick is on a non-flammable surface.
- Turn on your butane torch and start sweeping the end of the flame around your PMC piece in a continuous motion. Don’t hold the flame on any one part for too long. Hold the flame at an angle (don’t aim straight down).
- Your piece will burst into flames and then extinguish on its own in a few seconds – that’s good! That’s where the sintering really begins to happen. The bonding elements between the silver particles are burning away, and fusing the metal. Firing metal clay will always result in some shrinkage – that’s completely normal.
- Keep working the flame around your piece until it starts to glow a lovely peach color. Doing the torch firing in a dark room really helps you see the stages of the firing process. Once the peach glow appears, keep firing for a few minutes more (I like to do about 2-3 minutes more).
- Your pieces will still be white, but that’s actually just a layer of dust at this point. Don’t worry – there is fine silver underneath!
- Turn your torch off and let the pieces cool. Really cool. I have burned my fingers pretty good in the past thinking, “Eh, they’re probably cool by now”.
Step 10

This step is exciting and I absolutely love it! Using your brass burnishing brush, firmly brush across the surface of your pieces in one direction. You’ll see the dusty white layer disappear and beautiful, rich silver will emerge underneath.
Step 11
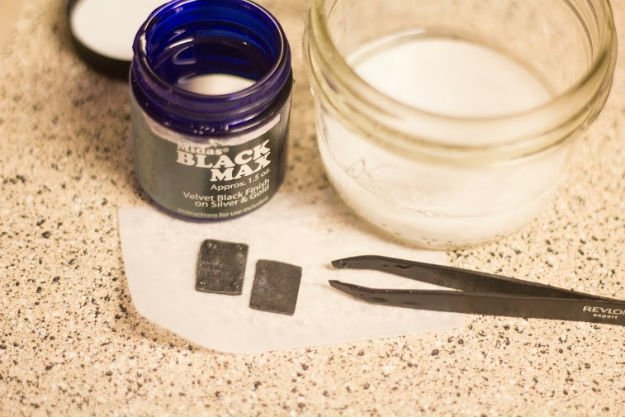
Well, that bright silver is lovely, but you may want something that has the elegant appearance of being “worn down” and vintage. So that’s where Black Max comes in. This stuff is incredible, and works instantly!
Being careful not to get any of the Black Max solution on your skin, drop your silver pieces into the jar. Bam, instant darkening! I left mine in for about 15 seconds, and that did the trick. Using a tweezers, take your silver pieces out of the Black Max jar and instantly drop them into a jar of Baking Soda + Water. The ratio isn’t as important as having a lovely, snowy bed of Baking Soda completely submerged in water. You want your pieces to disappear when you drop them into the jar. Nestle them into the Baking Soda at the bottom of the water and let them sit for a few minutes. That’s going to neutralize everything and make that lovely oxidation sink in.
Put your Black Max away, dump the Baking Soda mixture, and rinse off the silver pieces.
Step 12

Now use your polishing/buffing cloth to vigorously rub the oxidized silver pieces all over. The more you rub, the more of that silver shine will come out in the raised areas. See how the letters really pop once I rub away some of the surrounding darkness? The piece on the left is before buffing, and the piece on the right is after buffing. Big difference!
Step 13

Continuing my love affair with Diamond Glaze, we’re going to use it to attach the front and back silver plates to our book. Not only did I use it underneath the plate, but I also brushed it over the top and all around on the leather to protect it from the elements and make it just a tad more water-resistant. Don’t apply too much, though, or it will all start to look like plastic!
Step 14

Almost done! Once the Diamond Glaze is dry, it’s time to turn this little book into a pendant. Using the curved leather needle, punch a hole through the top-back-corner of the book. Slip in a jump ring, attach to the center of a long necklace chain, and…you’re done! Wear, enjoy, and treasure – you’ve put a lot of work into this fun craft project!