Perler Bead Bookmarks Are a Cute Kids Craft
Learn how to make perler bead bookmarks using simple supplies! Kids will love this easy project with beads, popsicle sticks, and glue.
Skills Required: None. Even if you’ve never crafted before, these are easy to make. You’ll be melting beads with an iron and gluing them to popsicle sticks.
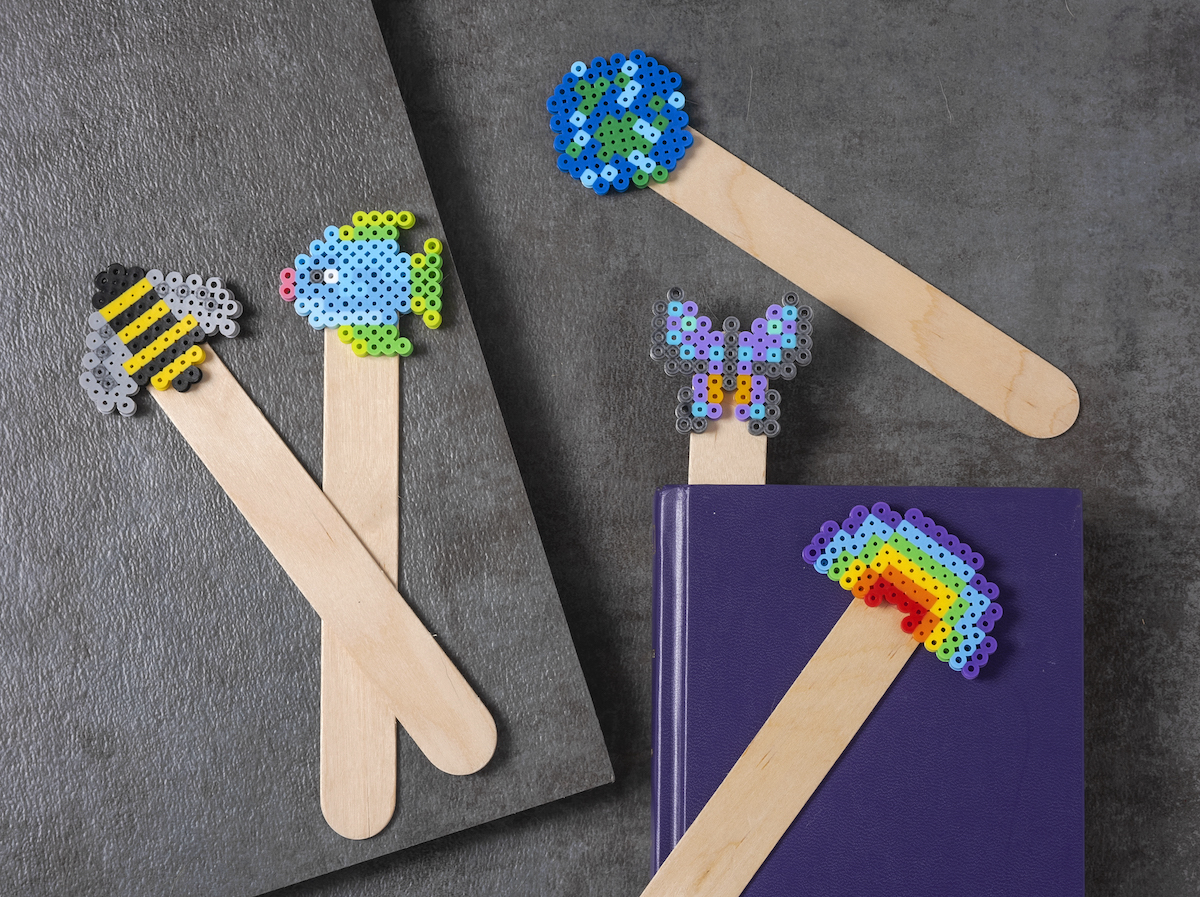
How many of you have kids that are big readers? I mean beyond being required for school of course. Reading is a hobby a lot of kids love to indulge in, and I definitely was one of those kids.
I remember a lot of the books I read as a child, but the ones that stand out to me are the Nancy Drew series (which we had my mom’s books from when they were a kid).
It took me a long time to read those because I felt that the “ancient” drawings of Nancy on the covers meant the books would be terrible. Finally I gave in, and once I read one? I read them all.
I also loved Roald Dahl. An author famous for Charlie and the Chocolate Factory, I loved all of his books. But my favorite was James and the Giant Peach. I read it so many times!
Some of those books from childhood never leave you.
And if you have a reader, they might have a bookmark collection. I know I did when I was a kid! I had a done of different bookmarks, some bought and some handmade.
I’m excited to share one of those handmade ideas with you today: perler bead bookmarks! They’re a super easy summer craft that kids are going to love. Not that you can’t make them any time of year.
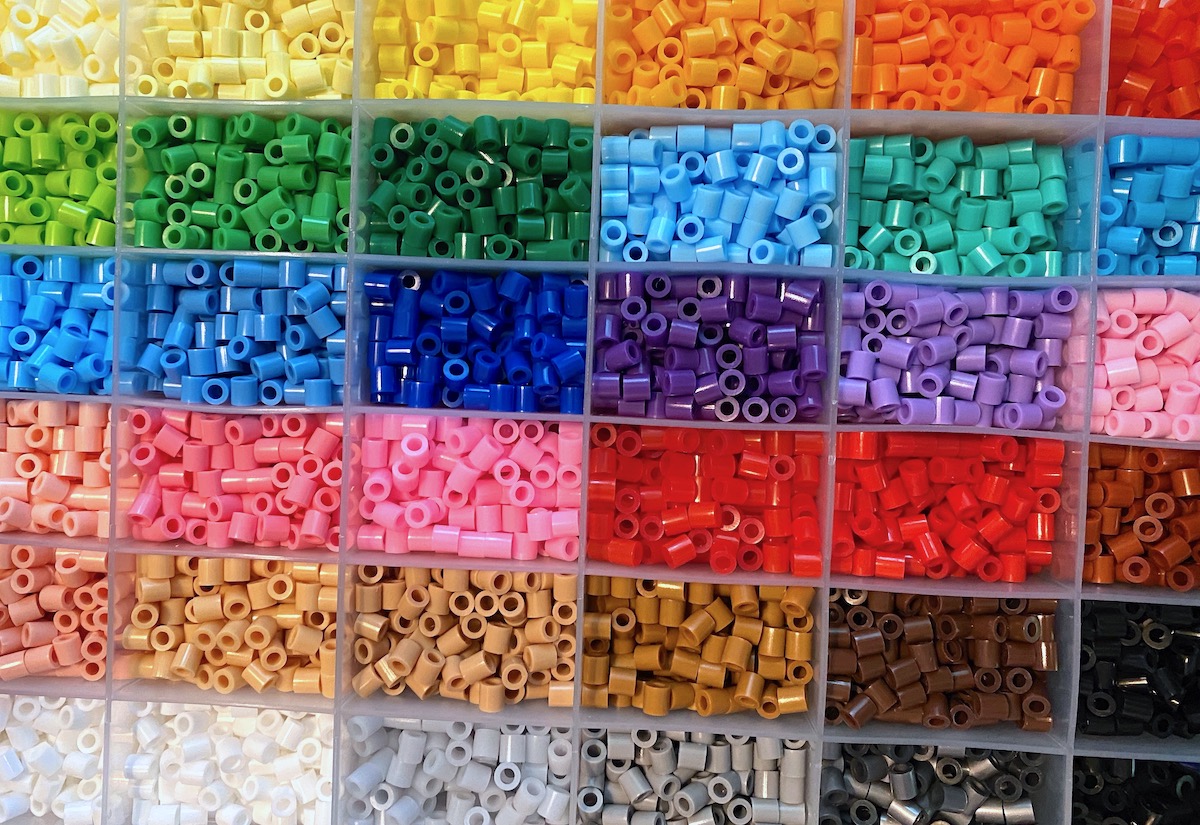
Perler beads are recommended for ages six and up, so this is a very fun craft to try with your elementary age kids. All children seem to love perler beads (also known as hama beads, fuse beads, or melty beads). But don’t be shy – adults love them too!
Tips for Using Perler Beads
Before we get into the patterns, I want to review a few basics of using fuse beads to make sure you get the best results. If you don’t want the tips, scroll down to the bottom to get the hama bead bookmark patterns.
Remember that the overall goal is to melt the beads together on both sides while still leaving the holes open. Here’s how you get the best results (with a rainbow as an example).
Use Ironing or Parchment Paper
Place ironing paper or parchment paper over the beads on the pegboard. Be gentle so you don’t disturb the beads underneath.
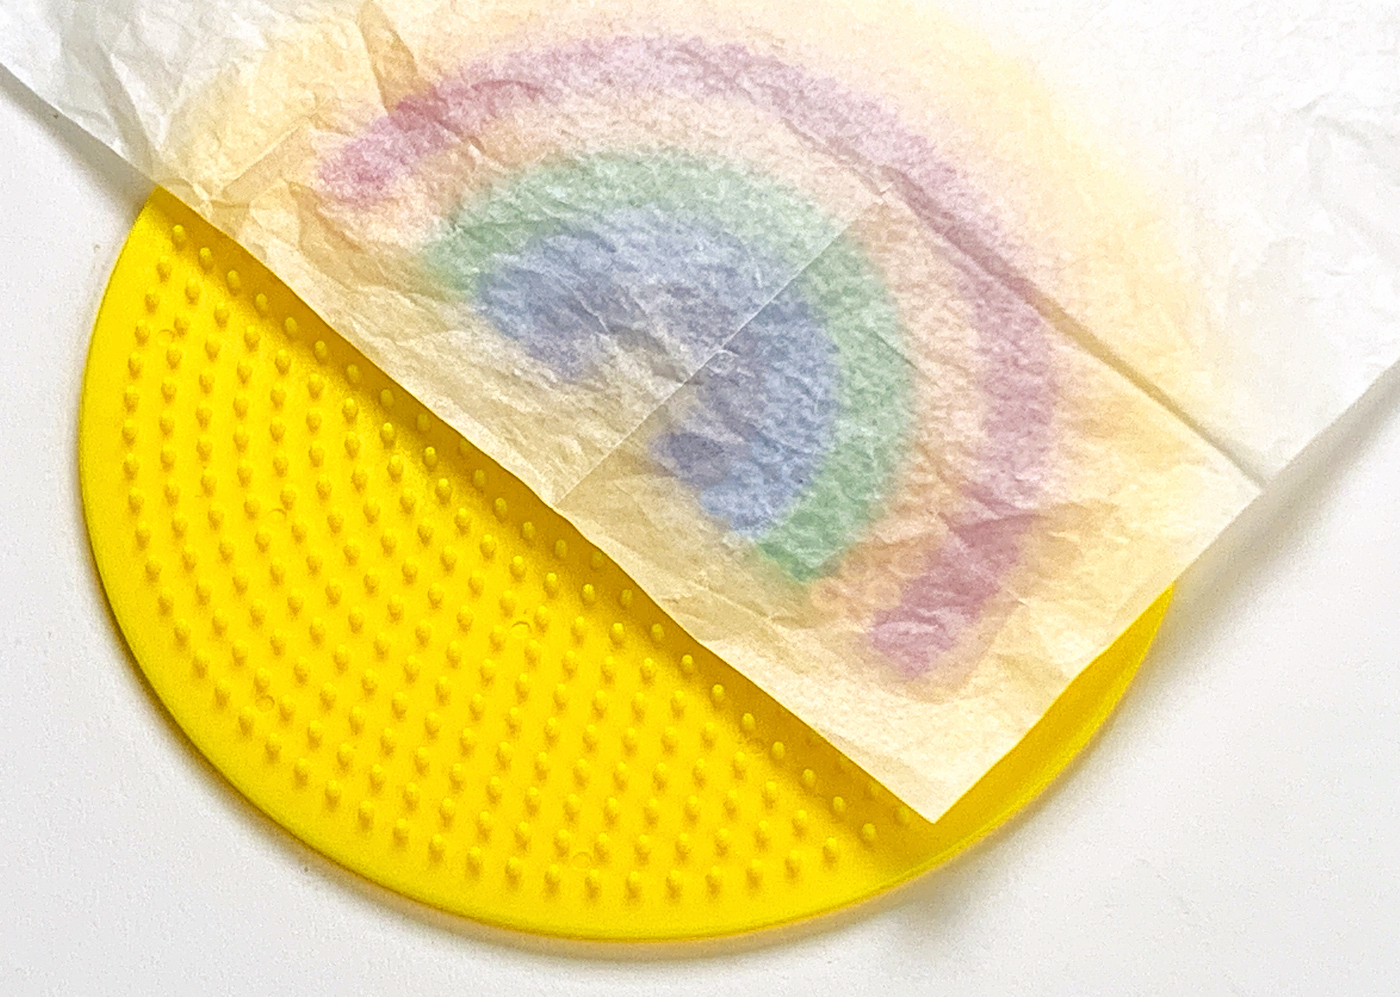
Heat your iron to the medium setting (no steam). In a circular motion, begin to iron the project. Don’t press down too hard with the iron. When ironed properly, the beads will still have an open center. Check and make sure your edges are melted. Let the design cool on the pegboard.
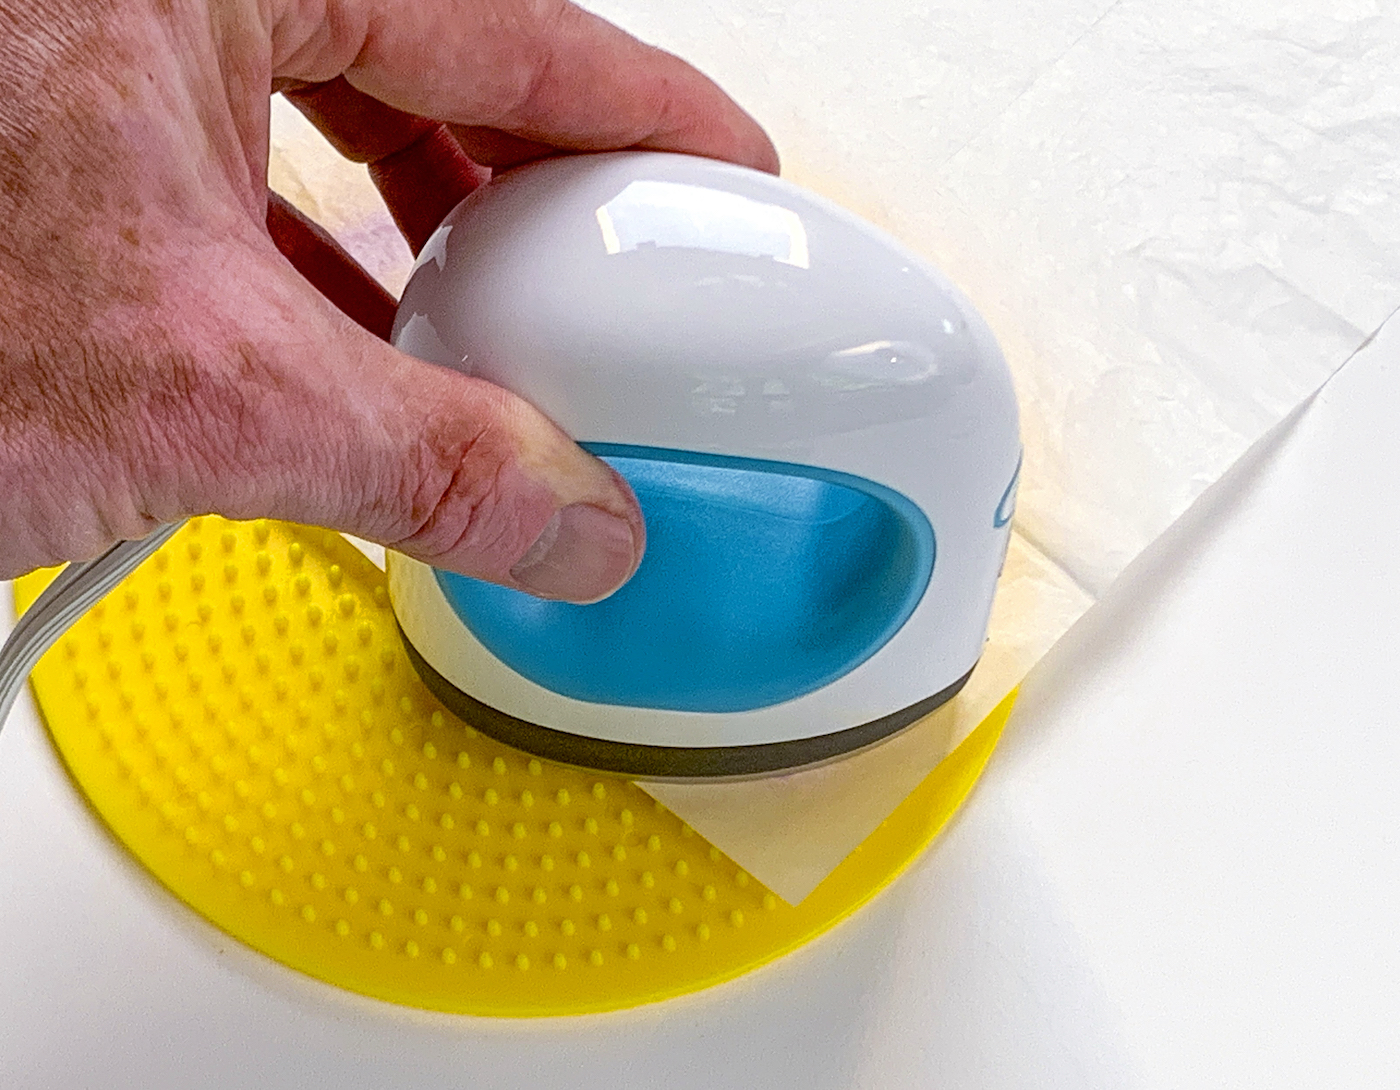
Note: BE CAREFUL about lifting up the paper while you’re ironing! If you want to check, carefully peel back paper around the edge of your design and see if all the beads are melted.
If you lift the paper up quickly and there are a lot of unmelted beads, they will easily fall off or go flying and you may be forced to start over. Sometimes the edges need more time so when you check, just check the edges and peel paper back slowly.
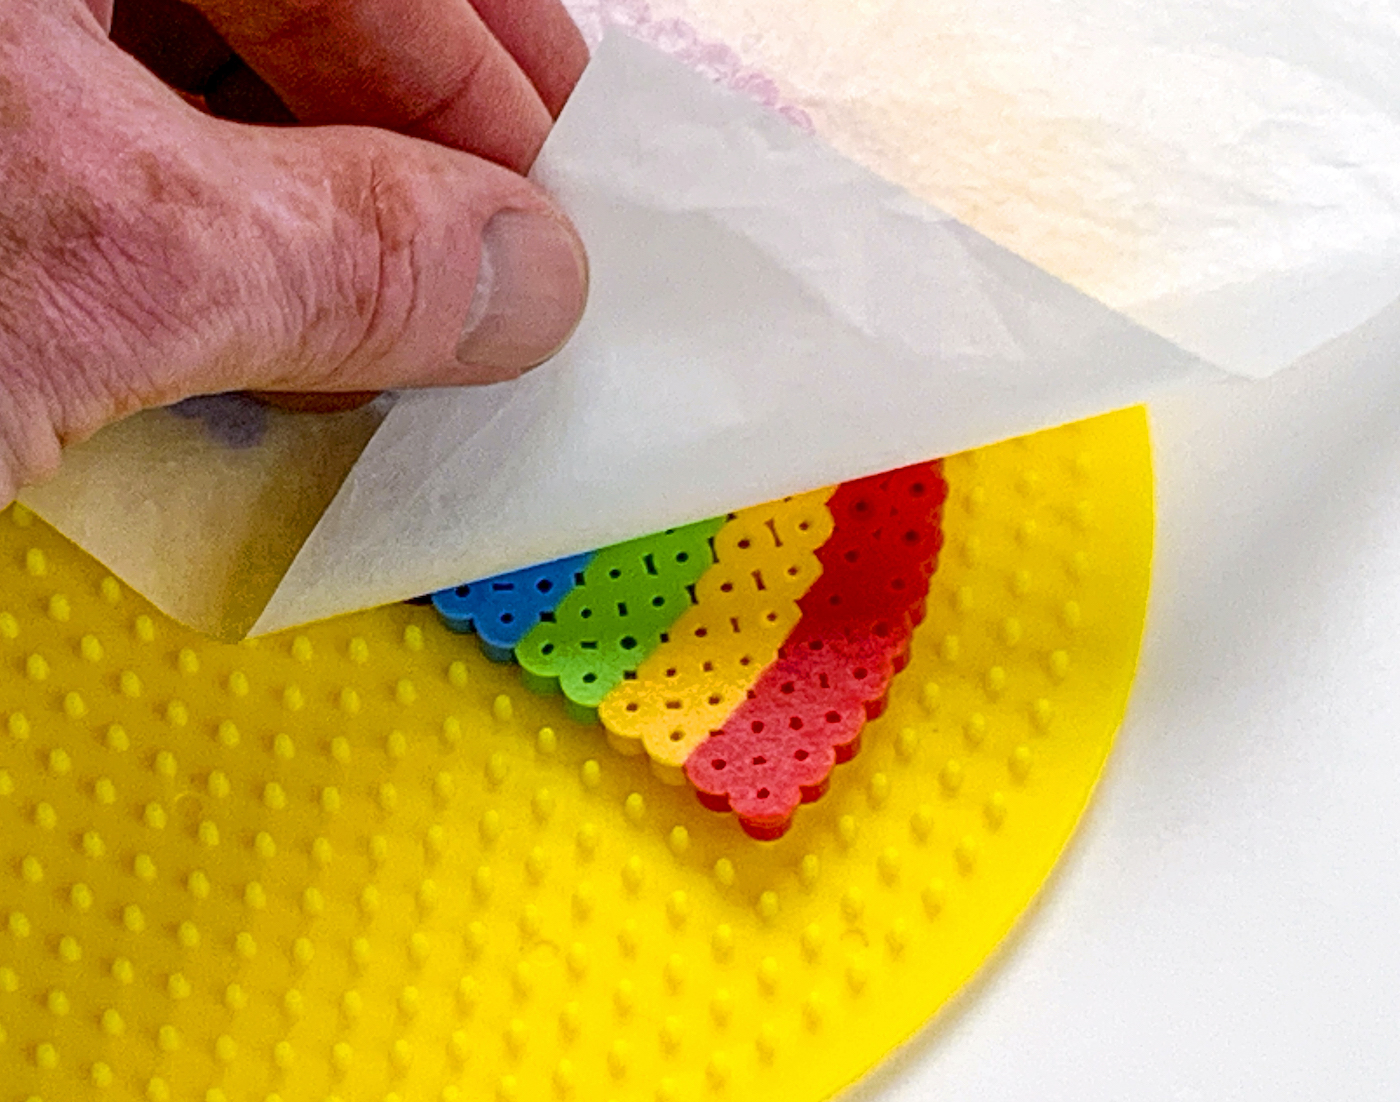
Another Note: some beads melt faster than others (clear melts faster than white, for example). So some holes might be larger than others. It’s okay! That’s part of the look of the project.
Iron the Other Side
Remove the bead design from the pegboard. Flip it over to the non-melted side and repeat the fusing process.
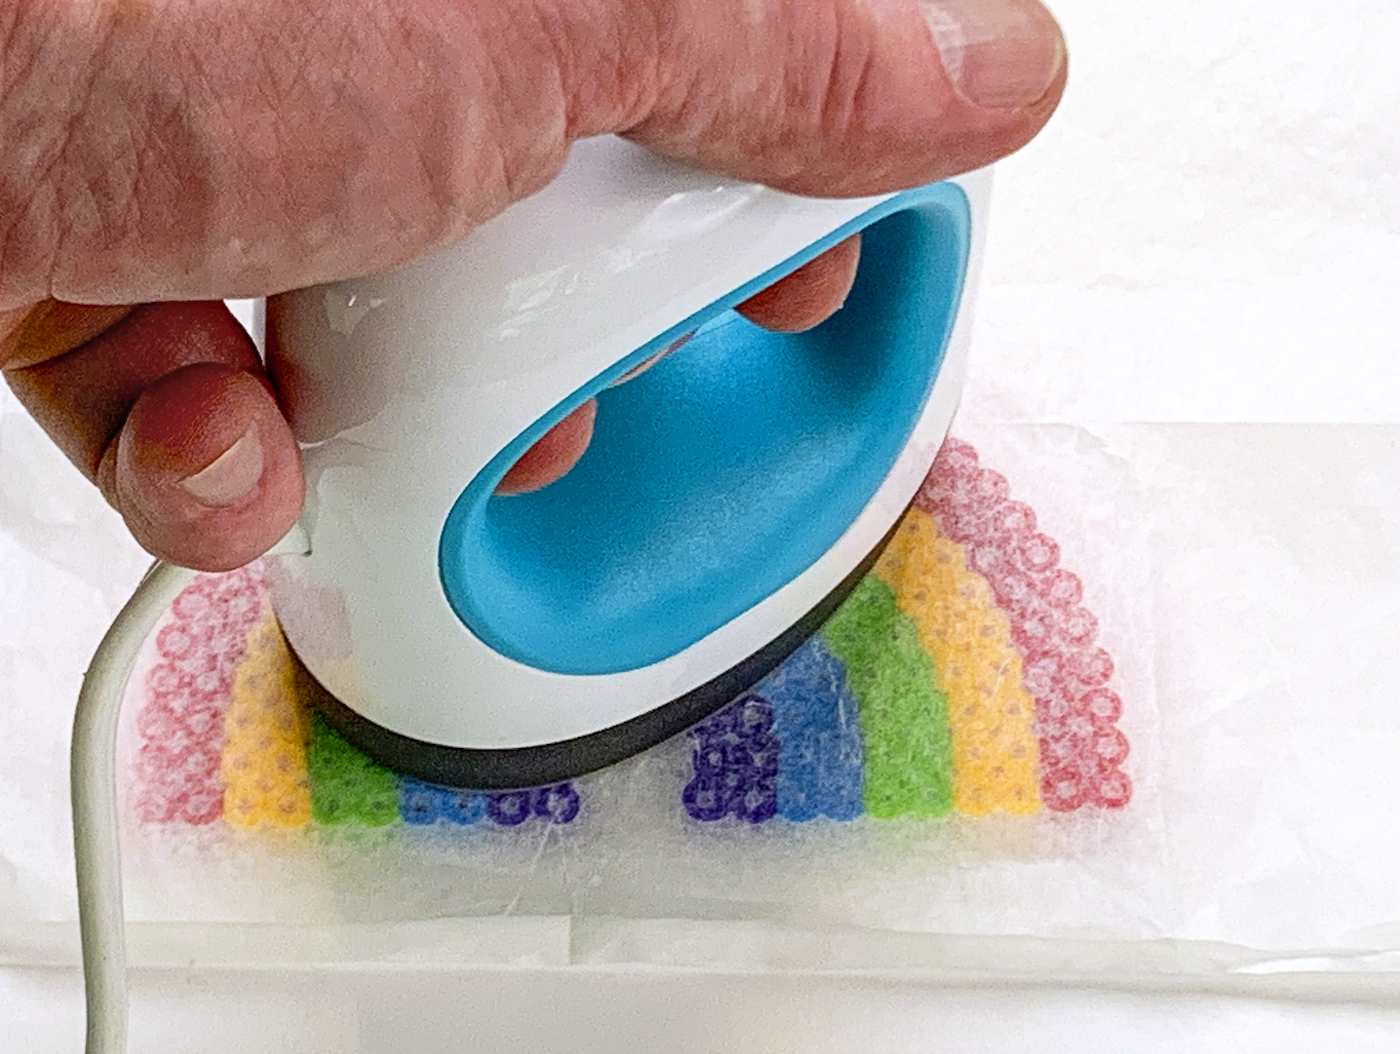
Remove the Paper
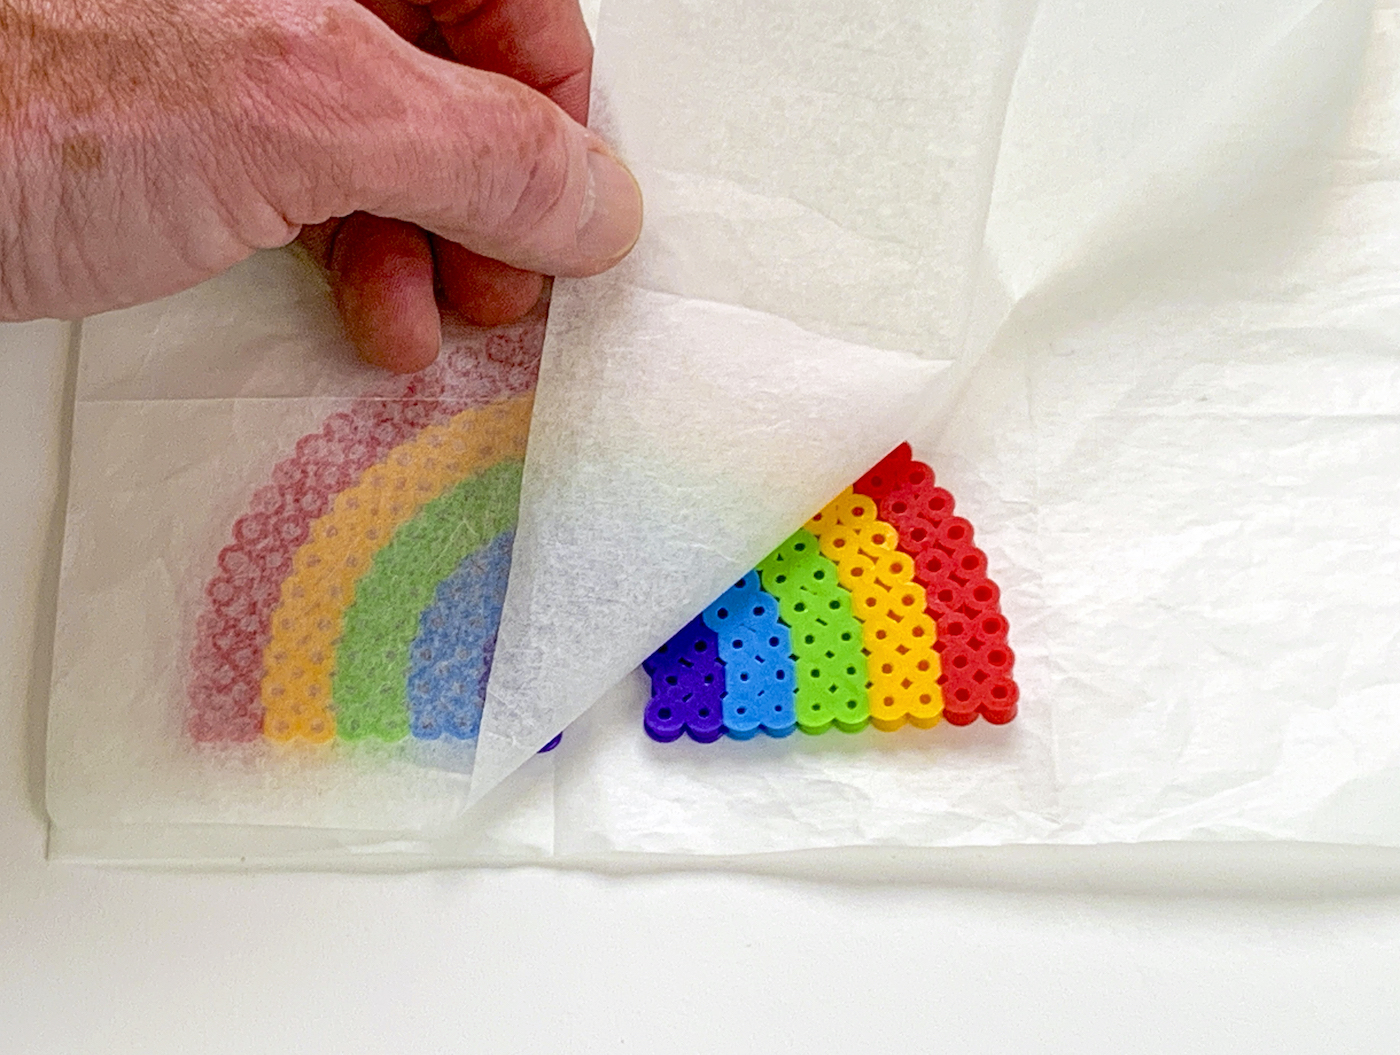
Let cool completely and remove the paper again (which is reusable). Some people pull the paper off after they iron the first side, but I just wait until the end and peel off both pieces. It’s up to you!
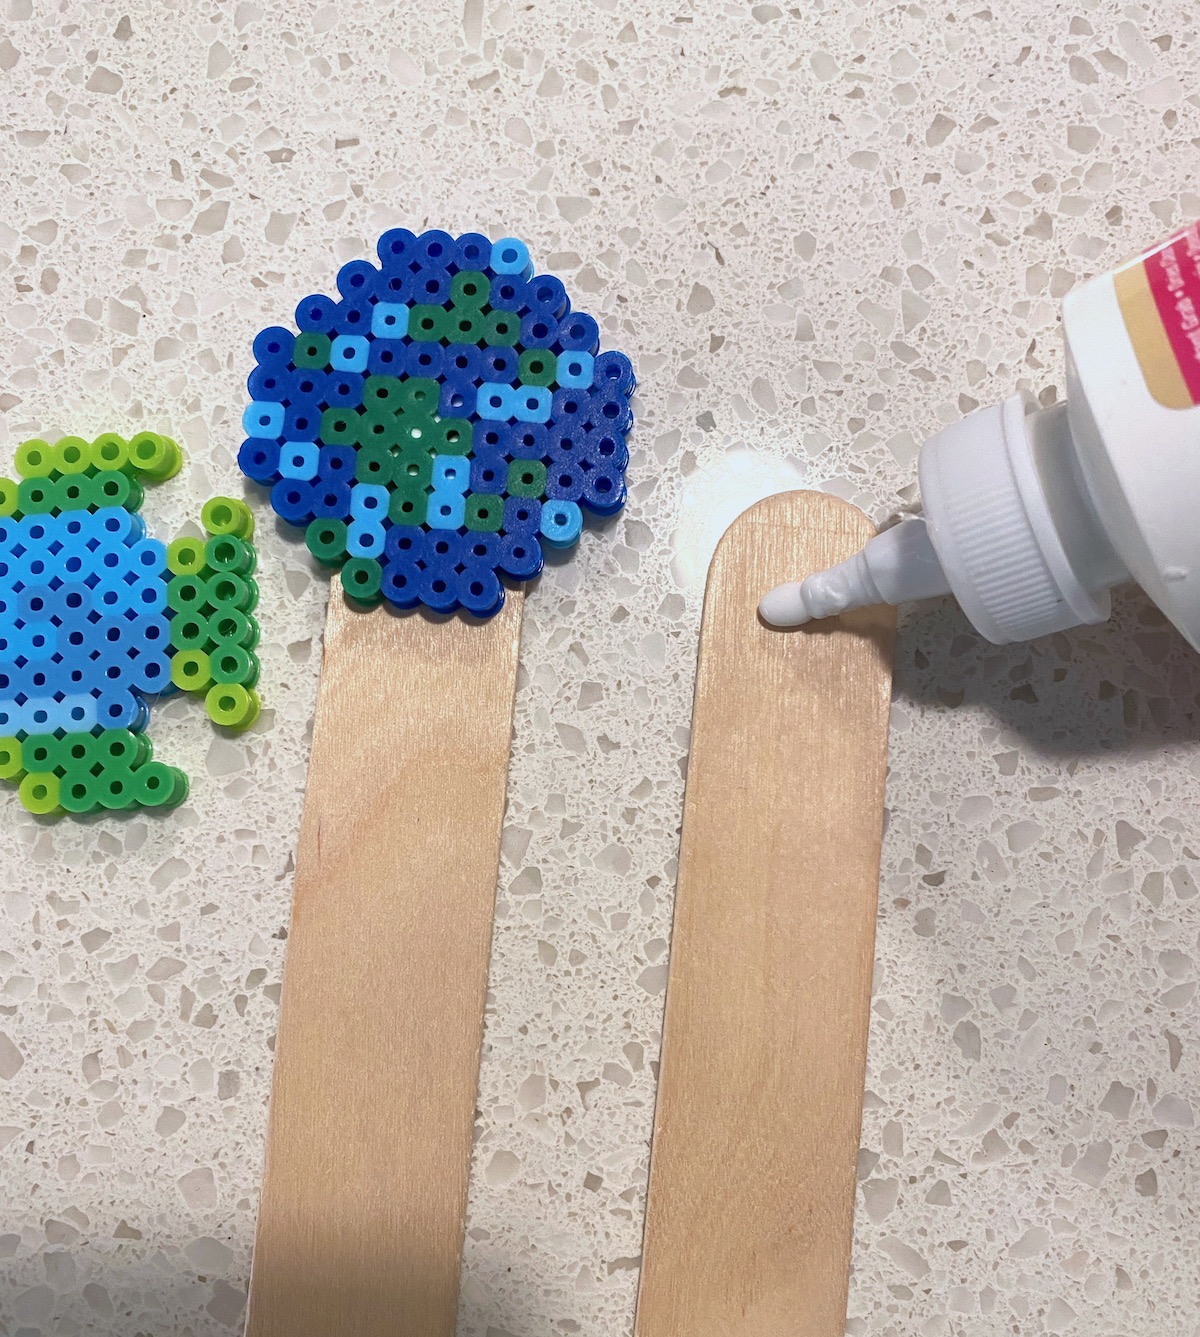
There’s only one additional step you’re going to need to do to make the hama bead bookmarks, and that involves craft glue! You’re going to attach your creation to the popsicle stick.
I used a dab of clear drying craft adhesive (Aleene’s works great) to attach the finished designs to the sticks. They dried completely in about an hour. You could probably hot glue them as well.
Now if you’re ready to make some perler bead bookmarks, here are the patterns! These patterns use anywhere between 50-ish to 150 beads per design.
There are about 25 patterns below, perfect for turning into bookmarks. Of course if you want to make your own designs, go for it! You can also customize these designs below with your own colors. Enjoy.
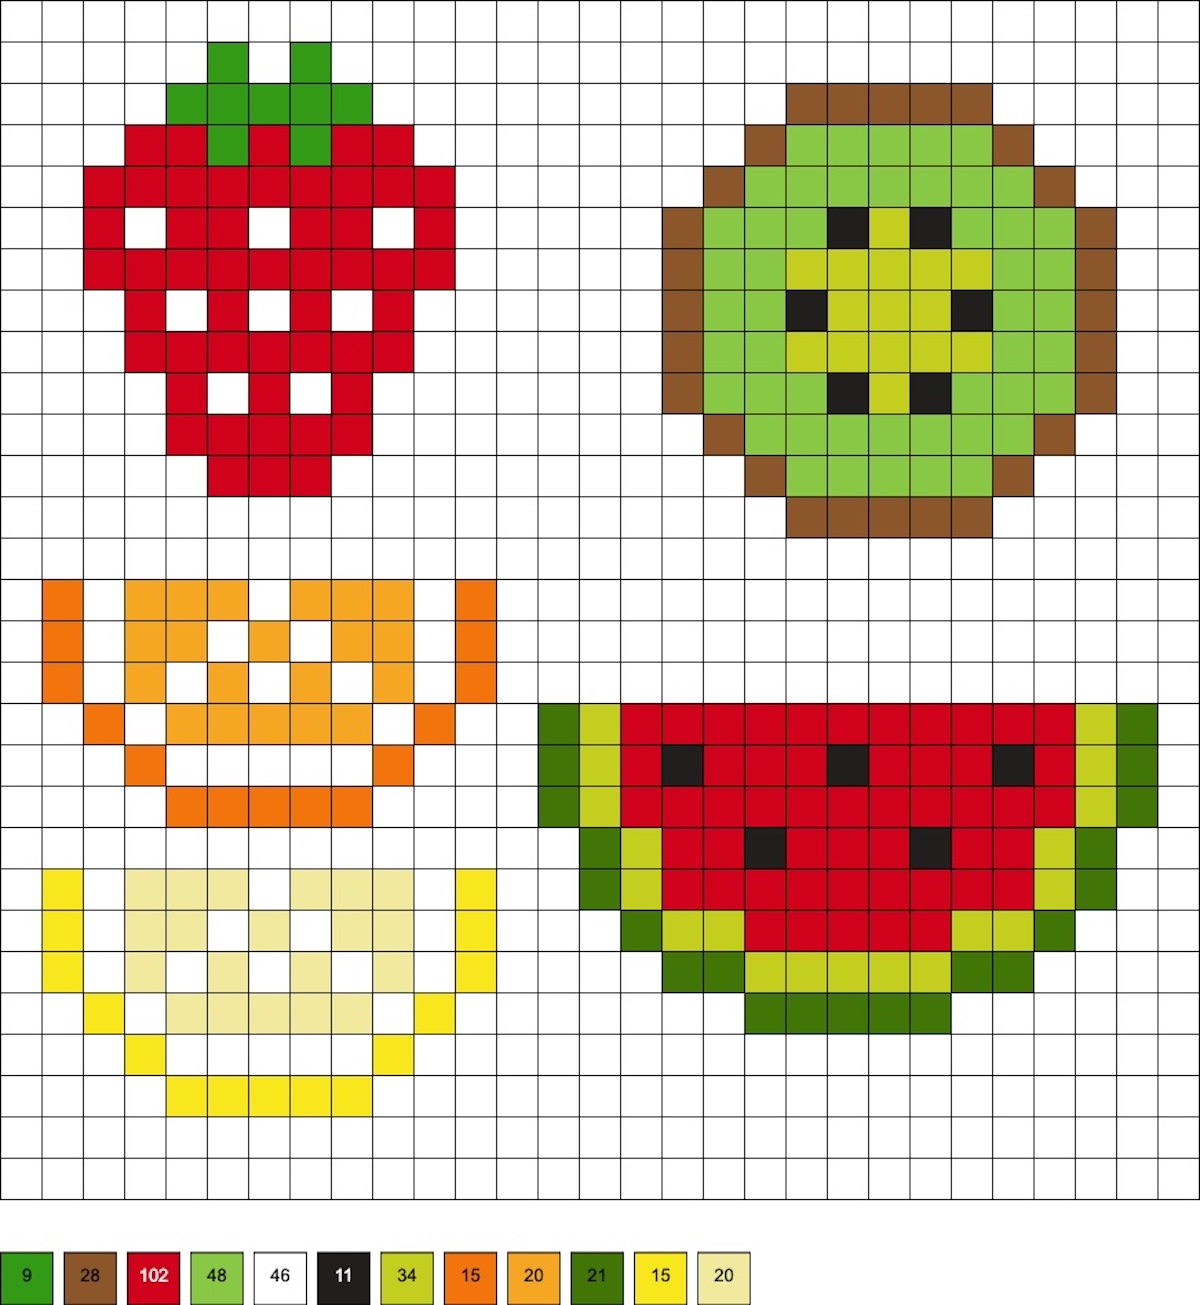
Mini Fruits – Strawberry, Kiwi, Lemon, Orange, and Watermelon
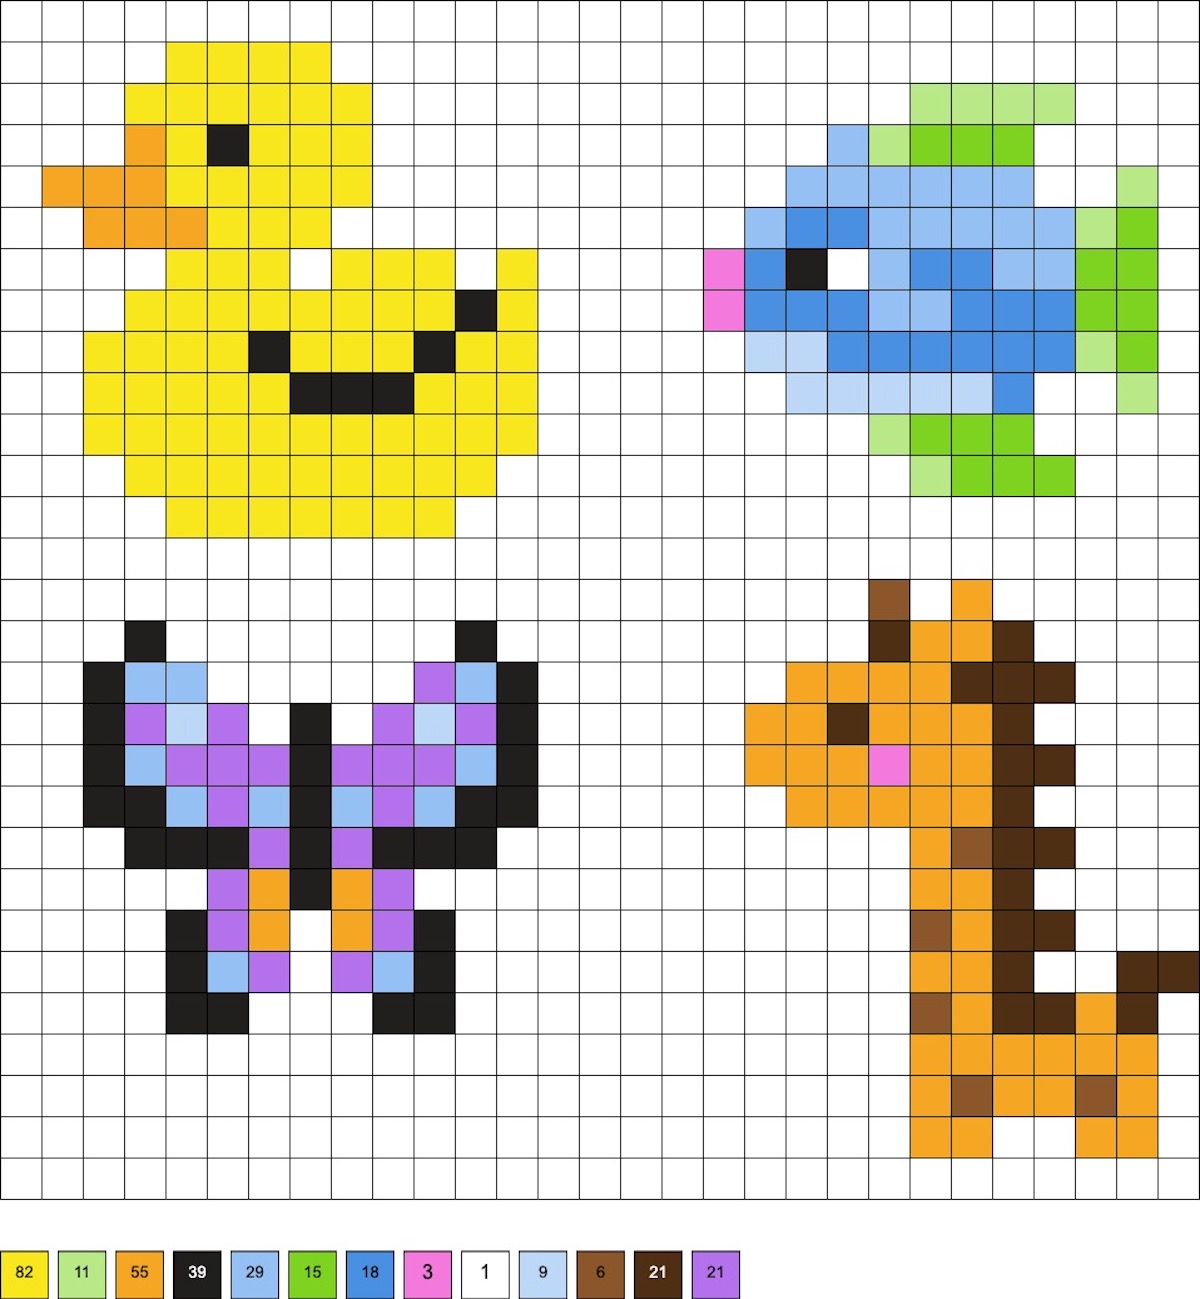
Duck, Blue and Green Fish, Blue and Purple Butterfly, Giraffe
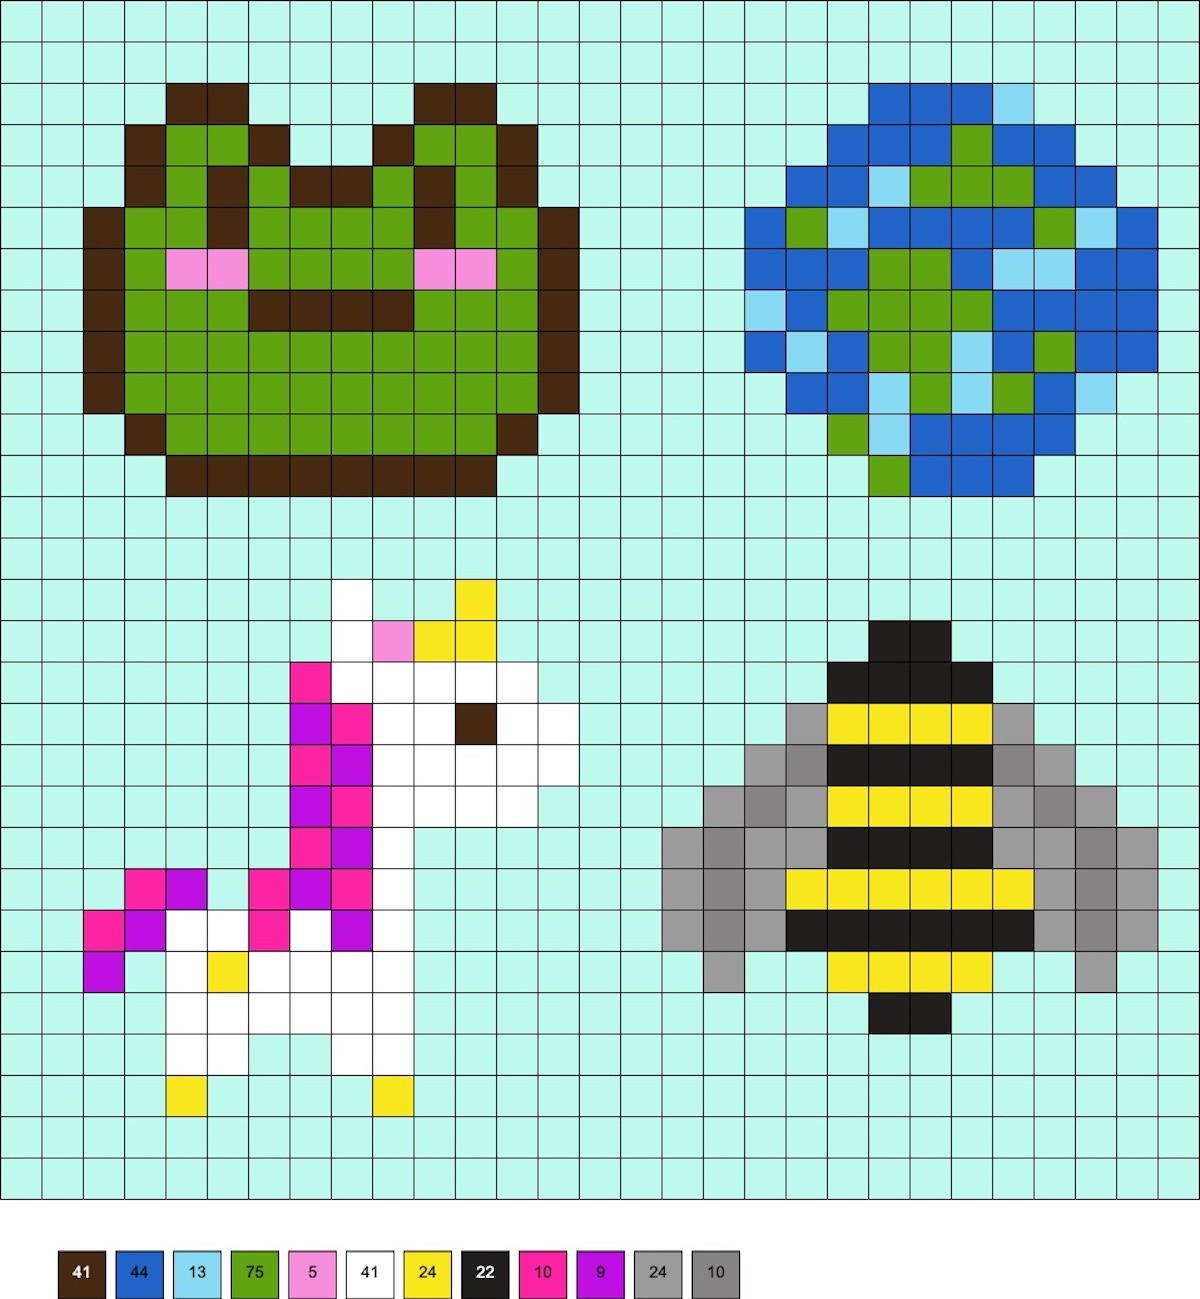
Cute Frog, Planet Earth, Bee, and Unicorn
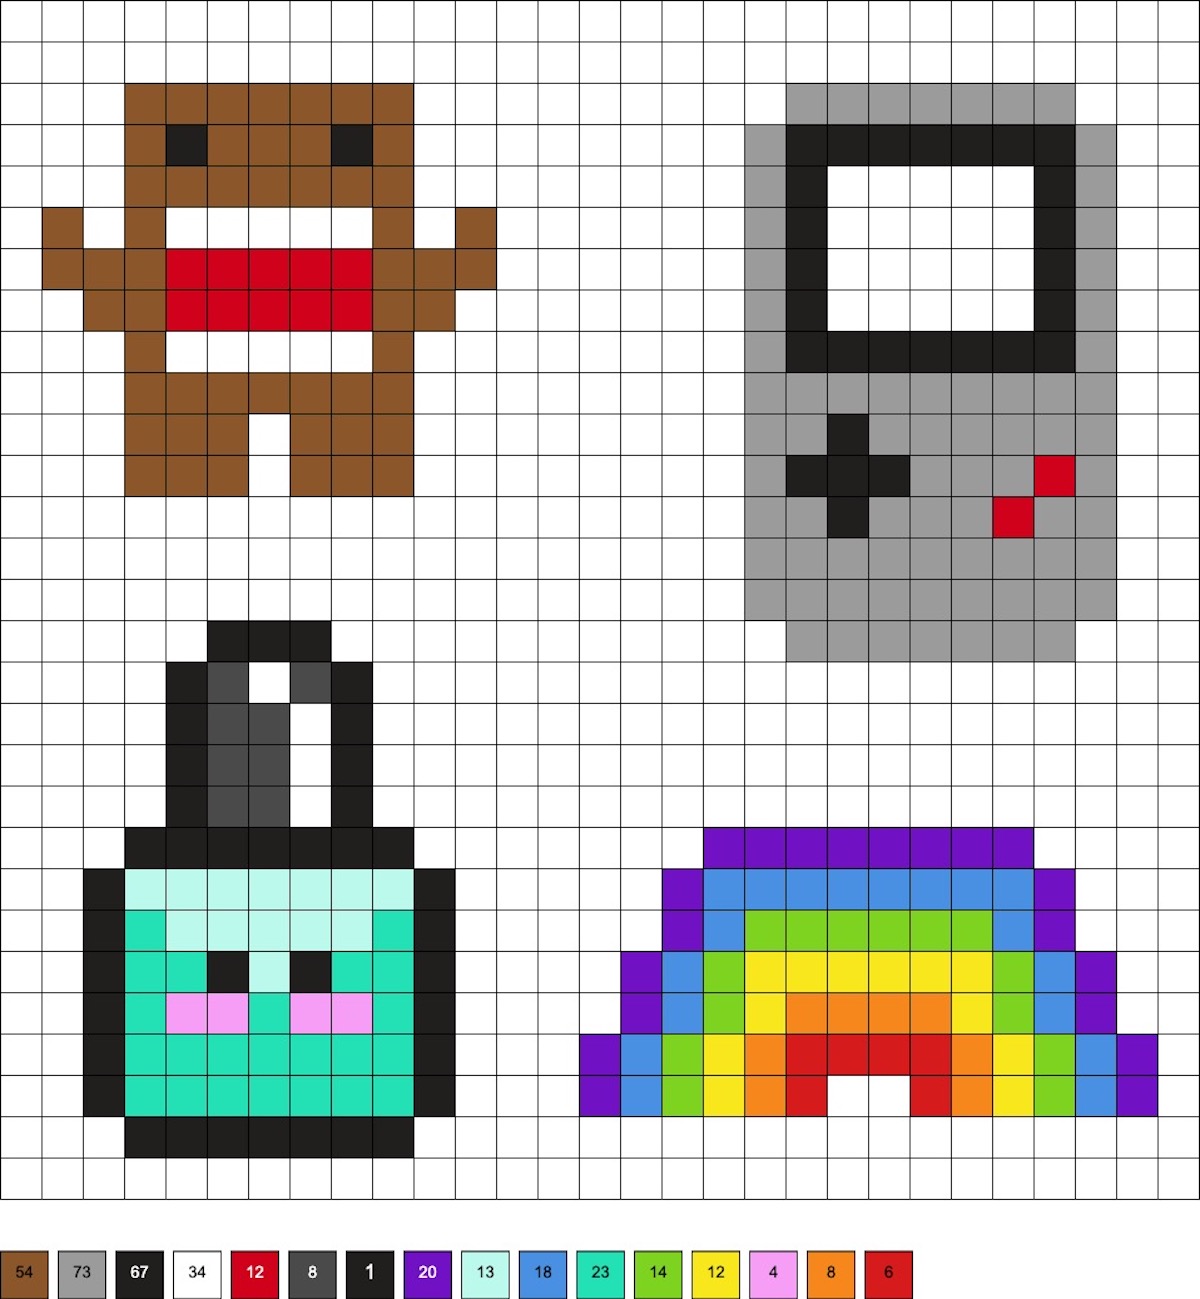
Mini Domo, Nintendo Game Boy, Nail Polish, and Mini Rainbow
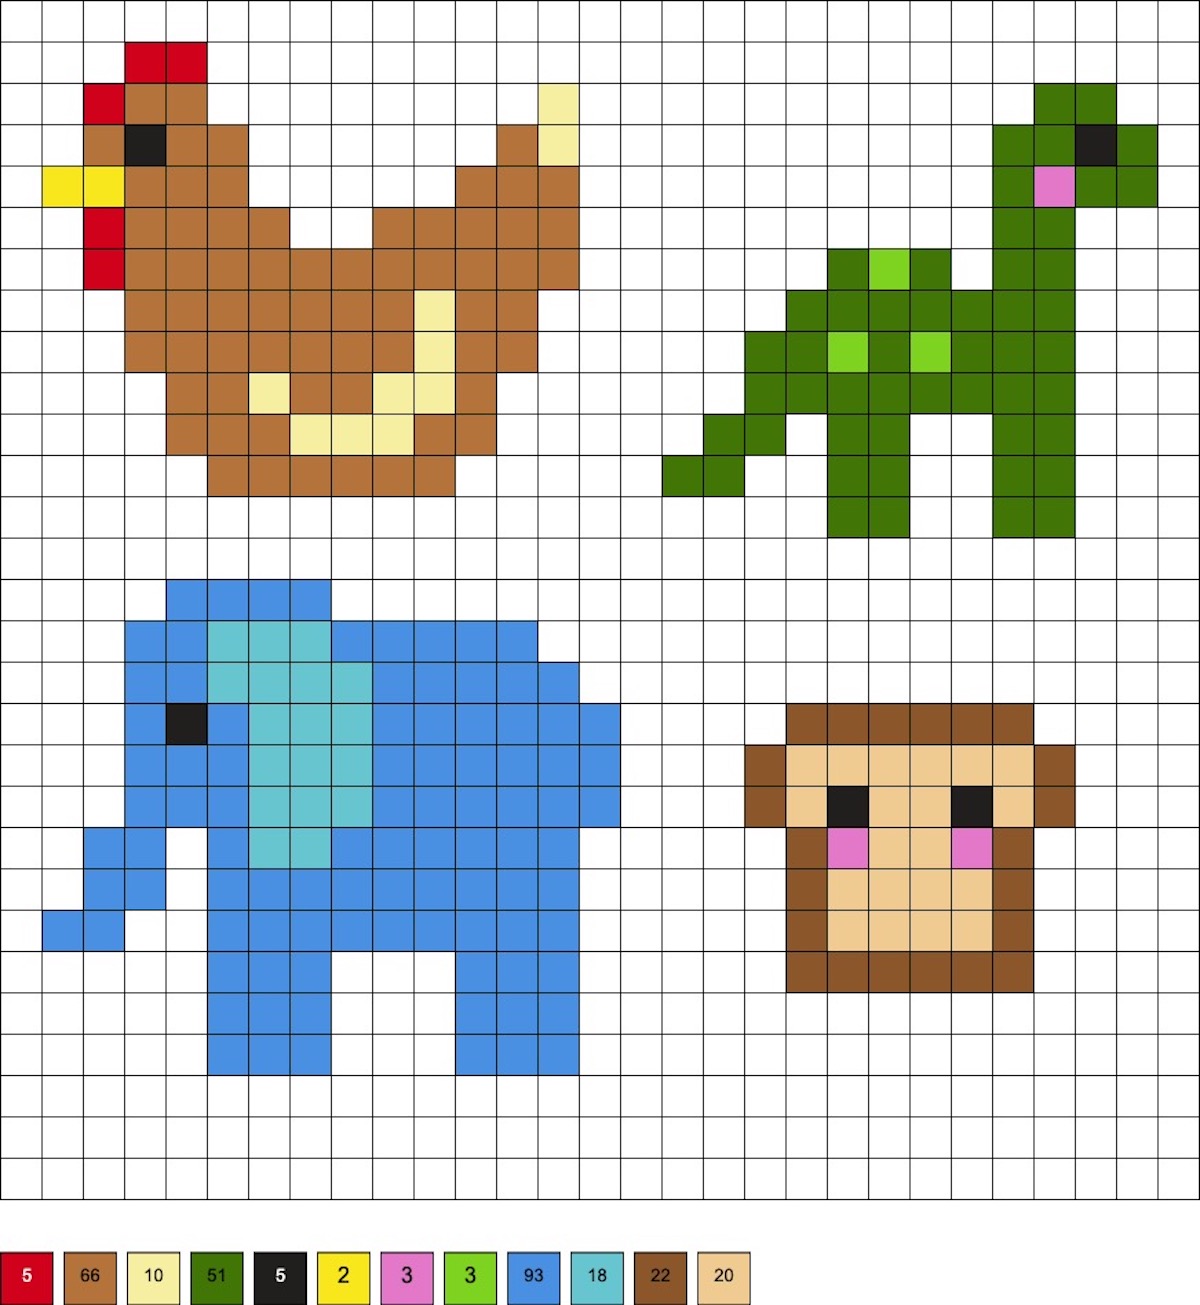
Chicken, Dinosaur, Piece of Bread, Elephant
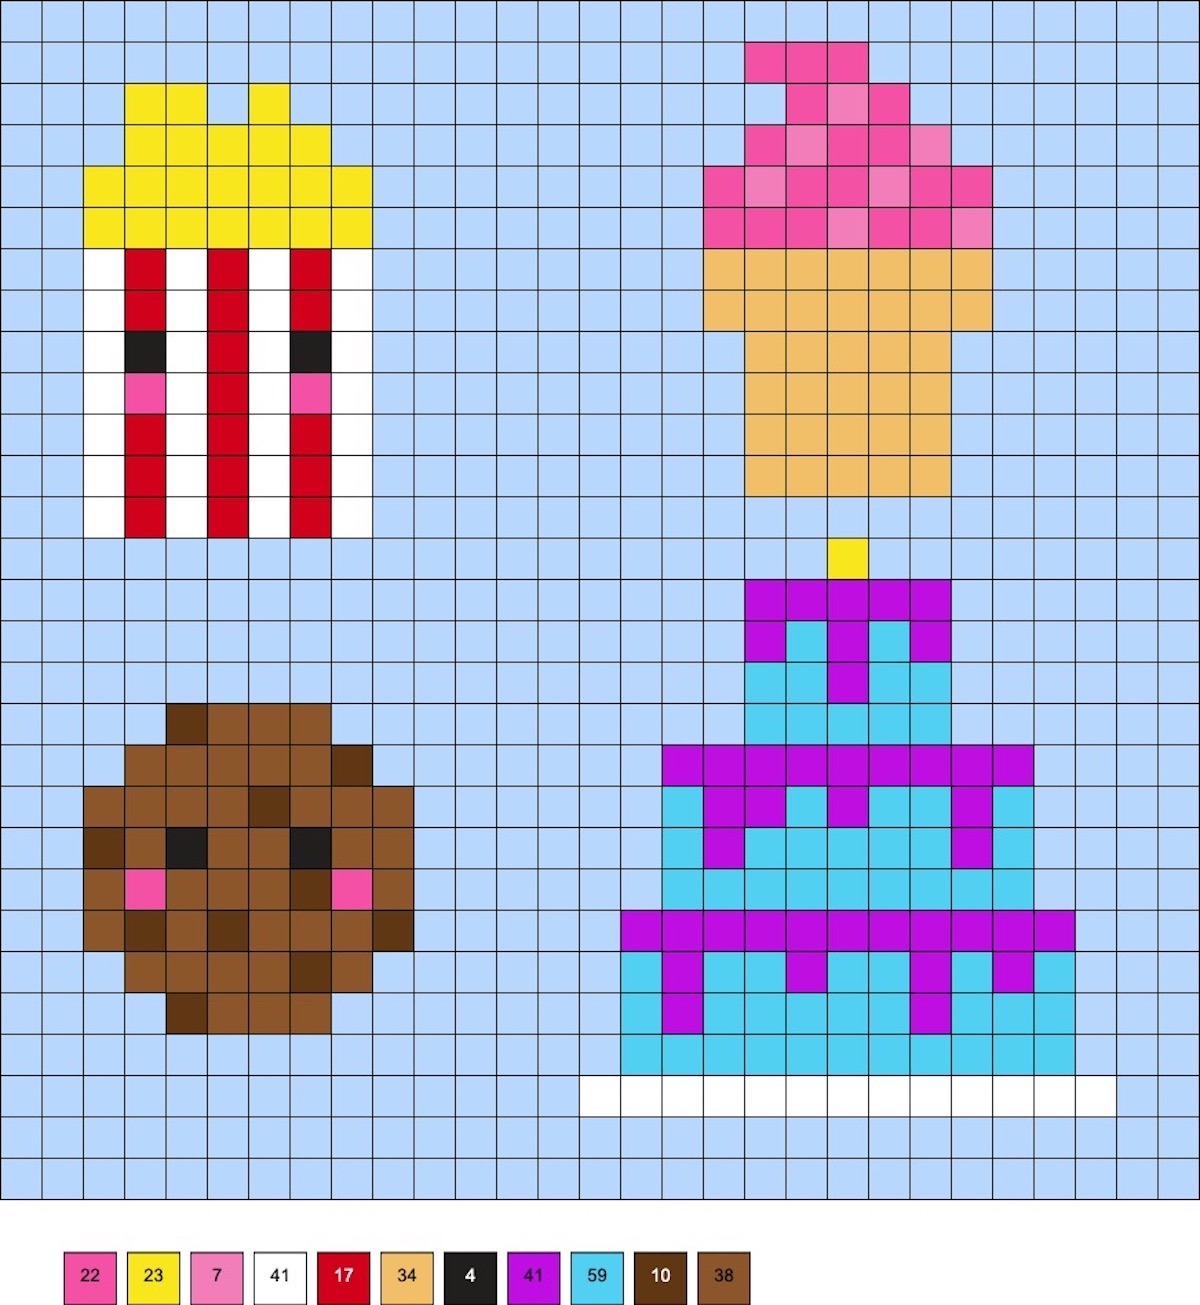
Red and White Striped Bag of Popcorn, Frozen Yogurt Cone, Birthday Cake, Cookie
If you’re ready to make a perler bookmark, let me know in the comments! I’d also love for you to check out these additional ideas:
- Care Bear Perler Beads (20+ Free Patterns!)
- Cat Perler Beads (Over 50 Free Patterns!)
- Emoji Perler Beads (Over 40 Patterns!)
- Hello Kitty Perler Beads (15+ Free Patterns!)
- Mickey Mouse Perler Beads (30+ Free Patterns!)
- Baby Yoda Perler Beads (10+ Free Patterns!)
- Star Wars Perler Beads (20+ Free Patterns!)
- Super Mario Perler Beads (30+ Free Patterns!)
The post Perler Bead Bookmarks Are a Cute Kids Craft appeared first on DIY Candy.