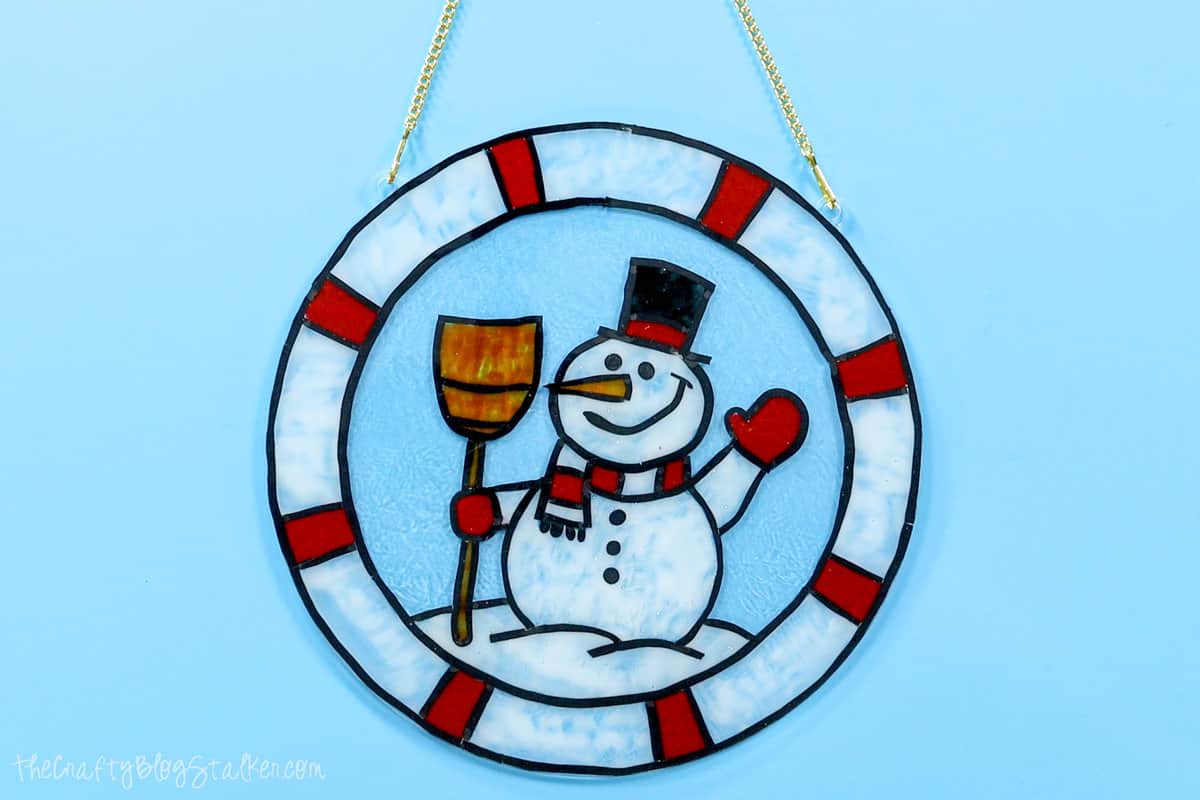
How to Make a Snowman Window Hanger with Gallery Glass
Ever wanted to create your own stained glass snowman? It's easy with this step-by-step guide, and Gallery Glass. This a great tutorial for beginners. If you make a purchase using the links included, we may earn a commission.
Creating stained glass windows is on my list of things I want to learn how to do.
For the time being, I have found a super simple hack!
Craft Tutorial Video:
Like videos? I have a video tutorial for you! Subscribe to my YouTube Channel so you don't miss out on any future video tutorials
More Winter Craft Tutorials:
Crafting and DIY are what we are all about here at The Crafty Blog Stalker, and we have several tutorials to show you how! Like Fingerless Gloves, Snowflake Canvas Finger Paintings, and a Hot Chocolate Mug.
Be sure to look around the blog for more fun Winter Craft Tutorials!
Frequently Asked Questions:
What are Gallery Glass Paints?
Gallery Glass paints are used on glass or even clear acrylic to create a faux stained glass window look.
Is Gallery Glass Permanent?
Gallery glass can be left on glass permanently but it can also be scraped off once it is dry. So you have your choice of leaving it on or removing the design when you get tired of it.
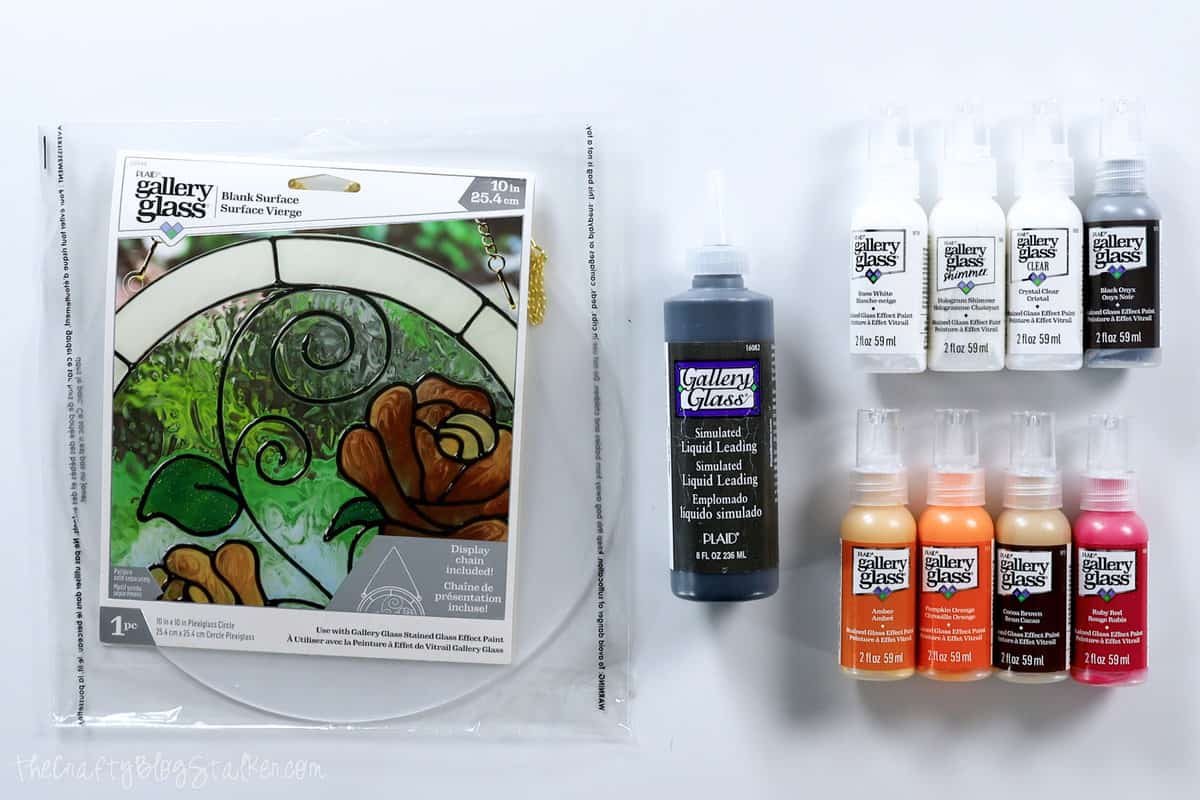
Supplies You'll Need to Create this Project:
- 10" Plexiglass Circle with Chain
- Snowman Pattern Printable
- Tape
- Liquid Leading
-
Gallery Glass Paints
- Snow White
- Hologram Shimmer
- Crystal Clear
- Black Onyx
- Amber
- Pumpkin Orange
- Cocoa Brown
- Ruby Red
- Thin Acrylic Sheet
- Lined Notebook Paper
- Self-Healing Cutting Mat
- Gallery Glass Tool Kit
Grab the Snowman Window Hanger Pattern:
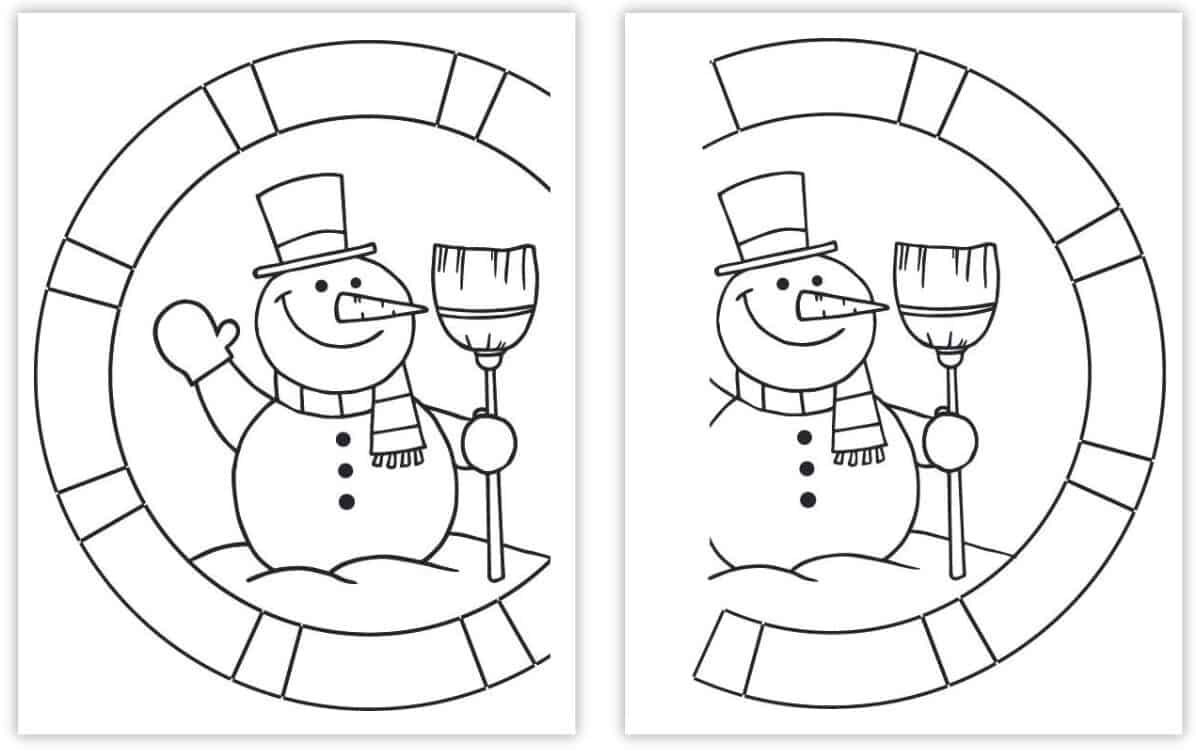
Grab the pattern and print it on your home printer.
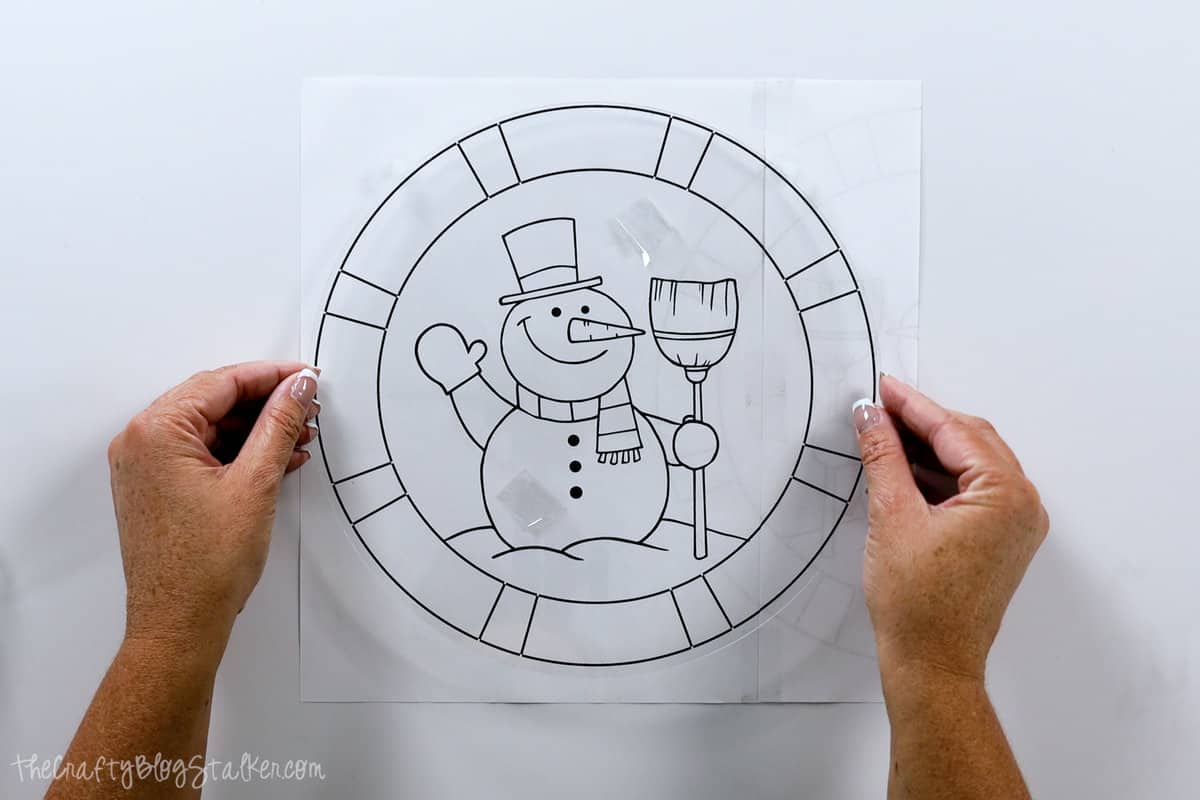
Layer the two sheets and align them so you have the complete circle pattern. Then tape the two sheets together.
Prep the Circle Base:
Peel back the protective sheet on the circle base, and remove the chain.
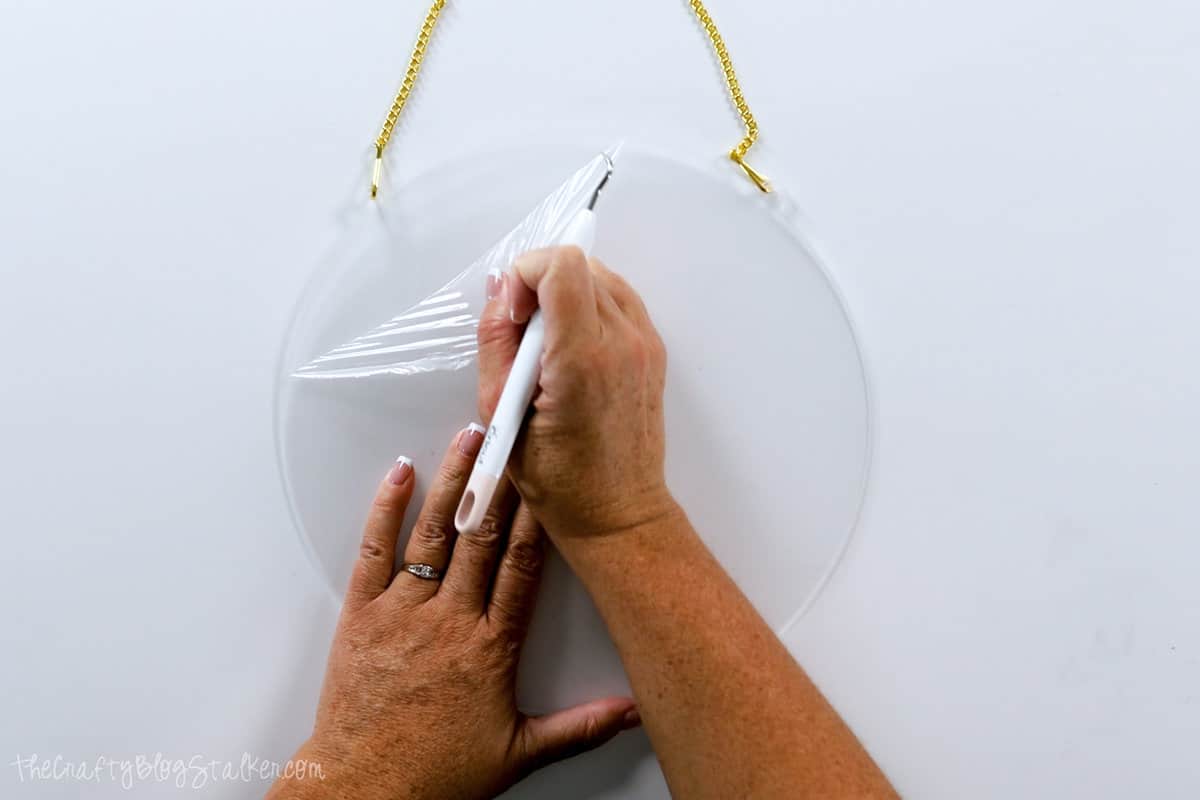
Place a couple of folded pieces of tape onto the front of the pattern, and center the circle base on top.
Liquid Leading:
The liquid leading is the outline of the design you create so you can paint between the lines.
There are two different ways you can apply the black leading.
Option One:
Apply the liquid leading directly onto the base, tracing the pattern below.
Let this dry for at least 8 hours before adding paint to fill the design.
Option Two:
Lay a thin plastic sheet on top of lined notebook paper.
Trace the lines using the liquid leading and let dry for 8 hours.
Peel up the lines of liquid leading and place them onto the base, tracing around the design.
Once liquid leading is in place you can immediately start filling in the design with Gallery Glass paint.
What I Did:
I went with option two because I wanted to do all of the steps at once for my video.

With my lead lines, there was a "thicker dot" at the beginning and ends of my lines from where I started and finished.
I cut those off with a craft knife on top of a self-healing mat, before I applied each line.
To apply, start with the outer ring and move inward.
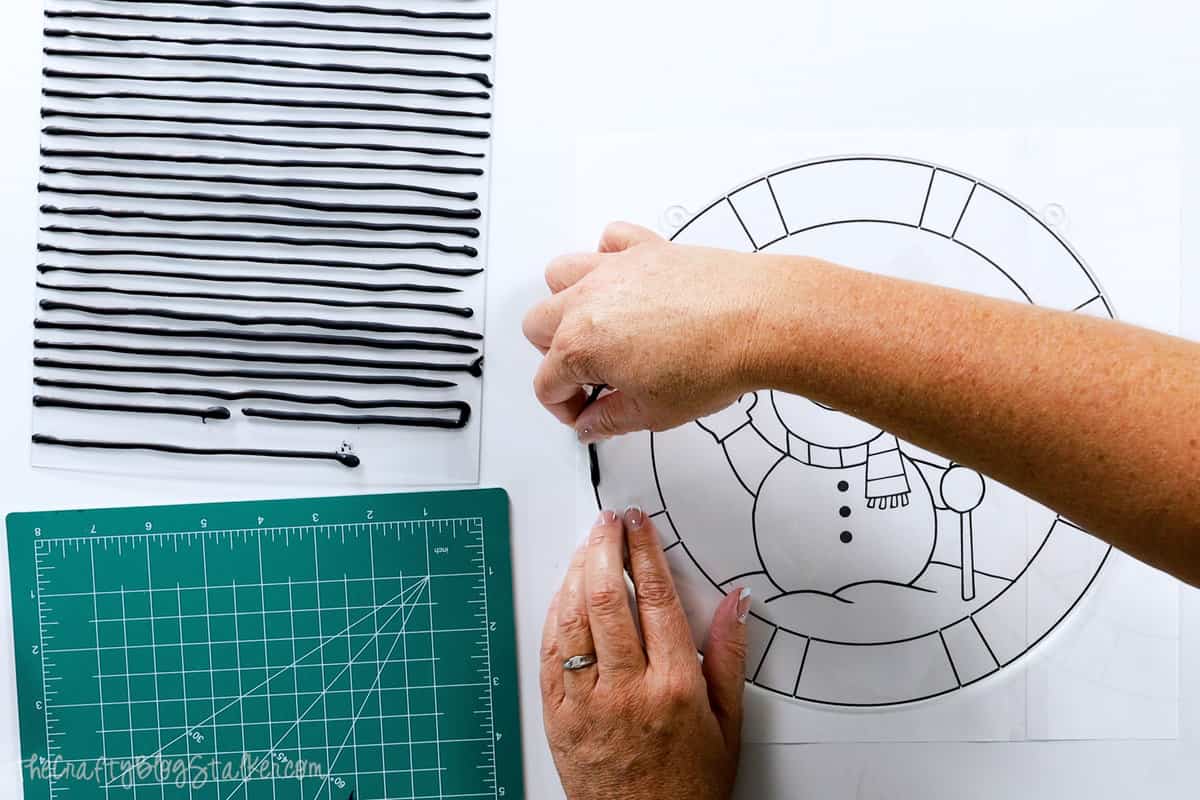
When I finished with a length of leading, I grabbed another, again cut off the front and end dot, and pushed the start of the new line right up against the end of the last line. Continuing until everything was outlined with the leading lines.
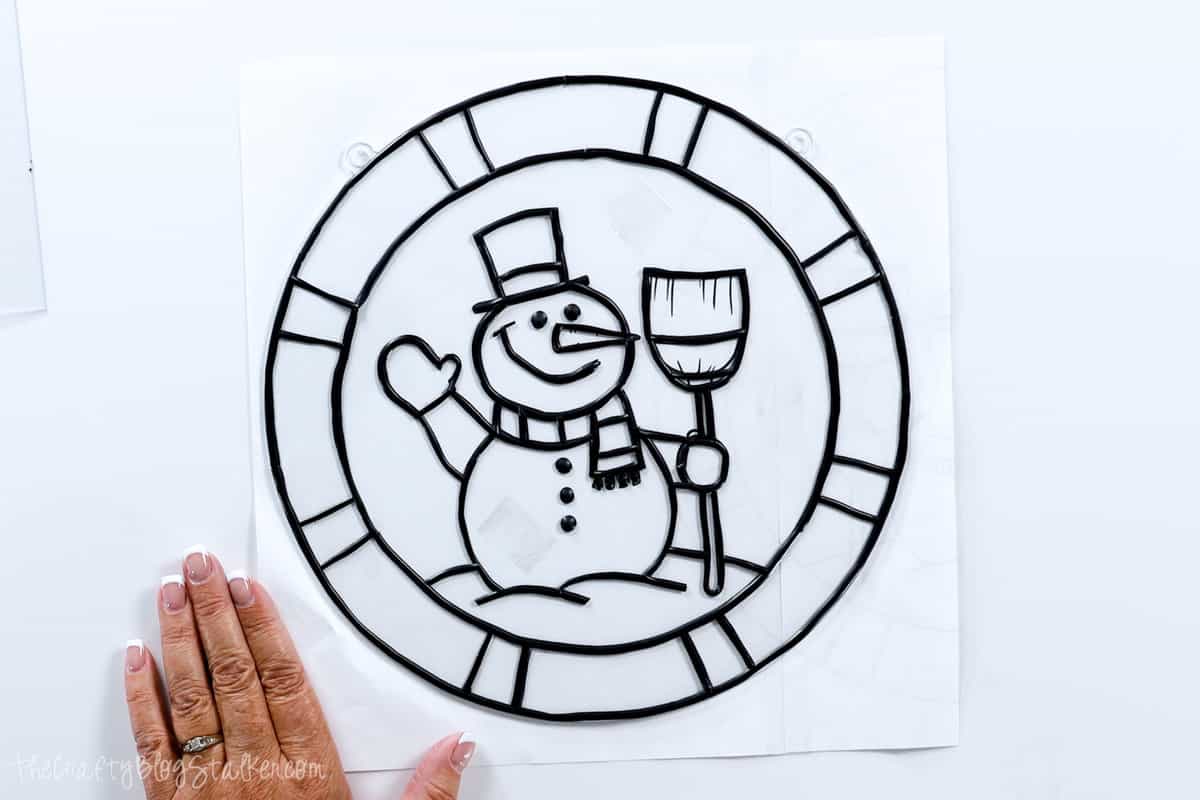
Now that the outline of the design is finished, you can peel back the stencil and discard. It is no longer needed.

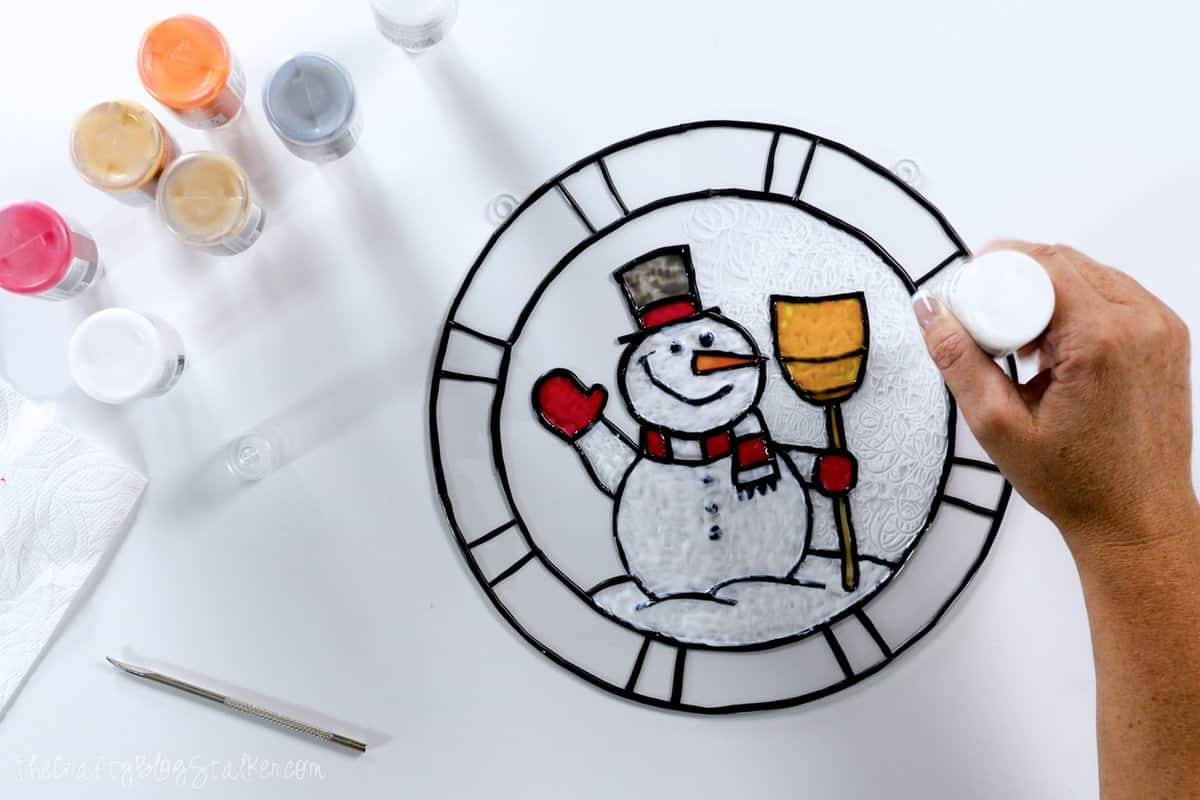
Painting:
Now comes the fun part of painting the design.
To fill the spaces, I would squeeze some paint into the area and then even it up using the combing tool from the tool kit.
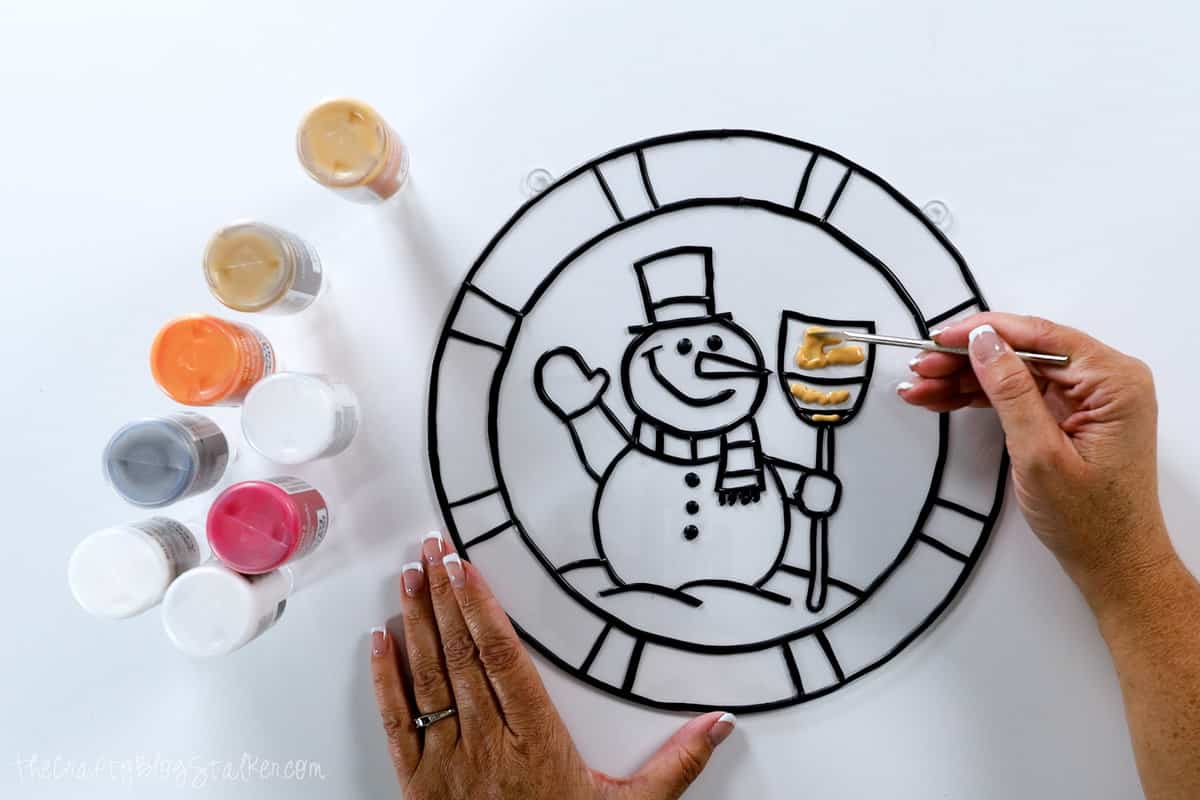
Here is a list of the colors I used and where I used them.
Amber - broom bristles
Cocoa Brown - broom handle
Pumpkin Orange - carrot nose
Black Onyx - top hat
Ruby Red - hat band, scarf stripes, mittens, and thin stripes in the border
Hologram Shimmer - snowman body and snow
Snow White - snowman body, snow, scarf stripes, and thicker stripes in the border
Crystal Clear - sky
Add Texture to the Sky:
To add a bit of texture to the sky, apply the Crystal Clear paint in swirls. Making sure to keep the application somewhat light.
Let Dry:
Here is how it looks once it has been completely painted.
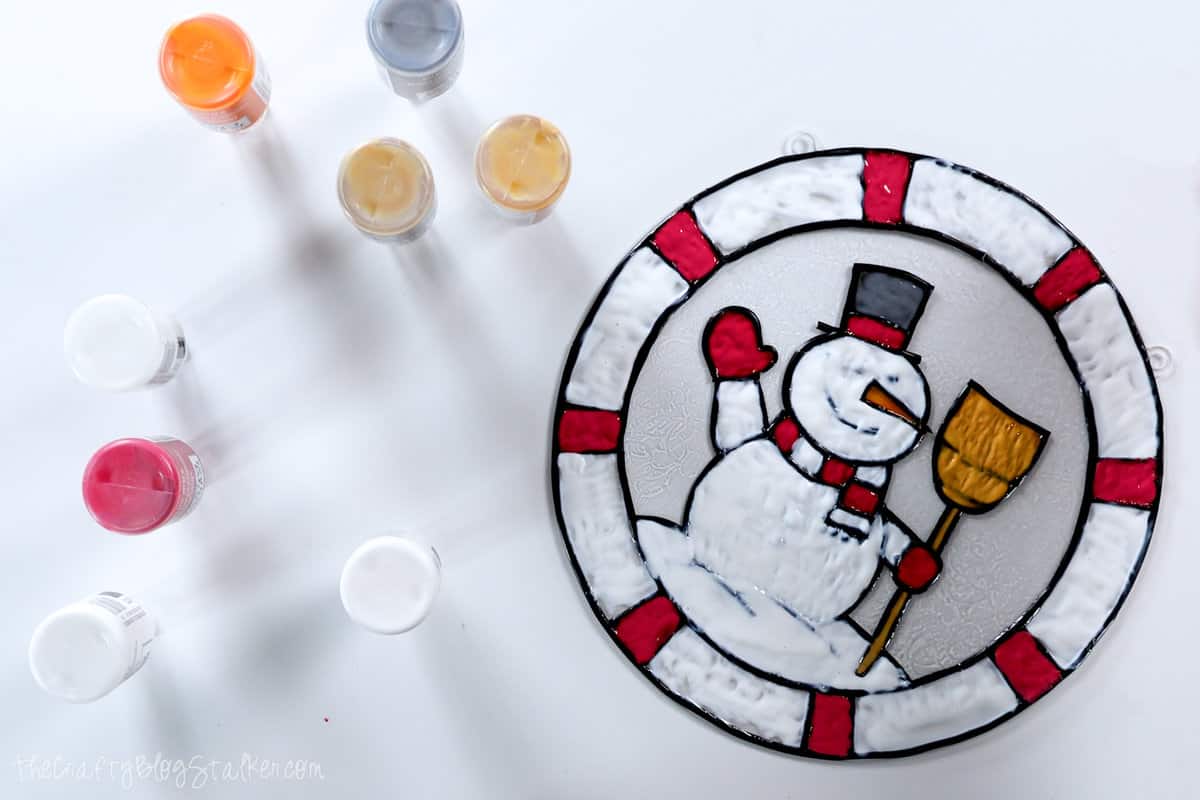
Let the piece dry completely. I let it sit for about 24 hours.
Once dried, the paint dries transparent. Here is the back.
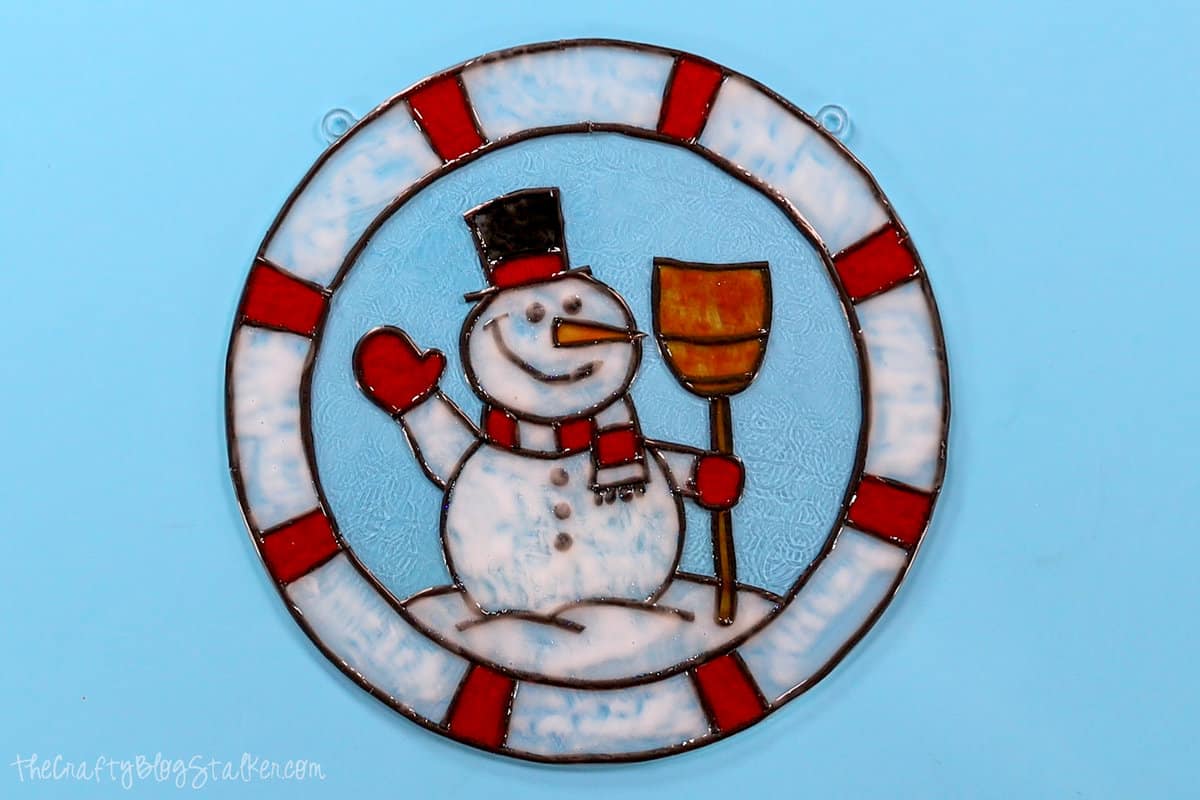
And when you flip it over, you can see the front.
It looks so good!
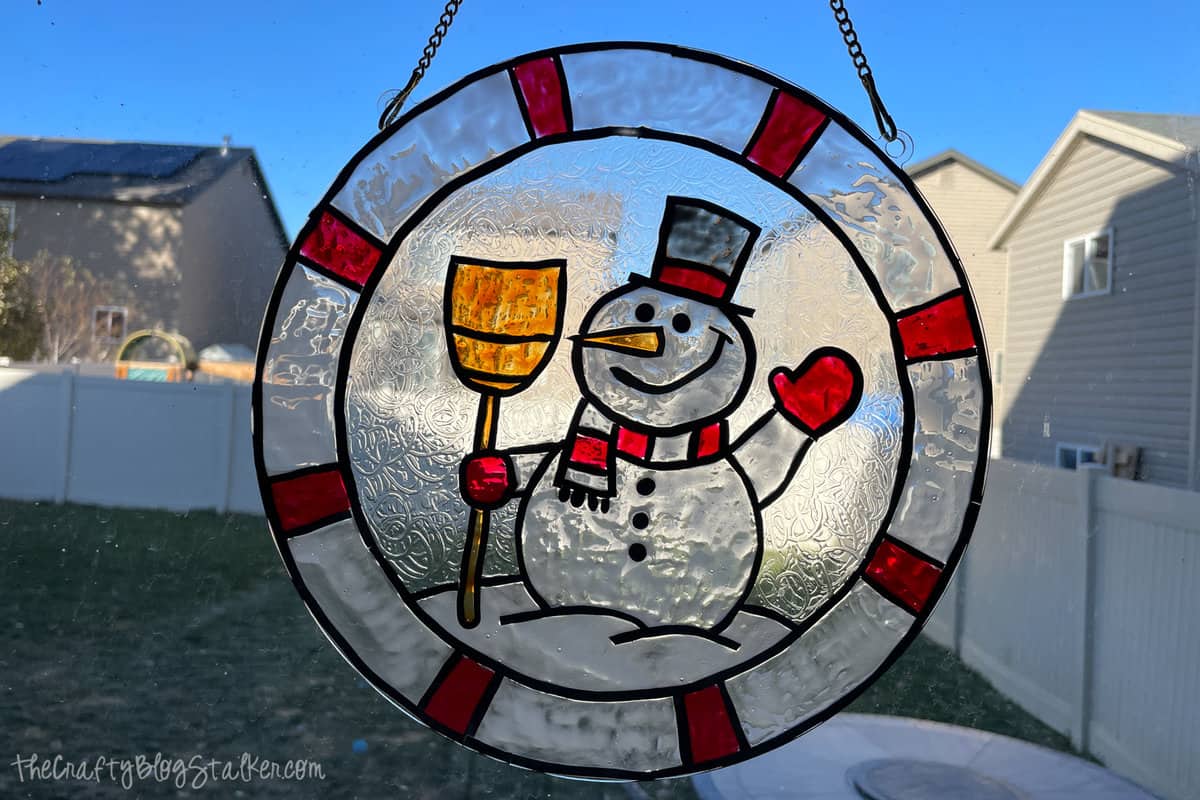
Clip the chain back in place and it is ready to hang.
I love how it looks on my sliding glass door. Now we just need snow!
Our Crafting Essentials List:
- The Cricut Cutting Machine is easily our favorite crafting tool. We use it in so many of our tutorials!
- These MakerX Crafting Tools are perfect for keeping in the craft room, and are always ready when you need them!
- This Fiskars Paper Trimmer is easy to use and cuts nicely without frayed edges.
- These Scotch Precision Scissors cut like a dream and you get multiple pairs in a pack!
Follow The Crafty Blog Stalker

The post How to Make a Snowman Window Hanger with Gallery Glass appeared first on The Crafty Blog Stalker.